Wednesday, June 29, 2011
Beautiful Wings embossed 3 ways- heat, folder and embosslit die.
I wanted to do a make and take using the Beautiful wings but it can get a little backlogged if each person has to diecut the butterflies in several different colors. So I just wanted to use just one color and since it was an embossing workshop thought it would be fun to incorporate heat embossing with the sentiment heat embossed with white EP onto Elegant eggplant CS and Old Olive CS embossed using the Elegant Lines EF and the Beautiful Wings Embosslits diecut the butterflies in white- showing 3 different embossing techniques- Easy to demo and do as make and takes. I did add some pearls before I took the picture - for some bling- I had the class use Smooch Illuminate Top coat to add some sparkle which was pretty in a very subtle way.
The sentiment was - yet again- sincere salutations.
Make sure you swipe the cardstock with the embossing buddy before you stamp it with versamark pad to avoid any stray powder sticking- it's a must in any heat embosser's supply list.
Lynda
Tuesday, June 28, 2011
Embossed Reverse Highlighted Window
A technique with no name- hmmm.
It's a embossed window but with the reverse of the highlighting technique- gotta love it!- Did take a little thinking to figure out what to do though.
This combines 2 challenges from SCS TLC331 and CC329 for suede, mambo and crumbcake.
The base is soft suede with a layer of melon mambo embossed with Elegant lines EF.
Then another layer of soft suede in a oval, then a crumbcake oval, stamped with suede using Just Believe stampset and then whole thing was embossed using the Square lattice EF.
I cut another oval slightly larger than the opening in vanilla - and although I usually just "eyeball" stamp, I did take out my stamp positioner to amek sure I got the right position for the images I wanted to use in the vanilla oval- used wasabi, then wiped the flower parts with the blender pen and then reinked it with the melon marker, added a little bit of highlights with soft suede on the leaves- then huffed and puffed and stamped the image. The whole window is raised using dimensionals.
The ribbon is crumbcake seambinding that I gathered by pulling just on the middle thread of the ribbon. Added the sentiment punched out with curly label - the layer is done with 2 curly labels punched soft suede pieces cut in half and spread out in both directions to add a bit of color behind the sentiment. Enjoy! Lynda
Monday, June 27, 2011
Double embossed Notably Ornate CASE
The stampin success magazine had a double embossed card whose colors I loved so I CASE'd it for my embossing workshop. The base card was pear pizazz with a razzleberry layer. The top layer was vanilla stamped using River Rock with the Notably Ornate stampset. the bottom was Newprint DSP that was double embossed. Using the Vintage Wallpaper EF, ink the SU logo printed side( on the inside) with versamark the emboss it using the big shot. Use black embossing powder and heat emboss it. I wrapped the pear pizazz stitched poly ribbon - put it through a hole and spread it out and taped it to minimize bulk. the flower is Fancy flower punched out 3 times with razzleberry, wet it well then crumple it. The center is the Boho blossom in black and the smallest paper daisies pierced and held with a black brad.
Most of this came out of not having the exact stuff they used to make their sample. But I guess that's where creativity and resourcefulness comes into play. I think some of my best work comes from just not having the stuff I thought I wanted and trying something different and have it work out - some times for the better- or at least I think so.
There are no mistakes in crafting- just creative opportunities!
Lynda
Sunday, June 26, 2011
Fabulous Florets embossed two ways
This is a card we made for class last month using Fabulous florets in a out of the box and masking technique. Stamp the flowers in poppy color onto the white CS. Stamp again on elipse paper or post-it note and cut it out. Use the masks to cover the flowers and stamp the leaves in pear pizazz. Cut a rectangle going around the flowers to create the out of the box effect. Emboss a piece of pear pizazz using square lattice EF. Emboss a poppy CS using the flower garden EF. Stamp the sentiment in poppy onto the Beyond the Garden DSP as shown. Mount it as shown and it was a reasonably easy card that demonstrated a lot of different techniques that someone can take away from the workshop.
Lynda
Saturday, June 25, 2011
SCS challenge WT328 and CC328
This is such a straight forward card - I saw the color challenge for navy, cherry and crumbcake and I am going mad for it- and the no white cardstock challenge was no problem.
The punch out with ribbon tied around it is from a card I got from my upline Tami and also inspired from a card made by Mercedes Weber. I heard that Picasso once said "mediocre artist copy, the great ones steal!" I welcome you all to CASE away! as I often do from so many talented people. Just please try to give credit to people you are casing- that's only fair. The base card is navy (although my picture color is a bit goofy), with layer of cherry on top- then a layer of crumbcake, stamped Upsy Daisy in cherry and punched out the corner with decroative label punch. then tied the 1/8 inch taffeta ribbon in navy (retiring but 25% off now so get it while you can before it runs out!) then stamped the sentiment from Perfect Punches - punched out with the corrdinating extra large oval- stuck on with dimensional- seriously folks, forget take ten, this is really take five! The thing that took the longest was tying on that frigging ribbon!
Lynda
Friday, June 24, 2011
Welcome Baby Pack
One of my DH's friends just had a baby girl and I wanted to make her a card. While I was a M*chaels they had Jolee's stickers with these goofy duck chicks that were just so cute. I was eyeing it for this purpose and this week they were on sale for 40% off so I had to get it. It came in a pack of 9 so here was an opportunity to make a whole set of them.
The base card is saffron with Welcome Baby in soft suede from Something to Celebrate from the Occasions Mini (retired). The white cardstock is diecut using the scallop rectangle clearlit (one of my favorites!) layered with pink pirouette. Little pearls in the corners add that something sweet and special. Added a piece of blushing bride 1/2" stitched poly ribbon then put the rectangle up with dimensionals to raise it up a bit. The little duck is self adhesive so nothing else doing. I figured if you had twins you could have the 2 ducks face each other (they come looking in both directions).
My sister has been clamoring for me to make her some baby cards but did not know if she needed girls or boy ones so I stamped the card with the sentiment and made some scalloped accents in pink and blue with the dimensionals on it without them peeled ( so she can peel it stick it on herself ) and the coordinating ribbon stuck on the back as well as some of the ducks on the acetate sheet it came on.
I figured it would be really quick cards she would only have to pick the color accent, stick the ducks on, peel the dimensionals and stick it above the sentiment and she would be ready to go. I did make a girl sample just in case so she would know what to do with it all. I put the whole thing in the clear mount stamp cases and she will be good to go.
If you want the stamp cases order them now as the prices go up in the next catalogue.
Welcome summer!
Lynda
Wednesday, June 22, 2011
Flower Garden embossed - a little more complicated
I had this little card in my mind but making it was a little more difficult. The idea was to put a piece of cardstock with the embossing folder going all around it except it did not fit through the big shot at the angles I needed to use it. I have never considered buying the Pro version for the REALLY big dies but I could see how it could be used for exactly this purpose since the width is wide enough to allow for all sorts of contortions I was trying to do but until SOME day when I will have the space enough to have one of those at home, I embossed one image on the white CS and embossed 3 other pieces of white cardstock that I ran through the embossing folder and colored using the aqua painter and the stamppad lids from saffron, eggplant and wasabi and then - yikes- yes cut them out - and used the multimono glue to glue it down. Hard to tell it was cut and I love the effect but it was a bit of work. It still looked pretty I thought. After stamping the sentiment in Eggplant, I layered the cardstock on eggplant then onto so saffron basecard.
Easy Peasy One layer embossed Flower Garden
This was a easy technique card I had at my last workshop using the Flower Garden embossing folder. The one on the left top is embossed with the Stampin Up logo on the bottom and the one on the right is with the logo on the top.
The one on the left is watercolored using the lids of so saffron, wild wasabi and elegant eggplant stamppads and aqua painter. The sentiment was stamped using the elegant eggplant. The one directly to the left here was colored using daubers and wht same ink pad colors. The one on the right side top with also colored with daubers using bridal bliss, pretty pink and wasabi pads. I think I did all 3 cards in less than 10 minutes. The sentiment is an oldie but a goodie- Sincere Salutations- which will be available through next year in the new Stampin' Up catalogue. Love it!
I have a really cool card using the same techniques as above tomorrow so come back and check it out!
Lynda
Tuesday, June 21, 2011
Gift Cards Set for a school Teacher
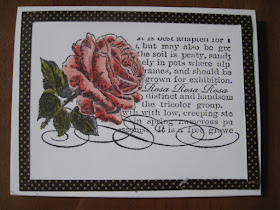
This is a card set mad using stamps from Penny Bl*ack.
These was designed by Diedre at Cranberry H*ill in Sunnyvale using twinkling H20's in red and green but I thought the colors were a bit harsh so I brought it home and changed it up a bit.
The base cards are all white and the same DSP onthe box is used to accent the image- one 12x12 to make a set of 4 cards and the box- not bad idea.
I colored them using copics and the background on the accent piece in blue- I think the extra blue makes the image really pop,
I did not like the fourth image so just stamped the rose image twice and colored it in.
This is the box that we made with the DSP on the top and the reverse polka dot image on the sides. It is really easy to make with a scorer. It's about 1 1/2 inches deep and it fit more than these 4 cards so I added extra cards with envelopes I hoped she could use and wrapped the whole thing with crumbcake seam binding ribbon. I hoped she would like it.
Lynda
Monday, June 20, 2011
A radically different way to Clingmount SU stamps
There is nothing that frustrates me more than trying to stamp something and have that stamp fall off from the acrylic block because the clingmount was not holding and ruin my image. As much as I LOVE Stampin' Up stamps the plastic image you put on the back often just does not STICK! Arggggh! I wanted it to stick but I also like to see the image especially words - I have stamped things upside down before. So here is my radical approach. It's a bit scary but it does work - at least for the new stamps. The rubber on a new stamp often
do pull aprt from the cling foam as shown in the first image. ( Be gentle and do not ruin the foam- if it does not pull away, I would not try this technique ). I put the foam down on my craft sheet (that does not stick to anything ) with the sticky side down.
Now peel off the paper off the cling side.
I normally would use my Tsukineko tack n' peel but did not have one big enough so used double stick tape on my a large clear block that fit the rubber- and it works just fine.
I stuck the bare rubber stamp onto the tape.
I inked the rubber well with Stazon black - it dries quick and is permanent.
Then I stamped the cling side of the foam putting the rubber exactly over the foam shape - the clear acrylic helps you see!
See? a perfect image.
I clean the stamp with stamp cleaner as soon as possible to get rid of the stazon so it is not permanently black.
then I peel the foam off my craft sheet carefully and place it over the back of the rubber.
A perfect stamp with no plastic to impede the stickiness of the clingfoam. You can trim it now to your heart's content.
Now, if I can have Stampin Up do this instead of me, it would be just perfect!
Lynda
Sunday, June 12, 2011
Direct to Paper
This week's tutorial on SCS was Direct to Paper- Gosh I had not played with this is such a LONG time, it was really fun and so easy. It would have been fun to have the stampin' spots - the little cube stamp pads - but alas I did not have any so I used the big pads. Before I did anything though I embossed the sentiment on the right with clear- you could have used white- and then ran down the colors on a white piece of cardstock- I just picked a color group and went down the list- daffodil, pumpkin, tangerine, regal rose, melon mambo, real read and rich razzleberry. No thinking is even required.
After it was all done, I thought a dark silhouette image would look good and since I am on the Fabulous Floret bend, used it AGAIN! The words are from the WordPlay set. Have fun with it- it's like going back to kindergarten!
Lynda
Saturday, June 11, 2011
A simple Fabulous Floret
I am told that the older you get the faster time goes by and somehow a whole month just zipped past with doing this and that without me posting once. I feel like I am going way past the speed limit and no one is pulling me over. I've got to slow down and get back into my stamping groove. The new catalogue is coming out and I feel inspired to clean up my space- that always makes me feel better-
This is the Fabulous Floret set from the summer mini- the minute I saw it, it called to me- " buy me, buy me, it said, I am oh so pretty and I've even got a matching DSP...."- Oh why oh why do they keep coming out with new things I want?
Anyhow, this is a very clean and simple version using one of my favorite sentiments from the retiring hostess set Occasional Quotes. Basecard is whisper white with the leaves stamped in wild wasabi. Sentiment is stamped in black and the flowers punched out using the MS flower and center from my favorite $1 punch from M*chaels in red and white. Simple as can be- literally a 5 minute card- maybe not even.
Happy almost summer!
Lynda