Monday, December 27, 2021

Birthday cards from my friends


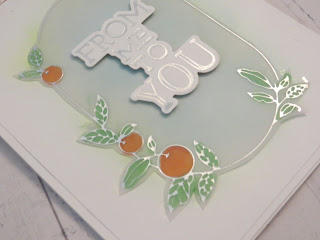
Marisa makes such beautiful cards- and I saw this and knew it was time to think about getting that foiling device- it is so simple yet elegant- I love it.
This gorgeous card is from Hermelinda  and this below from a another talented friend and Artisan Mercedes Weber- it has so much texture and layers- just absolutely beautiful.

 This really fun card is from Sheryl who makes 

this dragonfly pop its wings- I keep wanting to 

try this technique - now I am really motivated to make one.

and below just gorgeous card from Annette- snother one of my craft shopping enabler friends- she is always discovering new products and makes me want to buy it and try it - this is what good friends are for!

Sunday, December 26, 2021

Christmas cards from Friends

 I receive so many beautiful Holiday cards from my friends I just wanted to share some with you.  This is from Hermelinda with layers of gorgeous images so beautifully textured.

Another elegant card from Annette
 This card is from Bonnie- love the swirls in the background and elegant stag in the front

This fun card is from Sheryl - Love the retro car and the living room image inside

Some of my demonstrator friends used to get together every month and make cards together but now we are doing zoom meeting and it is still the highlight of my month- they are such talented group of women and they have such varied viewpoints and style, it is really fun to see what they are working on. 

This card to the left is from Marisa and you can often tell her cards- After I got her card I started to think maybe I need a gold foiling machine......

 
This was from Annette last year and it is hard to appreciate all the sparkle of this card with the gold behind the musical note paper but it is really eye-popping gorgeous. this is her card from this year and  the gold foil is really simple but elegantly beautiful.

This beautifully card came from Makani who always makes gorgeous scenery cards.  and this below is from Gayle- the  border is elegantly embossed -  This fun little card below from Bonnie this last year and I gotta remember to keep using the postage punch - how cute this is and I can use this layout for so many different things.


This last card was from Hermelinda and I have to tell you it was one of my favorites from this past year. The paper is so festive, love the sequin banner and the stars and the wine bottle and glass- so sweet! She also put little sequins in center of the snowflakes and there is so much sparkle and who does not like sparkle?

I keep making new year's resolutions to send out more cards for birthdays and for no other reason but to say I am thinking of you but the task of living every day keep getting in the way - maybe next year I will truly keep the promise!
Happy Holidays, Everyone!


Saturday, December 25, 2021

25Days of Christmas- Merry Christmas

 Merry Christmas!-  This is our Christmas card this year.  I used the Frosted Christmas bundle to make it.
the Card lays flat for mailing. The base of the card is 4 pieces of Real Red card 4 1/4 x 5 1/2  with a circle diecut from the center on all 4 pieces- mots important to try to center the circle so it creates the center hole. Score the cards at 2 1/8 down the center. you tape the 4 together 1 side to the next as shown below but do not close it shut before you tape the fishing line. 
 I diecut 2 pieces of the ornament outline in gold and the decoration in white . put a piece of fishing line between the 2 gold pieces to sandwich it together and tape it securely between the red cardstock on top to hold it securely.


This is the first panel- the sentiment and the snowflakes from Snowflake Wishes set was embossed with white embossing powder.

The last panel.  I still use Stampin' Up's My Digital Studio to manipulate the photos- I have it on one of my old laptops and I keep it around just for that program- I still think it is the easiest photo editing program ever and I really love it. It no longer has any support but I can do so much stuff with it on a page for scrapbooking and cardmaking. Oh well.  I did handcut all the pictures to fit the ornament with a trim of gold peeking around the photo.


from across the back: Kyle, Tyler, Dylan and Me (Lynda), Bottom row: my brother in law Rod, my mother in law Anne and my dearest hubby Dale.
Happy Holidays to You All and a Happy New Year!
Stay Safe!


Friday, December 24, 2021

25 Days of Christmas- Day 24- Peaceful Cabin Popup giftcard Box Card


Giftcard Box card sounds redundant doesn't it but it really is a box that holds a giftcard that is a popup. I cased this from https://buckeyeinklings.com/2021/09/02/pop-up-box-in-a-card/ but the box she had was a bit too big so I shrunk it down a bit to make it the size you see below. it fits the giftcard on its side exactly.
The base card is thick white CS. I took another piece of white CS and stamped the trees in Mossy Meadow but I wanted it more green so I used the water painters to spread the ink to make it a bit more green.  Stamped happiest holidays with heartfelt wishes. I used blender brush to use Balmy Blue with Basic borders dies to create some Cloud background and the fox in soft suede.


Stamp the house in black on a scrap piece of paper and diecut some fences from crumb cake as shown to create the front of the card..


  This is the dimension I used for my card. You will need  DSP 3x 6 1/2 or so. Score at 1 1/2, 3, 4 1/2 and 6 inches vertically.  Score at 1/2 and at 1 1/2 inches.
remove the middle panels on the bottom and cut the 2 remaining bottom diagonally as shown.
Put tape on the side tab and put the box together. then put the tape on the 2 triangles.


put the taped triangle face down on the fold of the card as shown with diagonal of the triangle on the fold.  When you close the card the top fold with stick to the top triangle and make the popup. Make sure the box and the giftcard does not pop out of the margins of the card though.
Enjoy!


Thursday, December 23, 2021

25 Dyas of Christmas- day 23 - Sweet little Stockings Giftcard holder


 This is a sweet little gift card holder I made using the Sweet stockings DSP.  I don't even have a dog right now but lowe that golden retriever wrapped in christmas lights!  Above is how it looks closed and below is how it looks open.


Take a piece of 4 1/4x 11 inch cardstock and score it at 2", 4" and 9 1/2" old olive cardstock.
Fold over the right side and tape the 2 sides to create a pocket for the giftcard as shown- you need a piece of 1 1/4 x 4 inch piece of christmas light paper to decorate the top.
Take a piece of 4x4" Cherry Cobbler cardstock and emboss with Tasteful Textiles 3D. You will tape it  only onto the middle section as shown below so when you open the card you still see the front of the card.
Take the large tag from the Stockings Dies - stamp the sentiment from Sweet little stockings in Cherry Cobbler. Fussy cur the dog and cat from the Sweet Stockings designer paper as shown and mount with dimensionals.- because the background is white even if you don't cut it exactly it still looks great.

Enjoy!


Wednesday, December 22, 2021

25 Days of Christmas- day 22 - Christmas Season Giftbags


I love these bags -3x9 Printed Gusseted Cellophane bags - 25 for $7 and the print althoug for all year round- does look kind of like snow so still very cute.  
I took the larger tag from Seasonal labels Dies  which is 3inches wide, stamped the pine leaves on the tag directly, and stamped the cone and the berries on a scrap and diecut it out and mount as shown.
I just used one cone and 2 berries.


Take a 3x 7 inch piece of Balmy blue and score at 2 inches to fit the gussetted bottom as shown. 

Fill with treats of your choice.
Punch two holes through the tag and the bag and cardstock.  Put a piece of Real Red stitched satin ribbonthrought the hole as shown on the left

then bring one of the ends through the other side as shown then back through the other side to create the loop and secure.  Trim the ends to make the sweet ribbon tie secure.


 I forgot to tell you that I stamped happy holidays from Frosted Gingerbread set on the back before I put it on in Mossy meadow.