Showing posts with label Moving cards. Show all posts

Saturday, February 22, 2025

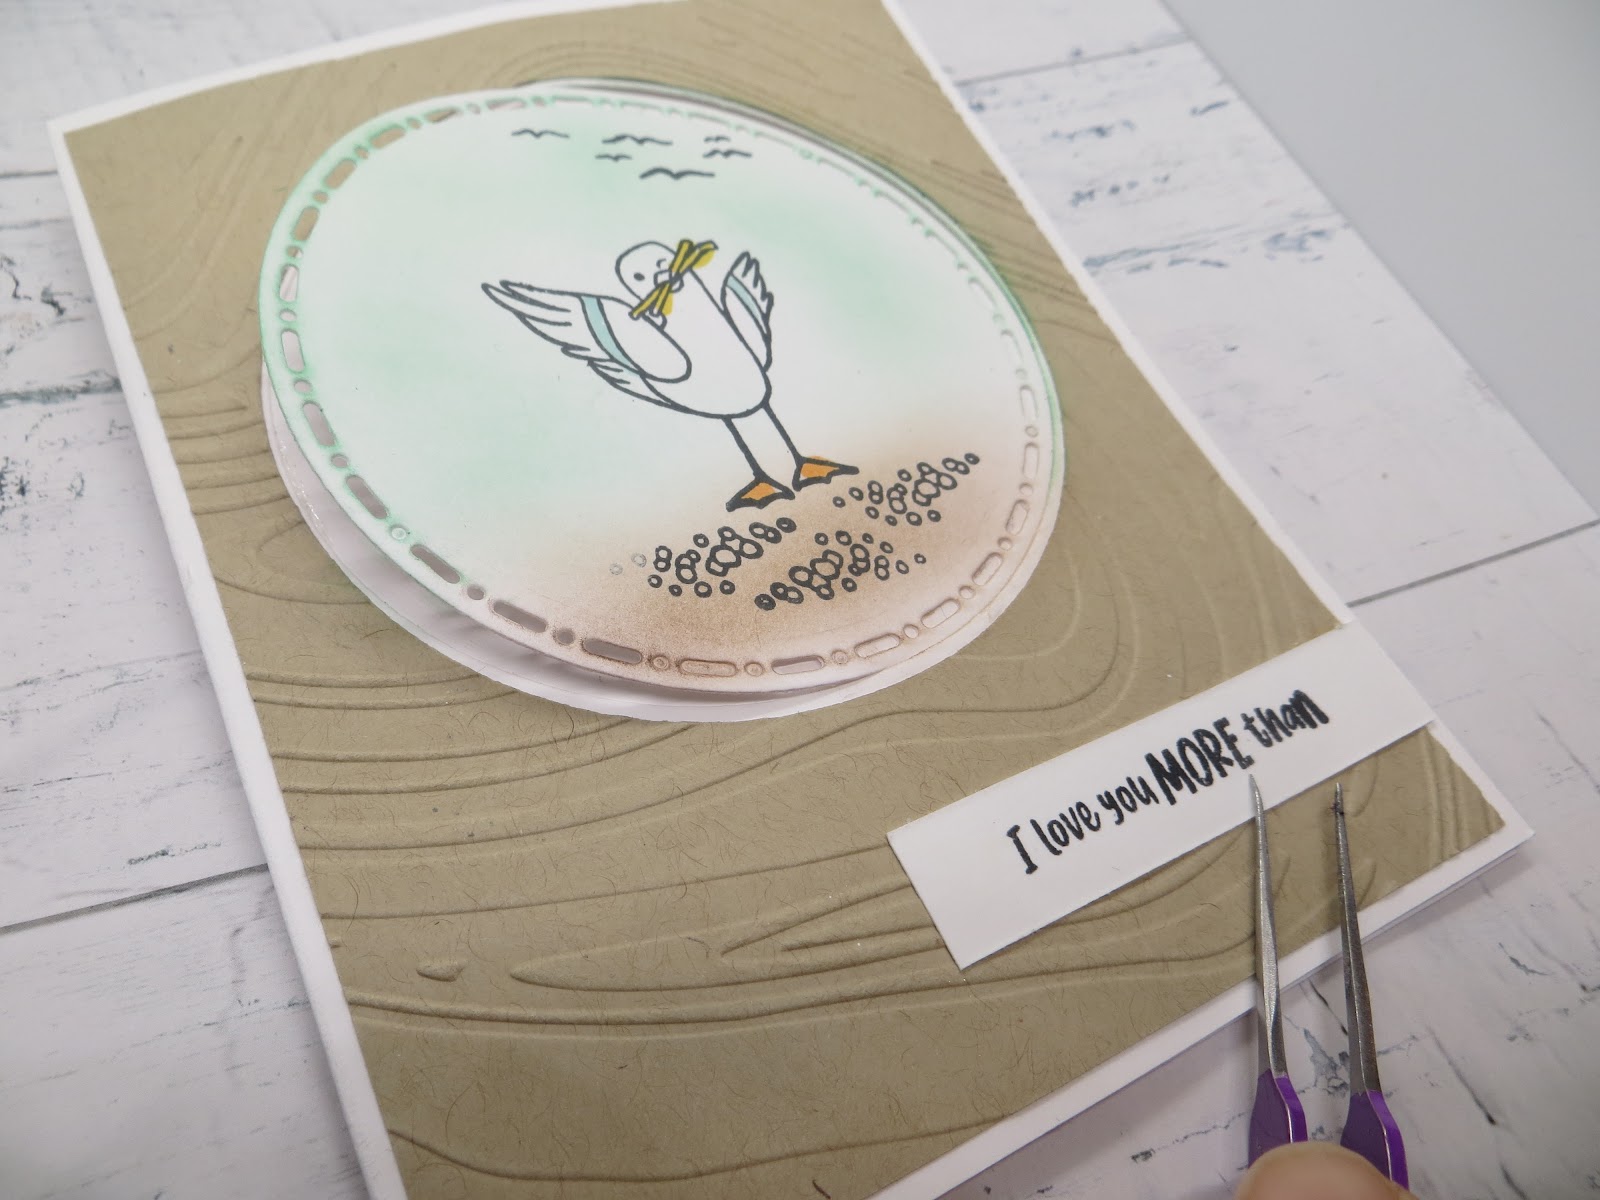
Friendly Seagulls flip card.


#3.   (free sale-a-bration set with $60 purchase)
take 2 White cardstock scored to make side folding 4 1/4 x 5 1/2 A2 size card.(DO NOT use thick cardstock for this project)
with one add a 4x 5 1/4 piece of crumbcake and mount using tape to the outside margins only and diecut a circle from the white and crumbcake panels. - Here I used Spotlight on Nature dies (but any simple shape die will work- even if irregular will work too for this project) 
emboss the crumbcake panel after cutting with So Swirly but Soft Waves embossing folder would be really great for this.
stamp the seagull with french fries, the distant seagulls and gravel onto the white circle panel you diecut (keept the crumbcake piece for another project)  use blender brush to add some color to the sky - here I used pool party and crumbcake for the sand) 
Stamp I love you more than sentiment on a 1/2 inch strip of white cardstock..  stamp French fries on another piece and the french fry image on a scrap piece of white cardstock and color in.
 
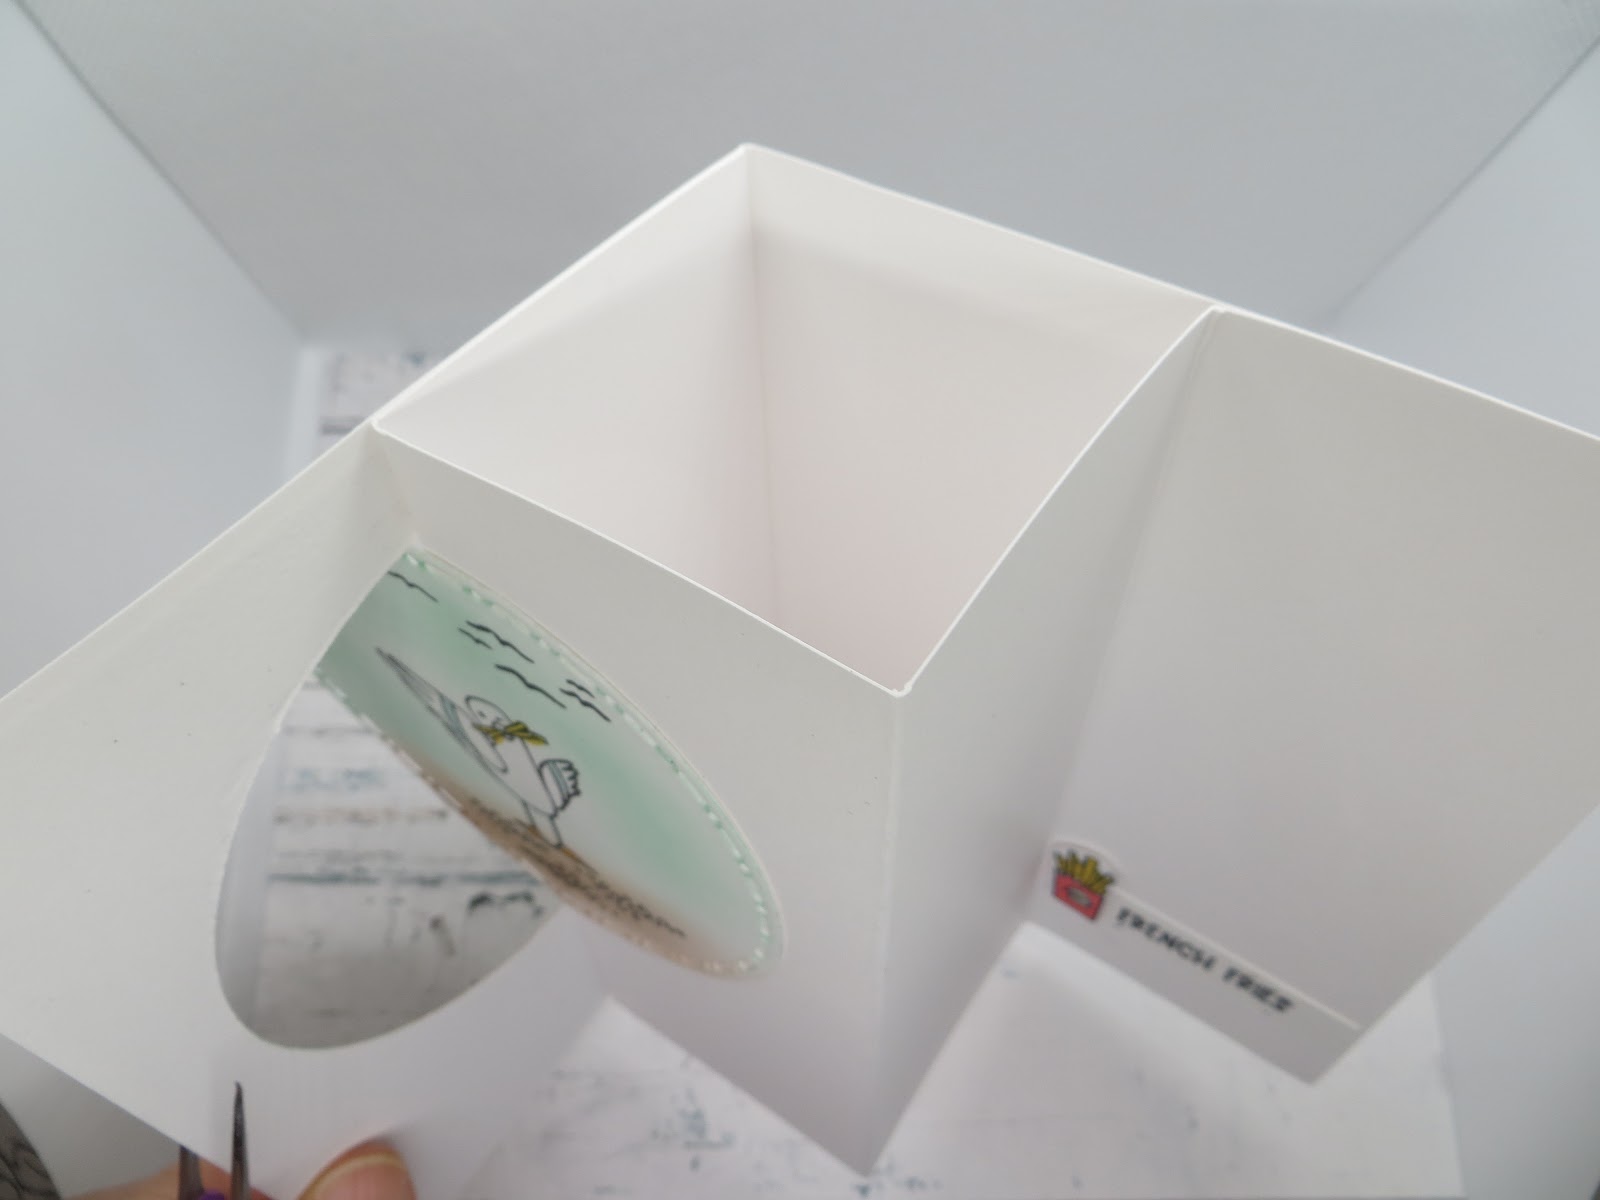
take the second white cardstock and score in between the center fold 2 1/8 inch from each end. 
Glue the left panel of the second white basecard to the the right half of the back of the white panel with the circle diecut out ( from the scored center to the half way out) - make sure to put the glue only on the back panel with the circle cut out and no glue on the open area..
the far right panel of the second white cardstock will be glued to the inside far right side of the first panel with the circle diecut.
so when you open the card there will be the circle opening on the left and a W fold in the center.
close the card and glue the circle panel to the RIGHT HALF ONLY in the opening so that it will flip when your card opens. 
attach the sentiment to the front and inside as desired. 
 

Saturday, January 25, 2025

Beautiful butterflies slip out card


My friend Sheryl had sent me a dragonfly card with this slip out and when I saw this butterfly I knew I had to try it with it.  So this was one of the january class card we made during Stampin' with Lynda.

Take White cardstock 5 1/2 x 8 1/2 and score at 4  1/4 to make a top folding landscape A2 card.


take a piece of white cardstock 4x 5 1/4 and stamp the hello on the r side with black memento 
diecut the slit - here I used the sentiment strip from Delightful wished but you can you the one that comes with the Butterfly set ( a little wider) or use the paper cutter to make a slit. 
I kinds of figured out where I wanted the butterfly and embossed the image to line up with the slit.


mount the embossed white cardstock to the basecard - - the slit should li\ne up.
stamp and diecut the large butterfly and color in as desired. 
add tear tape to the center of the butterfly and with the card closed use the slit to line up the butterfly and adhere to the base card through the slit so that when you open the card the butterfly wings will pop up and slide through the opening 


 Enjoy!

Tuesday, May 14, 2024

submarine slide out


4. Submarine life slide out card
 basecard is thick white 8 1/2 x  5 1/2  scored at 4 1/4 for A2 card
take another cardstock and stamp beauty of the day in old olive 
diecut opening on the front panel and use 1" punch to create a little half circle to pull out the strip in line with the opening
then the sand in cumbcake, 
the crab and fish in calypso coral
and seaweed in lost lagoon.
waves in pool party
- use blending brush or dauber or your color in mechanism of choice to color in the water
stamp submarine in poppy parade and sonar and fan with basic black on a scrap piece of paper and punch out .
the sentiment is stamped in lost lagoon on the base cardstock behind the opening on the front panel
 
You will need a lot of dimensionals - we will put the strip of white cardstock behind the opening to cover and put dimensionals around it so it will easily slide in and out. -put dimensionals around the front panel edge to mount to the base panel.
glue the sonar and the fan to the submarine then mount the submarine on the the white strip to make out the pull out mechanism and reveal.

Tuesday, November 28, 2023

Above it all pendulum card using a penny


You will need a penny for this card and lots of dimensionals -1  small  for sure and more to layer
white thick cardstock basecard
poppy parade for the gondola and shaded spruce ink for the trees
tuxedo black memento inkpad for the lines
you will need 1 penny and a lot of dimensionals for this -the dimensionals will need to be put in for the layering.  the penny needs to swing freely  
you will need some blue ink pad and blender brush or sponge dauber and sky stencil if you have it to create the sky before we mount the gondola.

the kids are from lawn fawn.


You can see how it swings left and right here.

you can find a tutorial with Jennifer McGuire here:
https://www.jennifermcguireink.com/2020/09/pendulum-cards.html