Monday, October 11, 2010

Day of Gratitude with library clip


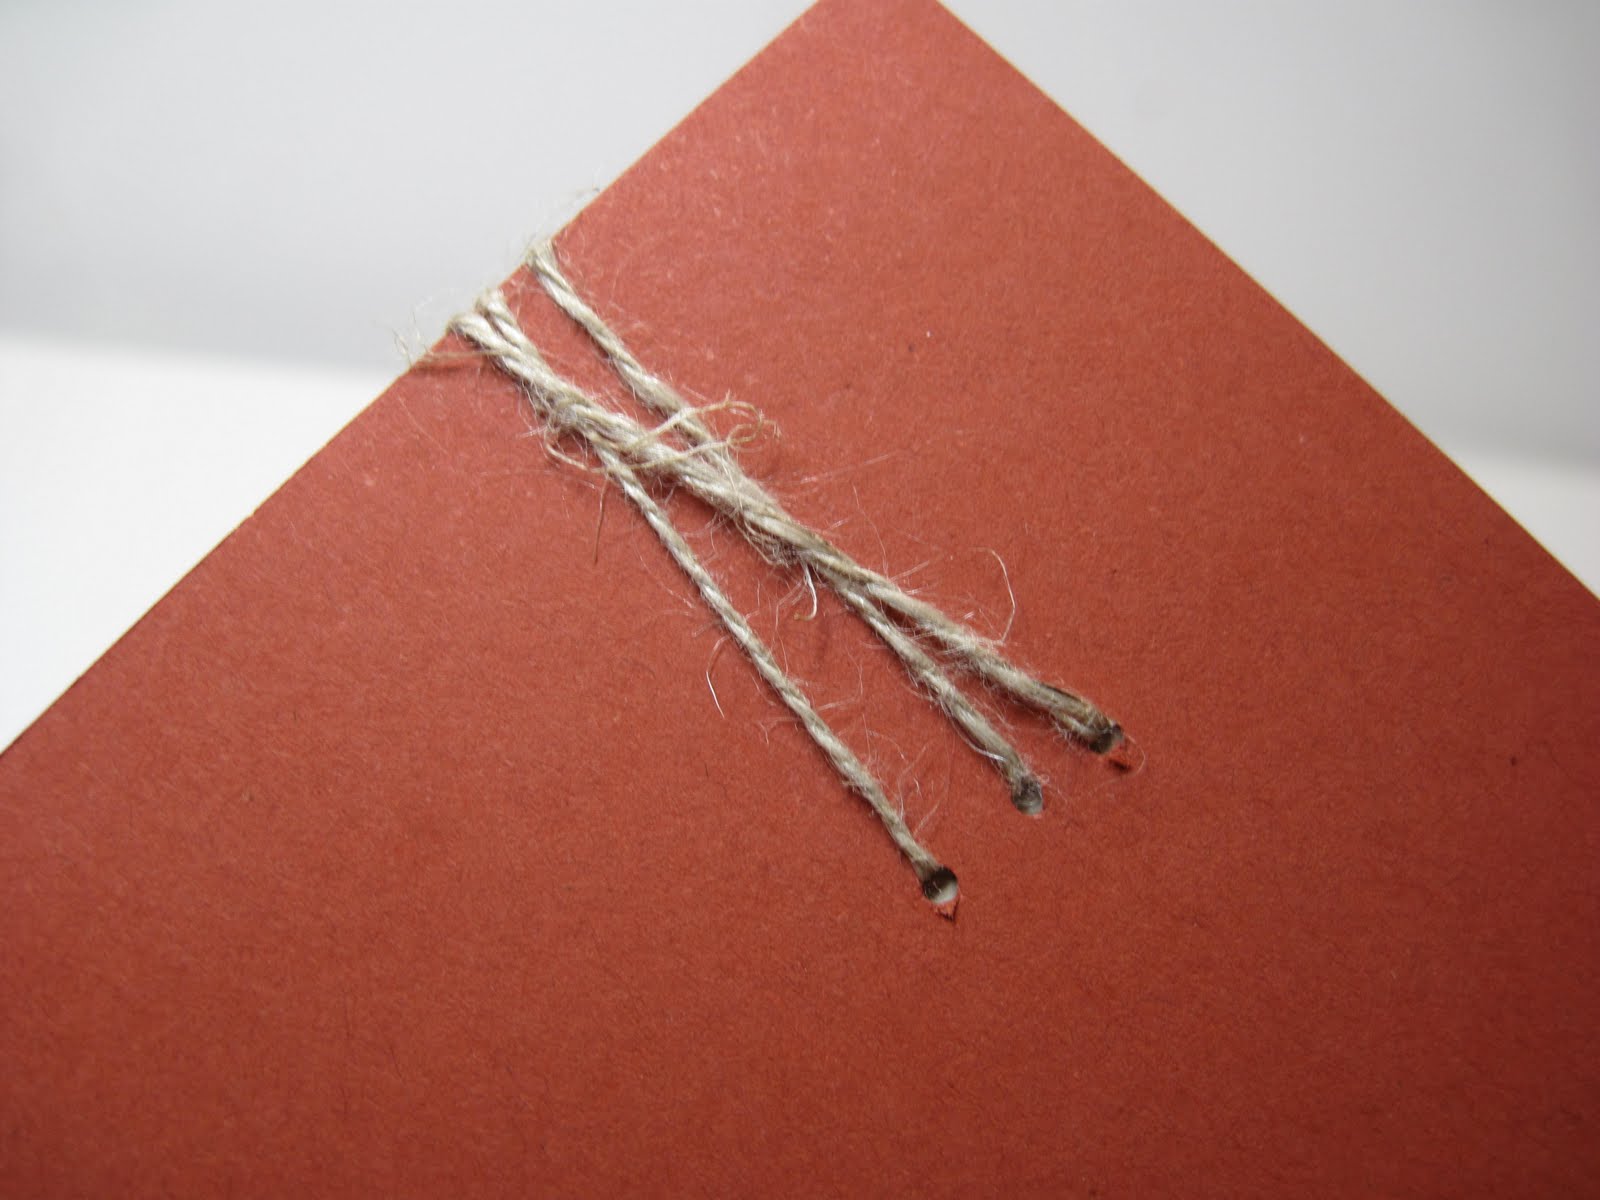
This is a case from a stampin up regional in Baltimore- I loved the idea of cutting up a piece of paper to make sections. The base is Cajun craze stamped with the large flower element in same color. I punched 3 tiny holes in the basecard to hide behind the crumbcake piece and strung the linen thread 3 times to make a connecting element and knotted it.


This is what the back looked like.

I cut the very vanilla CS to offset a little then stamped the images from Day of Gratitude set in crumbcake(leaf), olive (sentiment) and crumbcake then used expresso marker to make the acorn, and the flower is old olive and cajun craze markers. I pierced some of the pieces on the edges, and elevated all the pieces with dimensionals and fit the little library clip. Put the whole thing on the crumbcake piece and it was actually a clean and simple card style that I really like. I hope you do too.
Lynda

Saturday, October 9, 2010

Bells and Boughs with gold waffle paper


This is a case from Iliana Crouse. I had this for my workshop and it was darling. I am planning on doing this for my demonstrator swap later this week. Looks hard- but NOT. It did take a while to color everything in. Base card is real red.
The whisper white was stamped with christmas collage with black Stazon then colored in with red, artichoke, garden green and old olive watercolor crayons using the aqua painter.
I added a piece of garden gren to balance the card because the christmas collage in this direction did not go all the way across the card.


The accent piece is a shimmer paper circle then I tacked a whole bunch of tape behind and put gold waffle paper strip around it. In this one I cut out another piece of white, stamped the bells and colored it in with watercolor crayons again but it was so much work so that I will make it in the future with the bells just stamped onto the shimmer paper circle itself. It looks just as pretty.

I edged the white piece with another strip of gold waffle paper. The transition looked a little funny so I ran a piece of 1/8 inch taffeta but that looked lonely too. I took a bow made on its own and stuck it on the side with a glue dot and it made it look more complete. (and I alos like that my ribbon is not twisted - the way it would be if I tied the ribbon on the card itself.
See? looks hard but not really.
Love that big collage stamp. I'll work on more variations of the stamp as we draw near Christmas.
Lynda

I'm BA-ACK!


I now physically feeling the pressure from the last few months finally lift from me. The old office is completely closed- I turned in my key after spending 2 weekends from dawn to dusk, started at the new work- and the people have been super supportive, and my computer system maybe up and coming soon.
My parents flew in from Florida to watch my kids- which I really appreciate.
Life is Good.
And despite it all I wanted to make sure I held my monthly workshop for my loyal friends and customers. Stamping keeps me sane and a vital part of my mental health care. This is something I came up with to show faux letterpress technique although it was a bit messy. Base is basic black. I took the spider embossing folder and used the versamark to LIGHTLY ink the raised portion of the spider web. Embossed the paper, then into the impressed area I sprinkled some silver embossing powder, brushing off any excess.( you could use the brayer but do not press too hard or you will get a lot of silver on the non-web areas as well- although with the things on top it matters little.) (You could emboss with the folder, then wipe the versamark pad over the raised area then use the EP as a variation of this as well)
I punched an owl and a bat in basic grey, cut the bat in half and stuck the wings on the back to make the bat owl.
I started out with intention to make EEK but the letters were too big to fit. The BOO using all caps did not fit either. So I diecut the letter B from serif essentials, then took 1 1/4 inch circles and they fit the space better especially with the bat on top. I liked 3/4x15/16 oval punch from the holiday mini so I used that to punch the center of the circles- but it is much easier if you punch the small ovals first before you punch it out with the 1 1/4 circle punch.
Added a white circle from the itty bitty shape punch for the eyeballs and a fun little halloween card!
I sincerely appreciate all your encouraging words and support during these trying times.
Thank you all!
Lynda

Tuesday, October 5, 2010


This has been a life changing month for me. I closed my office of 17 years, had my partner retire, and started a new job. My youngest twins started kindergarten and with them in school most of the days I let my nanny of 9 years go too. She was more than a nanny, with me working all those hours she was their surrogate mom. I know for one of my twins, who was really attached to her, this si going to be really traumatic.
This is the card I made for her to say what I could not say in words. She has alway liked my flower cards so I hoped she would like this.
It is a big card 8 1/2 x 5 1/2 - half sheet not quarter like I normally make. The base is whisper white with a large pear pizazz sheet that I embossed twice with the elegant lines embossing folder.
There were some extra lines that got impressed using the folder twice but
I tried to put the center panel to hide most of the unsightly lines behind it so it worked out fine. I added the pumpkin and the daffodil 1/8 ribbon and used a corduroy button to anchor it but it was too plain so I added a flower brad- cut off the legs and glued it on and added a small pearl in the center and it was kind of pretty.
I also added some extra pearls here and there to add some sparkle on the embossed area where the circles fell.

The flowers are larkspur from the year of flower series from PTI, colored in cop*cs. I stamped extra pieces so I can color and pop them out. as you see here


The sentiment is from spiral bouquet stamped in black and I added a tiny pearl where the i was dotted- it was perfect size!
The whole family and the kids signed it on the inside with a special sentiment. I hope she liked it.
Lynda

Friday, October 1, 2010

Enjoy Every Moment October Blog Tour


Welcome to the enjoy every moment october blog hop! I hope you have been having fun visiting all my fun and talented friends who have put this together for you. I myself have been thinking of some holiday ideas to use for the owls and these are 2 little ideas I wanted to show you.
The base is real red with bashful blue DSP in polka dot that I thought resembled snowfall. Whisper white was torn to make it look more snow like. Put a little glitter with glue and the back ground is ready to go. The sentiment is rough type from the summer mini. The owl body is chocolate, with hat and scarf from a retired SU DSP.

The songbook is from the First day set also from the summer mini that I cut out and stamped with the holly from the new holiday mini tag set in green. I put a little gold on the spine to make it look more booklike. I cut out another one in white and layered in underneath to look like pages in a book.
Pretty easy owl card- I thought it would be fun to put maybe 3 owls standing underneath a lamppost or a tree- I will have to try that next time.


This is another one that was swimming in my head for a while. I thought a reindeer wannabe owl- Used the snowflake punch to make the antlers and the circle from the new designer DSP to make the nose. the body was punched in crumbcake and scallops stamped from PTI background retro set. the branch was die cut with bird and branch sizzlet strip in olive that I ran the soft suede pad to paper direct technique. Added some liquid applique in white and glitter. The back ground was airbrushed in B32 Cop*c with a circle masking the moon.


Wandering words set for the santas sleigh ride separated from the words.

A little liquid applique, glue and glitter and voila! another not too difficult card!
don't you just love owls?


The sentiment is a partially inked stampset from saleabration earlier this year.
A little bling to make it a little special and it is a cute card. We can all dream!
Now get going to the my wonderfully talented friend Mercedes here: http://mercedesweber.blogspot.com/

Sorry folks I just could not get that next blog icon to work by just clicking- I'll try better next time!
Lynda

Tuesday, September 28, 2010

Day of Gratitude- CC290


CC290 Basic Rose Delight just called for this. I was playing with this idea anyway and the colors were just what I needed. I stamped the medallion from Day of Gratitude on shimmer white CS (although hard to see the shimmer here) used markers to color in the stamp with basic grey, rose red, daffodil, and olive. I cut the corners with a craft knife to have the edges come out of the box.
Embossed the half of the red cardstock with square lattice and stamped the sentiment in Basic grey and then the whole thing mounted on crumbcake CS.
I did add a little tiny rhinestone jewel in the center- you know me- I HAD to! I love sparkly....... even a little tiny bit that only I know is there. It's like wearing really lacy something underneath your regular workday clothes- nobody knows you're wearing it but somehow.... you just feel a little sexier that day- kwim?
Lynda

Monday, September 27, 2010

Sick Owl


Hi, everyone! BLT left me a comment that she wanted a sympathy owl and I had been thinking about it anyway so I thought I would show what I came up with. Yes, I read every comment and really appreciate the love that people have left me- I am addicted to you!

This is also for the CAS86 cookiebacker sketch and CC290 color challenge with basic grey, rose red and daffodil delight as well on splitcoast.

The base card is Basic grey with white layered on top. A put a layer or daffodil with a strip of white on top with gell well sentiment from teeny tiny wishes set.

The inset is made with bashful blue base and the bed is my MS halloween fence punch that I cut out all the bats and doodads to make it look like a bed.

The owl was punched in basic grey textured. I also punched 2 wings from the bird punch and wrapped one of the wings with whisper white I sponged with daffodil to make it look for like gauge. I gave him a black eye by making one of his eyes a different color and cut out a blanket and hotwater bottle out of rose red DSP retired- the blanket, the hot water bottle and the bottle cap was freehand cut. I did prop the arm, the waterbottle with dimensionals. Doesn't the daffodil eye make him look absolutely jaundiced? heh heh- I think I should have given him a pillow now that I am looking at it- I will have to take this apart and add that on- Yes I do stuff like that a lot!

I have more owl creations that I've been working on to show you this coming week. Some of my stamping girlfriends have planned a really fun blog hop and I will be revealing some of my new Holiday owl creations on October 1st in celebration of my new work starting and the blog hop to kick in the holidays- it should be a blast and I hope you join us in on the fun and do some blog hopping!

Lynda


Saturday, September 25, 2010

A Big Change in Life


After 17 years working in my private practice I closed my doors this week. I know, I know, you're a doctor you must make gobs of money. right? With the cost of rent, utilities, office supplies, disability insurance, tax on property, premises, add payroll, and benefits- which I had to even suspend earlier this year and payments from insurance declining I had nothing to take home since this January- but I kept working 6 days a week to keep it alive - I had to, to keep it alive- it affected my family life- I was afraid that if I took vacation, I could not make enough to pay all the bills that month- So I decided to close my practice and rent 2 rooms and share overhead with a group of doctors. It was a hard decision not because my office will be smaller or that I will not be the boss, it was because the nine people who have worked with me all these years were all going to lose their jobs. It is really like family. But the practice was bleeding money and I had to stop it before I was so far into debt that I would jeopardize my home. Everyone cried on the last day. My mentor and part time partner, and father figure decided to just retire instead of moving with me.
For me it was so emotional, and he is such a private man, I just could not bring myself up to tell him how I felt, it was like -saying good bye to your Dad for the last time- kind of feeling. I was all choked up and all I could do was talk about the weather and some patients that I was concerned about- as if it was just another ordinary day. I felt like I had let him down that I just could not make this work and because of me he was being forced to retire. How do you put value on love, affection, respect, gratitude?

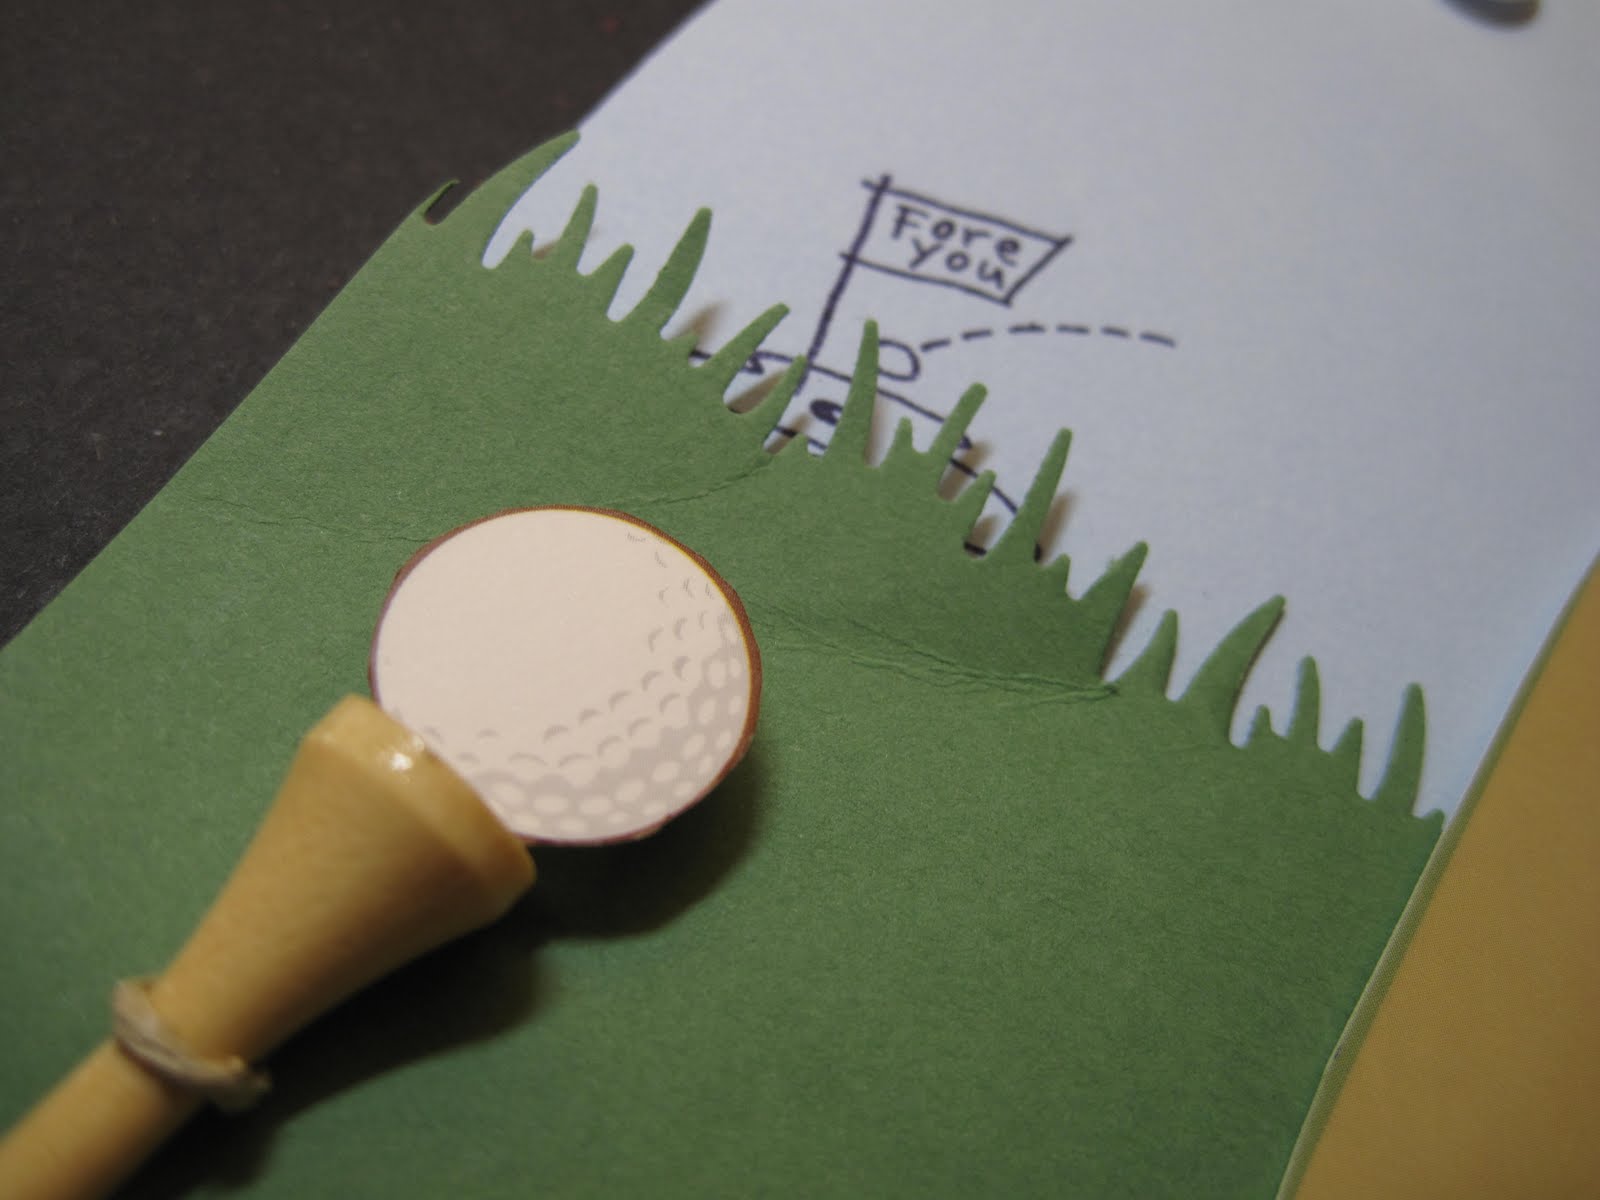
I still wanted to give him something special that I thought he would enjoy- I made this card to tell him some of the thing I could not bring myself to tell him lest I just totally lose it- He really likes to play golf so I thought it would be appropriate. I took a Bliss blue CS and die cut some clouds from MFT and papertrey. Placed some on dimensional to raise it up. The grass is garden green, punched along the top with the MS grass punch. I stamped Fore you from Stampen*ous clear set called Little things - a real oldie but a goodie- in black to peak behind the grass.
I had gotten some golf shaped pens at the dollar store a while back and it had a picture of a golf bag and the golf ball on the package so I cut it out. I wanted him to be able to use the pens so I did not want to glue it down so I tied it down with hemp twine- I punched 2 little holes into the green cardstock where I wanted to tie it down and put it through the back and tied it before I glued the green piece down sot the front would be nice and tidy. I did the same for the tee that I bought for a whole pack for a buck. I don't play myself so I don't know if these are any good for real playing but it's perfect for me to make cards. Added the golf ball cut out with several dimensionals to raise it to get it to the middle. I hope he likes it.


Thursday, September 23, 2010

Some Fun packaging ideas from Tami


At our last get together Tami had shown us some great packaging ideas I want to share with you.
This is the mini brown paper bag form the mini, decorated with the new fabric, diecut with the new big shot die and tied with the ribbons from the mini,
This is the tag, diecut twice, embossed with the spider web folder and decorated with the new DSP and stamps from the mini and a bling added on the bird. It fits a larger snack size candy bar


I thought this was really darling trick- borderpunch the piece of paper before you run it through the milk carton die to make half a milkcarton into a tiny treat holder. Just make sure you put the paper to line up with the bottom half of the die.... Used a piece of fabric diecut with the scallop square die to make a cute liner to match!


This is the Halloween matchbox using the new DSP and stampsets.


and the candy wrapper die using the sets from the new holiday mini, tinsel tie, and champagne glass glitter and new brad.

What fun ideas!
Try some of them out as the holidays will be here before you know it!
Start your projects early so you will have time to make the special treats and really enjoy the process.
Lynda


Tuesday, September 21, 2010

My Motto in Life


There are so many things that bog us down- work, demands of family, keeping a clean house, marriage, grocery shopping, laundry- the everyday mundane activities sometimes take away your ability to enjoy what it is that you are doing- I actually love the smell of fresh laundry, cookies in the oven, roses in bloom, sound of my kids laughing or my husband snoring. It tells me that all is well with the world- I tell my patients that nobody ever says on their deathbed- I wished I worked more or kept a cleaner house- it's always about spending more time with people you love, having done things that you would not have if you knew you did not have any more life time to do it. So take a breath today- look around you- take a minute to really enjoy your life- as simple or as complicated as it may be. You are here for a purpose. Take time to Enjoy the simple things.

I saw this Housemouse stamp in the stash that Makani was going to sell off and I had to have it for myself. I want to be like that mouse even if I tend to be the one under the umbrella.
The image is stamped in black memento and colored in with Cop*cs.
Added some tiny rhinestone jewels to make it look like water glistening. Layered the whole thing on turquoise and poppy. I punched the dotted scallop border ribbon and cut it longways into 2 to split it above and below the sentiment to create a subtle scallop border. the sentiment was written by hand using the 0.5 copic liner in black, and added some larger bling to the corners as well and voila! not too difficult a card- hardest part is trying to figure out what umbrella colors I wanted to use.....
Lynda