One of my co-workers is very pregnant and we are having a baby shower today so I needed a quickie card to give away - so I took a whisper white base card, found some old DSP to match the litte onesie I got for her- I think this is from making memories- then I looked for Stampin Up cardstock to match. Punched a large scallop circle from Old Olve, then circle cut a 2 inch prett in pink CS then 1 3/4 circle was punched in white and then embossed with polka dot EF. Then I looked around for something I could put in the center and I did not have any appropriate SU image but I found this PTI Baby button bits set so I used the teddy from that and the sentiment and tied the old olive stampin up scalloped edge ribbon and it was a fairly quick and easy card that looks dynamite in person. But you could put any baby image in the center that you have that you color to match your paper. I raised the teddy and the scallop circle with dimensionals to add some dimension and used strips of the DSP on plain white bag that I got from a store to match and a custom gift bag and card!
I have been trying to reorganize my stamping space and I am finding I have to keep all my similar used items together. I tried doing it by color, companies or style but I keep finding that when I need a baby card, I am looking all around for things and it's hard to remember which company had what. I do have a corner for all current Stampin UP but whenever I need to make a card for an occasion, I am always scrambling. I spend more time looking for things that I am sure I have rather than really stamping. I now decided that I am going to have a stackable drawers or project boxes for everything else- one for BABY and keep all baby things together and keep BRIDAL in another, MASCULINE, BOYS, HALLOWEEN, etc. What do you think? How do you organize your stamping supplies?
Lynda
Monday, April 30, 2012
Sunday, April 29, 2012
Market Basket -upside down Petite Purse
On Saturdays we have a local organic market that we love to go to with bunch of local vendors with piles of vegetables. fruits and flowers. It is just fun for my kids who love fresh kettlecorn and sampling berries with juices running down their chins.
So I made a little market basket using the petite purse die upside down. This is really easy to make. Diecut petite purse using crumbcake and cut off the part that would normally be the"bottom".
Trim off the rounded part of the sides of the purse and tuck and tape what would be normally the "top" of the purse inside the bag to create the bottom. I made a handle from soft suede cardstock and then "sueded" it by crumpling it and taking the CS apart to create a real soft "suede" handle that was attached using mini brads. (the handles were a tad long so I trimmed it to size.
I also love the flowers that they wrap in newspaper and wrap with cording and of course my market basket would have to
have one too. I die cut little leaves sizzlet using some variety of left over green cardstocks pieces then punched blushing bride CS with the little flower from the itty bitty punch set adn put a little pearl in each one. I put some dimensionals inside the cone of First edition DSP to allow the leaves to be more 3D.
The mini ceramic veggies I have collected over the years for a doll house that I will never have - unless it's made out of Legos!
Oh well!
Lynda
So I made a little market basket using the petite purse die upside down. This is really easy to make. Diecut petite purse using crumbcake and cut off the part that would normally be the"bottom".
Trim off the rounded part of the sides of the purse and tuck and tape what would be normally the "top" of the purse inside the bag to create the bottom. I made a handle from soft suede cardstock and then "sueded" it by crumpling it and taking the CS apart to create a real soft "suede" handle that was attached using mini brads. (the handles were a tad long so I trimmed it to size.
I also love the flowers that they wrap in newspaper and wrap with cording and of course my market basket would have to
have one too. I die cut little leaves sizzlet using some variety of left over green cardstocks pieces then punched blushing bride CS with the little flower from the itty bitty punch set adn put a little pearl in each one. I put some dimensionals inside the cone of First edition DSP to allow the leaves to be more 3D.
The mini ceramic veggies I have collected over the years for a doll house that I will never have - unless it's made out of Legos!
Oh well!
Lynda
Saturday, April 28, 2012
Rosenberry Rooms blue and black bag
Splitcoast had an inspiration challenge using a company called Rosenberry Rooms specializing in children's rooms and and there a diaper bag caught my eye- http://www.rosenberryrooms.com/169-chocolate-ice-diaper-tote.html
I love the pale blue and black combination so I decided to make a replica using - of course - the Petite Purse die. I die cut the purse with Pool party CS and another in basic black. Cut off the top part of the pool party one to create an open purse. Trim the black one to make a border on the bottom 1/2 inch all around. I used the cropadile to punch an 1/8 inch circles to thread the ribbon (I punched it so there would be ribbon going around each corner) then tied it as shown (actually it's the back because the front has that tiny slit for the closure I did not want to see in the front...) Added the 1/8 in taffeta ribbon for handles (tucked it in under the ribbon using tiny glue dots so it is as neat on the inside ) and my little purse is ready for an outing!
Enjoy!
Lynda
I love the pale blue and black combination so I decided to make a replica using - of course - the Petite Purse die. I die cut the purse with Pool party CS and another in basic black. Cut off the top part of the pool party one to create an open purse. Trim the black one to make a border on the bottom 1/2 inch all around. I used the cropadile to punch an 1/8 inch circles to thread the ribbon (I punched it so there would be ribbon going around each corner) then tied it as shown (actually it's the back because the front has that tiny slit for the closure I did not want to see in the front...) Added the 1/8 in taffeta ribbon for handles (tucked it in under the ribbon using tiny glue dots so it is as neat on the inside ) and my little purse is ready for an outing!
Enjoy!
Lynda
Thursday, April 26, 2012
Zebra Petite Purse
Diecut the Petite Purse with whisper white CS. Take the texture plate and ink it up with Versamark pad all over.
Put the whole diecut onto the texture plate (the positive, negative and the handle) and emboss the whole thing making sure the edges are all in the plate (it does fit but barely!) Emboss using black embossing powder (if you are not using SU then make sure it is a detail embossing powder). Try to be careful handling it because you don't want to rub the powder off. Heat emboss and this is what you get. I used the white gel pen to outline the edges and it really makes it pop. Added a little white brad for the closure. I really racked my brain for this one trying to figure out how to do it. I am thinking I should work on cards using the retired sets for the next few weeks....
Lynda
This is the texture plate I used to create the texture on this project. (not SU).
Tuesday, April 24, 2012
Another Crocodile Petite Purse
Labels:
Tools- Big Shot,
Tools- Embossing Folder
Monday, April 23, 2012
Faux Louie Vitton Purse in melon
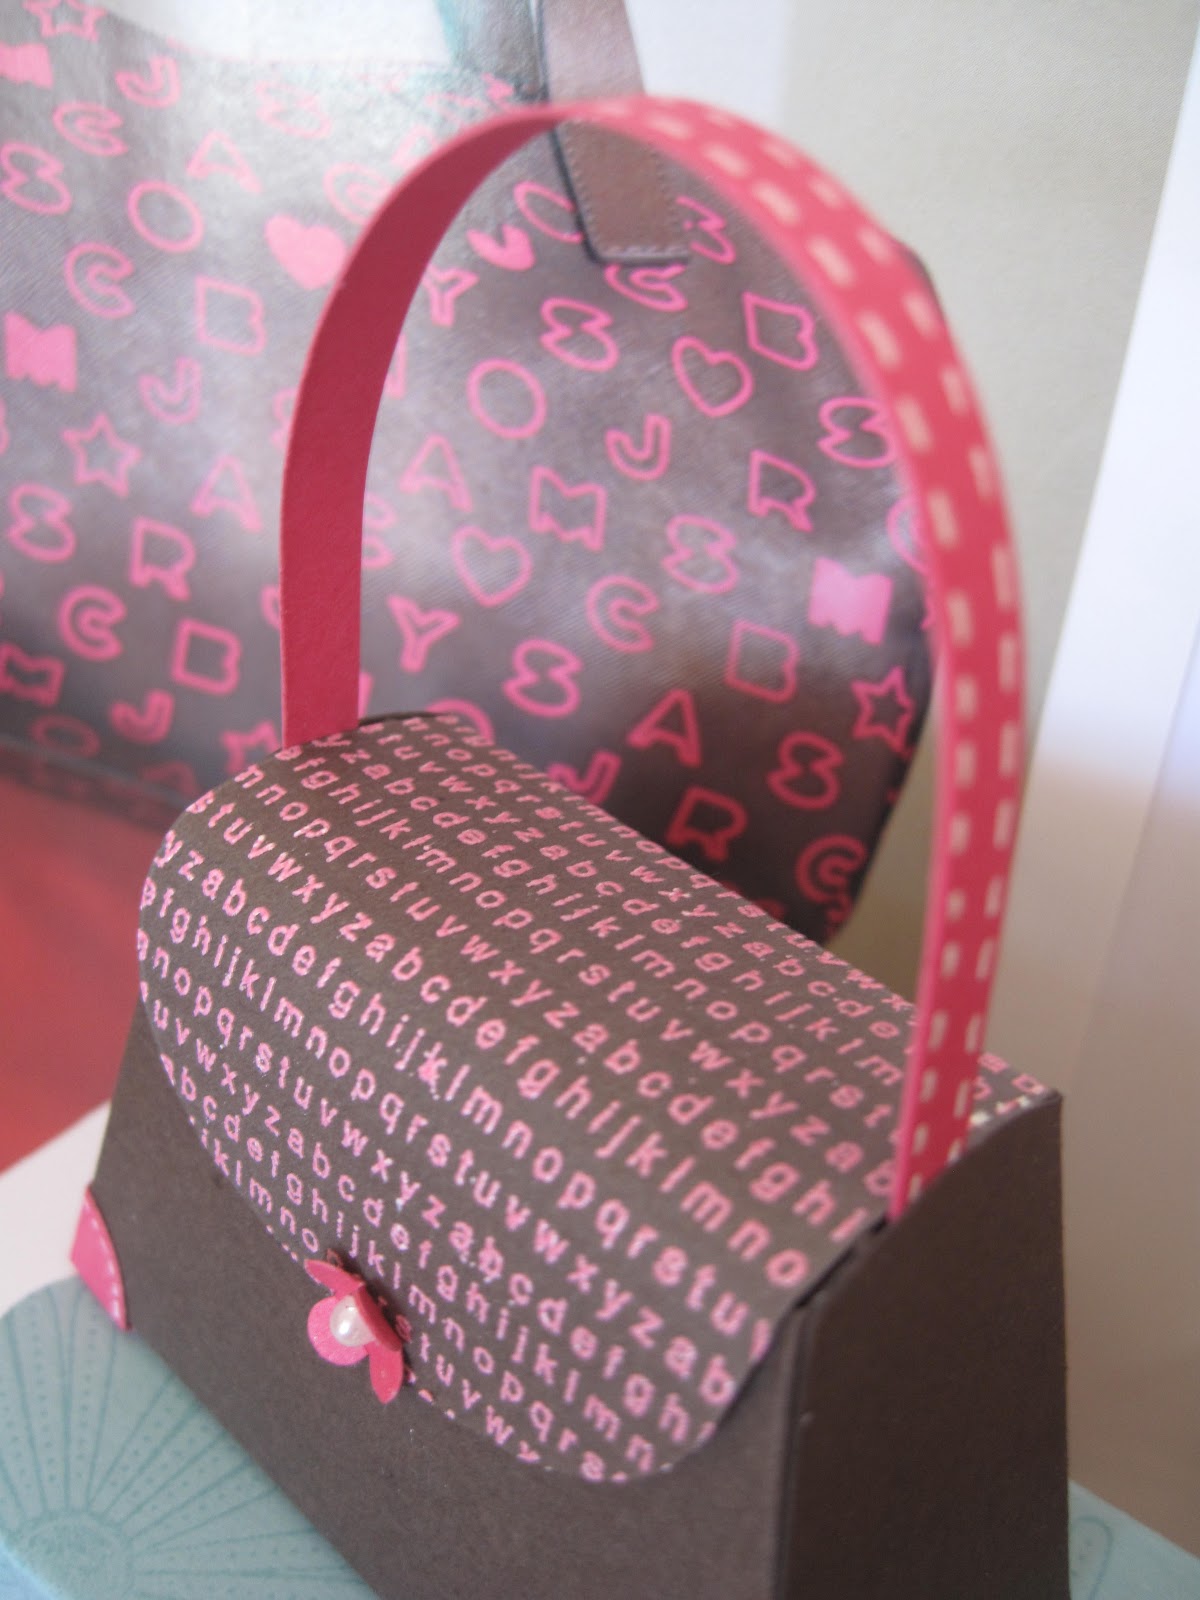
I saw an ad in a Nordstroms catalogue for this chocolate purse with little symbols printed all over it and I thought it would translate well into our Petite Purse using the Melon Mambo embossing powder. I wanted something small so used A to Z (soon to retire) stamp with the versamark pad and embossed it with the embossing powder. Added the handle and corners and central flower with melon mambo CS.
Enjoy!
Lynda
Sunday, April 22, 2012
Petite Purse Upside down Picnic Basket
The top of the basket was also covered with strips of 1/4 inch and then 1/8 strips on top and then sponged again. I thought it would be fun to add wine bottle and glasses, and maybe the bread from Studio Sketches to add some realism but didn't have time... but wouldn't it be fun?
Enjoy
Labels:
Tools- Big Shot,
Tools- Embossing Folder
Saturday, April 21, 2012
Just Believe SCS IC333
Today's inspiration challenge IC333 from Splitcoast was awebsite called BHLDN and this simple napkin image http://www.bhldn.com/explore_the-look-party-print-novelty_the-look-decor/undersea-cocktail-napkins-12 stuck with me so I used it to inspire my card for today.
Take Whisper white CS and emboss with the houndstooth folder. Take another piece of whisper white stamp Just Believe flowers tiwce and sentiment as shown in Tangerine Tango. Edge the layer with the ink from the paper direct to paper and tie with calypso coral twine. Layer with dimensionals to raise it up a bit and a really simple easy to demo card.
Lynda
Take Whisper white CS and emboss with the houndstooth folder. Take another piece of whisper white stamp Just Believe flowers tiwce and sentiment as shown in Tangerine Tango. Edge the layer with the ink from the paper direct to paper and tie with calypso coral twine. Layer with dimensionals to raise it up a bit and a really simple easy to demo card.
Lynda
Labels:
Clean and simple,
SCS Challenge Cards,
Stampin' Up
Thursday, April 19, 2012
Totally A-mazing
Take a 3 inch piece of wisteria ribbon and poke a hole in it and the limeade CS and put the brad throught it( Jelly Bean Brad from the Occasion Mini ).
Stamp the sentiment using Wisteria ink and punch out with modern label punch and adhere using dimensionals.
A little tricky but a cute card for maybe one of my boys!
Reminder to self: buy more mazes in case it does not make it into the main catalogue next year!
Wishing you an a-maze-ing day!
Lynda
Wednesday, April 18, 2012
A happy birthday Popup
I got a card like this for a swap at Leadership in January and didn't think much of it until I opened it up and thought WOW! Cool little popup- The card did not have anything in it to identify whose card it was- I took it apart to figure out how it worked and I wrote it up for whoever wants to make it- If you know whose idea this is, PLEASE let me know so I can give credit to the cardmaker.... this is so clever!

Take a cardstock 4 1/4x 11 and score it 2 1/4, then at 7 1/2 inches along the long side. scallop punch the short side on the left and emboss with square lattice folder or some other folder of your choice up to the first score line as shown.
Add more sticky tape as shown and attach a 2x3 inch piece of carstock with your sentiment ( or gift card or picture or ....whatever you want to pop up!)
Take a piece of 1 1/2x 4 3/4 strip of CS and score it at 3/4 inches.
Take a triple flower punch and punch 3 different colors to make the bows. Attach one for the center bow centering it on the score line using sticky strip on the short scored side only as shown and then again on top of that. The right side should not go over the score line on the right (see first picture). This is the pop-up mechanism.
It should look like this when the fold is open.
Take 3 - 1 1/4 inch squares of coordinating DSP and little strips of cardstock and the triple punched flowers and adhere as shown. Make sure you put tape only on the middle mechanism and not on the whole back so it will glide back and forth well.
Be sure to stamp the sentiment before you stick it on to ensure a clean stamped image. Then sticky strip the front sides up to hide the mechanism and let it slide!
Subscribe to:
Posts (Atom)