Monday, May 26, 2014

May Paper Pumpkin trip into the Redwoods

 My husband's friends from college days and their family get together once a year for a camping trip in Redwood State Park in Humbolt county which we look forward to every year.  The air is so clean and fresh and dewy, the trees so majestic, you can't help but relax- even for a type A like me.  We took hikes along trails although Dylan got a horrible tendonitis of his foot by the end of a 6 mile hike- poor little guy!
 The elk are aplenty - grazing all over the place.  We went to Fern Canyon where they filmed Jurassic Park, the place looks absolutely prehistoric with ferns growing up and down the canyon walls and wood pilings rich with green growth.


At the beach  it is miles and miles of beautiful sands.  Driftwood here and there but rarely with anyone else besides us.  We even saw some whales from the shore  spewing through the blow hole and surfacing and diving which was amazing.


 This was our campsite with the huge netting for the mosquito- challenged family like mine- although my legs today still looks like a map of the constellations with all the bites I still got...

Now what does all this have to do with stamping?  Well, as I was leaving for the trip, what arrived in the mail but my favorite little monthly box!  I took the box off and tucked away the package with my portable stamping bag (with all my essential stamping gear). just in case I had any time to kill.
 This was the corner of the picnic table where I laid out my kit to figure out what I wanted to do with it. The kids were still snoozing, I had my morning cuppa and I had my little Quiet Time- Yippee Skippee!  Time to get out the Paper Pumpkin!
This is a picture Kyle took of me literally "stamp camping" as he was goofing with my camera after he got up.  Now I am more in love with my Paper Pumpkin than ever. I love it that it is complete and portable.  I used my catalog as the stamping surface, even.

Below is one of my finished cards- a variation on the sample in the pack.  Love the stamps in this Hey, Man kit-  Love the baby tags and the words that go inside it- Dad, Son, and Bro.  And out of the whole kit I brought the only thing I really needed was my scissors and that was because 'I had to be different' and wanted to make a horizontal card instead.

I think Stampin' Up should have a "where can you take your Paper Pumpkin?"  challenge- Imagine it on a plane, on a train, in a box, with a fox....
by the pool, at a game....


Friday, May 23, 2014

Endless Birthday Wishes Challenge


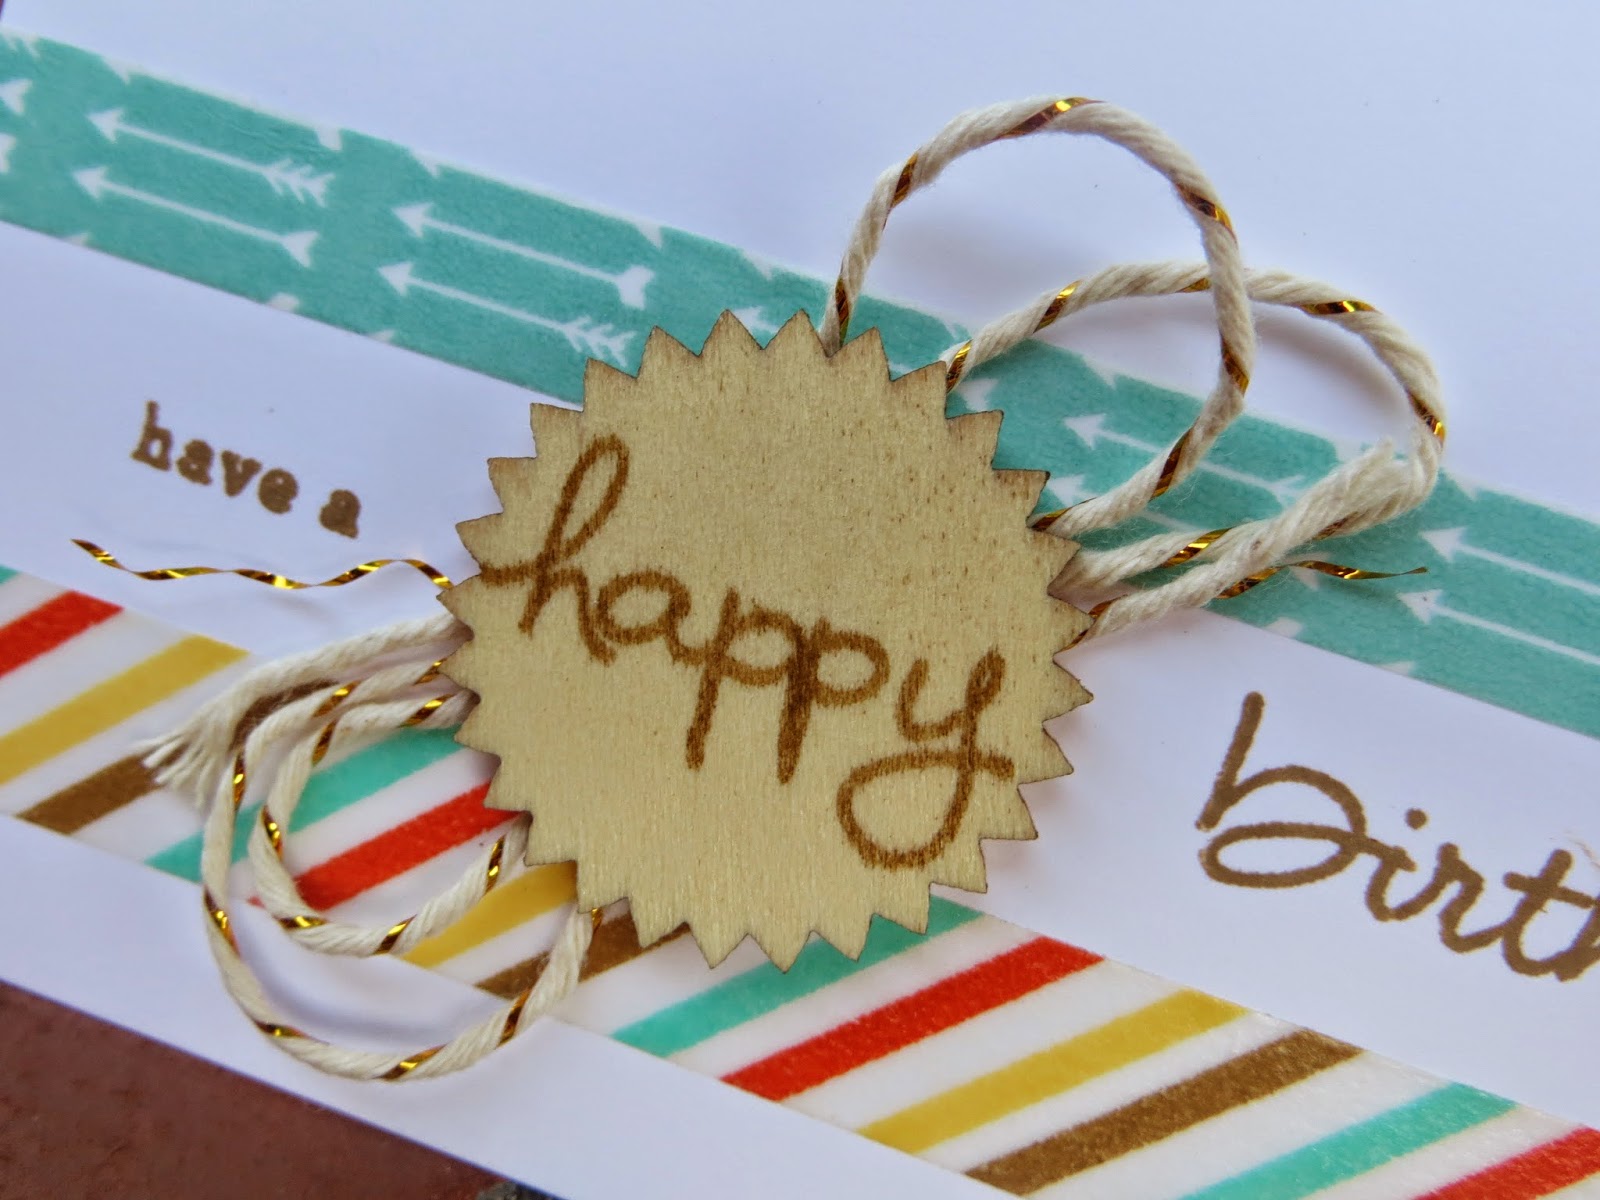
 My upline Tami has a get together quarterly and we were given a challenge - to use Endless birthday Wishes set to make 4 different cards using notecards and washi tape and you could stamp but only using one color for the stamp.  (so the colors do not get messed up during workshops for example) and these were my takes on it.

The funny thing is, I really love limited item challenges because it forces you to use things you normally would not have- like these wood pieces but they were SO MUCH FUN!
 And the Endless birthday set is that- Endless!  you can create so much different combinations of messages.  Love It!
So challenge yourself and get started on some cards- you can always use them as gift enclosures and everyone has a birthday- what a nice surprise to find a card for a co-worker, a teacher, a friend or family on their special day....

This one was so simple but was my favorite. 
The wood pieces fit these words so nicely and gave a fun dimension to the cards.  Enjoy!

Monday, May 19, 2014

Watercolor Peaceful Petals

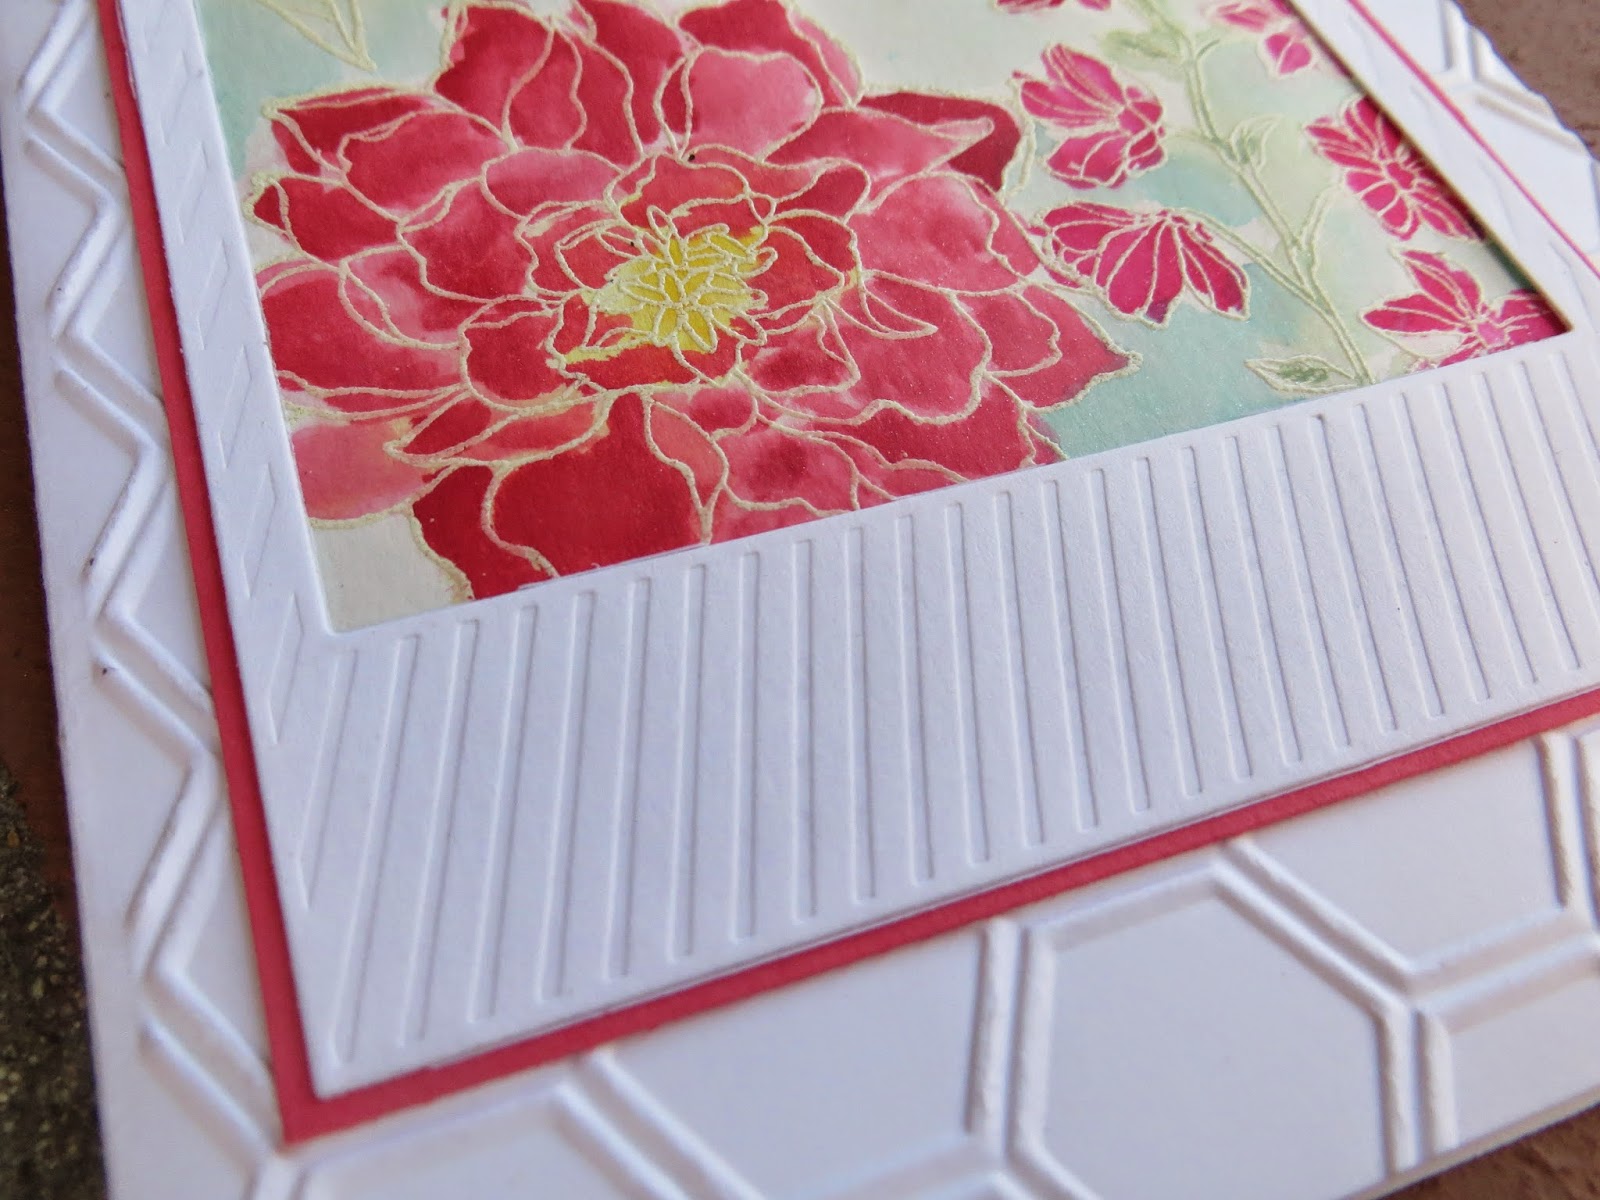
 A very simple looking card but it took a little doing. I had the card in my head but the watercolor part took a little more time than I anticipated.  The base card is whisper white textured with Honeycomb embossing folder.  I then took another piece of whisper white and diecut it with the On Film framelit - my totally favorite tool for the moment!-   then layered a piece of Strawberry Slush behind it about an 1/8" larger then the diecut on 2 sides to add just a touch of color.  

I then took a piece of Shimmery White a tad
smaller than 31/2 square (which makes it perfect for the opening without hanging over)  and used versamark to stamp the images from Peaceful Petals stampset (in Occasions Catalogue Pg 20) after using embossing buddy to get all the static off. After stamping , I used white but you could also use clear embossing powder to set the image.  I then used the Aqua Painter to put a thin and I mean THIN! layer of water all over the heat embossed Shimmery white paper then used dabs of Strawberry Slush, Melon Mambo, Pistaschio Pudding and Coastal Cabana and Daffodil Delight ink refills on a plate to get the watercolor effect.  I suggest you start with the lightest colors such as the daffodil  then slowly then the blues, and greens in a very diluted way then add the pinks , then more concentrated colors where you want it.  The embossed lines should keep the colors within the area you want.  I love how this looks very much like some of the asian print fabrics.  I left the area on the bottom blank on purpose so I could add a sentiment later but I think it is a very pretty general card you can use for anything!
Enjoy.
Lynda

Monday, May 12, 2014

Cutie Pie Besties card

Don't you just love this Cuite Pie set?  It was a card I made for my stampin' sister Mercedes.  Base is Baked Brown Sugar with a layer of Crisp Cantelope with Coastal cabana diecut with On Film framelit die.  I stamped the 2 head that was the closest to our hairstyles and drew the table with a straight edge.  I stamped the accessories from Totally Tess (retired). Isn't the marker and the card and the wheel the cutest ever?  then drew the body around it to kind of fit.    Colored it in with markers ( Blush blossoms for the skin because the skin tone blenderabilities were not yet available then!) Sentiment on the top form a special stamp I got from convention years ago and the stampers first sentiment from the Star Stamper photopolymer set we got at Leadership.  I thought it stated what I feel so perfectly.  I heart you Mercedes!  I am counting the days until we go to Convention!  

Saturday, May 10, 2014

a quick Undefined PS3 controller Birthday card

It feels that everything at my home is so Rushed.  My son Tyler was invited to a birthday party that I did not know about until an hour before and of course, I am expected to whip out some fabulous card for the occasion.  So I fell back on the PS3 controller that I carved from Undefined which seems appropriate for all 13 year olds in his crowd.

The base card is Bermuda Bay, embossed at an angle with Arrows Embossing folder.  Two different Kaleidoscope DSP is diecut with On Film framelit as shown.  I stamped the controller using versamark pad onto whisper white CS and heat embossed with black embossing powder and cut it out.  I drew a black line where the cord would have gone and mounted the controller with dimensionals.  The Happy Day banner is from this year's hostess set Banner Greetings, stamped with Bermuda Bay inkpad.  The For You is from the new 2014-2015 catalog hostess set called Hello There stamped in Strawberry slush both mounted with dimensionals.  Little pocket on the inside using the smallest of the envelope liner die, stuff it with cash and he was good to go.  Not bad for a 15 minute on the fly card, eh? 

Monday, May 5, 2014

The Rose Garden in April

 If you have some time this or next week, and live in the Bay Area, visit the San Jose Municipal Rose Garden.  The place is an explosion of color this time of season with heady perfume of delicate roses that waft through the air, a treat for all your senses.

The entire garden is surrounded by climbing roses along the fence and inside a wide open field perfect for frisbee throwing or an impromptu picnic on blanket under a shade of a tree overlooking the whole garden.
This is Chris Lloyd with a sweet spicy scent of an old fashioned hybrid roses that I love.

Around the corner were some roses my kids thought was hilarious called Yabba Dabba Doo- but still pretty.

 There are volunteer gardeners keeping the place beautiful with arches of climbers, old and some starting.  Just a beautiful place a a photo-op... if I could get my kids to cooperate!

I am just so awed by the beauty of nature and all the blessings we receive every day, the clear blue sky and a gorgeous spring day, the company of friends, good health of family and yummy DQ sundae we stopped by eat afterwards!

Thursday, May 1, 2014

My punch storage drawers

 I have a small workroom that is packed with stuff and I like my punches close to me so I can access it easily and visible.  I have seen some solutions using curtain rods and shelves but I just have no wall space to do them.  These drawers were on sale at the local craft store for 50% off - it is self assembly but it did not take too long to put it together and they are stackable to boot.  I used wood glue to really secure the drawers because I knew the punches would be heavy and it has worked out really well. 
The new style of punches fit perfectly side by side - the smaller ones I can fit 3 across.  You can easily see what it is with the label up and how many each drawer can hold.  I have 2 drawers filled so far so glad this came with 4.  The only issue is when there is not enough punches to keep them upright. I sometimes will put a small box or something behind them to keep them upright.   I am keeping all the shapes in one drawer and holidays and others in another.  Even the tag punches fit standing up.   Maybe this is a compact solution that will work for some of you as well.  I've had this now for several years and I think it is the best solution for me!

Monday, April 28, 2014

Nola's Iris Garden

 I used to volunteer at my kids' preschool and the teacher would ask me to go outside - since she knew I was stuck inside most of my work days and loved gardening and I would divide the bulbs when it came to time.  Over time from there and other places I had amassed some beautiful irises.  But when we had our backyard landscaped, the landscaper told me "sure" when I asked that they save the iris bulbs, but alas when I got home that day, they were all gone, they were accidentally thrown away. Nola's Iris Garden is a 5 acre private garden free for wandering many months of the year at the top of the San Jose hills at the end of Sierra Road- beyond several curvy miles up the hill.
 They have acres and acres of all sorts of different colored irises, some for sale there and others for mail ordering.
My boys ran around like crazy as 9 year old boys are apt to do.  They loved this beautiful turkey that reminded me of the outfit that Audrey Hepburn wore for My Fair lady for the Ascot Races in this gorgeous black and white plumage.  We also saw heritage chickens, a goat, bunch of people riding horses, cats and dogs....
 From the top you could see the Bay area - you could see the San Francisco bay from here - unspoiled and serenely beautiful.  Hard to believe that this is nestled just above the busy silicon valley life.

Dylan is sitting quietly taking it all in.  You can't see it but beyond his feet is a hillside going straight down covered with irises!
This is one of the varieties I loved called Sharp Shooter- such intense colors and contrast.  I will have to order that one and Secret World on the next go around when they have it.  I was able to get Navy Blue, October (a Summer Sun colored iris)  Preteporter (a pale lavender color) to name a few.  We'll see how my garden develops in the next season.....


These are some of the shots I took with my new
iphone just to see-  It's amazing the quality of the pictures from smartphones and how they have changed over the years. Gotta love technology.

Saturday, April 26, 2014

My Undefined Playstation Controller Birthday Card


 My son Tyler is going to a birthday party of a friend who is a gaming crazed teenager- wait, that's my son, too!  I wanted something game related but did not have a stamp for it so what did I do?  Took out my son's playstation controller and drew it out and carved it from my Undefined carving kit of course! I drew it up, and rough carved it and then stamped as I continued to carve to make sure I got the image I wanted and it turned out pretty cool, if I say so myself. It took less than 30 minutes!
 I stamped it on whisper white using versamark and heat embossed it with black embossing powder then cut it out.  I stamped Happy Birthday from Bring on the Cake (sadly on the retired list- so if you need it, get it now while you still can! ) on a piece of whisper white and diecut it with On Film framelit and colored the words in with Bermuda bay, Strawberry slush, Crushed curry, Smoky slate, and pumpkin pie markers.  I then cut a piece of 3 1/2x 3 1/2 Kaleidoscope DSP and layered it underneath it.  I dry fitted the controller I cut out to see where I wanted it then used the black  marker to draw the "cord"  then mounted it using dimensional.  Stamp small Simply Stars (also on retired list) with Strawberry slush and cut out and mount with dimensionals.  Celebrate from Starburst sayings diecut with coordinating Starburst Framelit Die.
 I think it does make sense that the kids want cash since giftcards are usable at certain stores and can easily be forgotten and lost, but I still want to give it to them in a special way.  The envelope liner framelit die to the rescue!   The smallest liner is perfect for trifolded cash- Makes it a little more classy then just money folded inside the card.  Used another sheet from Kaleidoscope DSP to make the envie.  Added the Happy birthday banner from Itty Bitty Banners, diecut with Bitty Banners framelit and reasonably easy - but I hope he thinks Spectacular- card.


Things you need to make this card:
Paper:     Whisper white  CS    100730           $8.50 (40 sheets)
               Kaleidoscope DSP    132995          $10.95 for 12 sheets
               Bermuda Bay  CS      131197          $6.95 (24 sheets)  

Stamps:  Undefined stamp carving kit            Kit 133402 / refill kit 134808
               Bring on the Cake      128490Wood  $38.95        121958 Clear $27.95  
               Simply Stars              130889 Wood  $13.95        130892 Clear $10.95
               Itty Bitty Banners      132022 Wood  $15.95        126257  Clear $11.95 
               Starburst sayings       133182  Wood  $25.95        133185  Clear $18.95

Ink:     Bermuda Bay              131171 
            Versamark              102283
            StazOn Jet Black      101406
            Markers: Strawberry Slush, Pmmpkin Pie, Smoky Slate,  Bermuda Bay and Crushed Curry     
Tools:  On Film Framelits     132969   $29.95
            Bitty Banners framelit  129267   $14.95
            Starburst framelit  132967  $26.95 
             black embossing powder     109133     $4.75
            Envelope Liners Framelits Dies   132172   $26.95   (type in the name in search and you will find it in the store although it does not come up automatically when you look in the framelit section) 
Dimensionals                                       104430            $3.95 (300 dots)
Multipurpose Liquid glue                   110755            $3.95

You can buy any and all of what you need at http://www.stampinup.net/esuite/home/lyndalee


Sunday, April 20, 2014

Happy Easter! Purse handle basket


Ah, what to do with all those purse handles left over from the bunny purses I made for Easter treats?  I was playing and thinking about making a trellis , a background for a oval cutout, but I thought, hey, I need to make a Easter basket and it was perfect for it.
I make the basket by weaving the handles, tucked the ends over and put a strip on top and bottom to finish the edges and added the ruffle ribbon in brown sugar to "line the basket".  I used the Small Oval punch with white, daffodil delight, pool party, pumpkin pie, Pistachio pudding and Gold to make the eggs and used dimensionals to pop them out.  The base card is soft sky with grass made from strips of Pistaschio Pudding cut with Fringe Scissors layered- the top layer is attached with dimensionals as well.
The hello is from A Dozen thoughts stampset, punched out with  Deorative Label punch  twice to make it smaller -tied with Calypso Coral Bakers twine.  I put a left over strip to make a handle but left it  unattached at the top to make it more 3D and it works- although I probably can't mail it...
And the bottom picture was our Easter Sunday dessert - It was a gorgeous chocolate cake and yummy to boot!   Happy Easter to you all!  Celebrate Life.
Lynda