Friday, February 20, 2015

Happy Birthday

 Isn't this Irresistably Yours paper just darling?
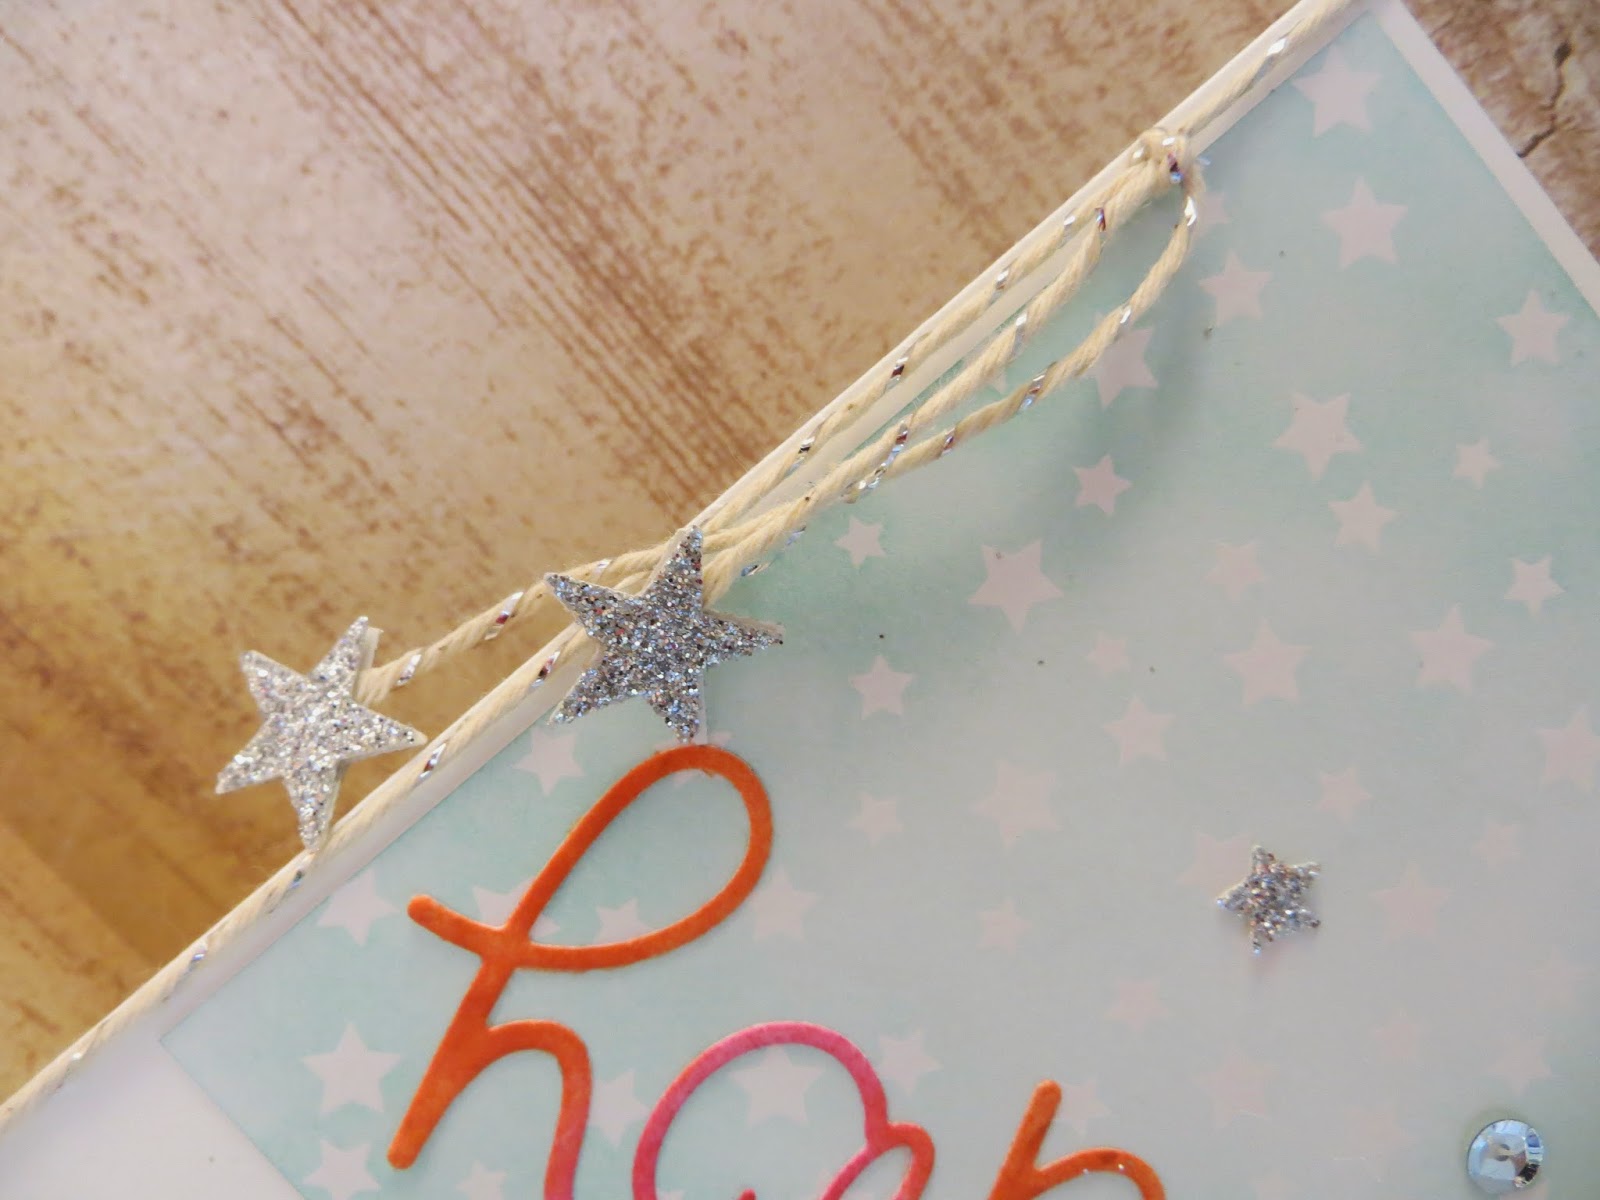
Cut the paper 4x4 and you can get 9 pieces out of the sheet.  I sponged soft sky outside in to bring out the stars a bit.  Then mounted it on whisper white stamped with sentiment from Crazy About You in Tempting Turquoise.  I punched out a bunch of stars from Confetti Stars Border Punch with Silver Glimmer paper to scatter around the card besides the sequins from Frosted Sequins (in Clearance now) or So You Project Kit.   Tied the edge of the card with the Silver Baker's twine and tied a know. I put 2 silver punched stars back to back on each end of the string so that it would be pretty no matter how the strings dangle.  Dauber some tangelo twist and melon mambo on a scrap piece of whisper white, diecut with the happy die and mount on card.
 Details on the star dangle
details on the silver stars and sequins.


enjoy.


Tuesday, February 17, 2015

It's a Big Day

This is a variation on a card we made at my upline Tami's that we made at my Stampin' Party this month.  I wanted some bright colors for the birthday card.  After this long winter I am ready for some color.  The base card is Coastal Cabana with 2 different pieces of Best Year Ever DSP from Sale-a-bration (free with any $50 purchase).  The bookmark is made with Ornate Tag Topper punched on both sides, stamped with the sentiments in Memento Ink then used the Blenerabilities to color it in.  Tie the Calypso coral ribbon ( from Best Day Ever Accessory Pack from Sale-a-bration).  Stamp the cake on a 2" circle whisper whiter CS and color it in with blenderability as well making sure to dauber the edge of the circle to make it stand out a bit.  Mount on the Crushed Curry cardstock punched with 2 3/8 inch scallop circle using dimensionals.

It would make a sweet little card for any birthday boy or girl!

Monday, February 16, 2015

Saturday, February 14, 2015

Happy Valentine's Day


This was a relatively easy Valentine's Day prep for me.  We had made this before and the kids were involved in making their own treats for their friends.  Given that we had to make over 60 it was so nice to have a die that made it easy.  We used Flower Frenzy Bigz L die and overlapped one of the petals to secure it. We used  one of the other 5 petal flower to create the sepal in green. We punched a quarter inch hole in the center to put the lolly pop through.
I used a one sheet of sticky paper and cut it into strips, had the kids stamp happy valentine's day onto one side and write the name of the recipient and their name on the other.
 We then peeled and stuck it together kind of pushing it up on the flower to secure the flower petals and sepal.
 For my Stampin' Party in February I was given so many hostess gifts, I wanted to show you some sampling.

This one to the right is from Mercedes Weber - a sweet little treat bag with a tag with the donut that just kills me- now I have to get THAT DSP!
 This treat box is from Marisa who used the tag topper punch and the die from Chalk Talk for this darling triangle box.  Too cute for me to open!


This is a treat from annette using Hey Valentine stampset with Happy Heart EF- love sneaking that treat out without damaging the package!
 These are cards from Lin which I love- everyone knows my weakness for bicycles- I can't pass up a great bicycle stamp espeically when they have sweet fillable baskets on them...

How blessed I am to so many wonderful friends!
Margery, Hermelinda, Jean, all your treats were eaten and well appreciated!

Tuesday, January 27, 2015

Lotus Blossom Thanks


I just got a package with some of my wish items from the Spring catalog- the berry basket and Crazy about you bundle. My butterfly dies are on back order but I just got so excited about my stuff I had to just sit and get a card done.  This is one I made as thank you for my customers who made a purchase this month.  The base card is whisper white.  I took a  1 1/2 inch strip of Calypso coral and ran it through the woodgrain embossing folder.  I used my new Hello You diecut thanks in Lost Lagoon.  I used the left over dryer sheets underneath the cardstock to get the chads out lickety split! Took a 1/4 inch DSP from Moonlight paper pack to an extra interest.  Stamped the Lotus - first Strawberry Slush, then Calypso Coral then lastly Pumpkin Pie.  I tried a bunch of different color combos before settling on this one.  The stem is also Lost Lagoon- stamped off the solid line before stamping then the mottled stem in full strength ink on top.  Used left over 1/2 inch strips of Lost Lagoon stamped with So Much from Crazy about You set  to complete the thanks in Blackberry Bliss to repeat the color from the DSP and a pretty simple mod looking card.  Love It!

Friday, December 26, 2014

christmans Gift for the men in the family

I had gotten some 11x17 white cardstock and had not used them at all. I wanted to make a card for my DH, Father in law and brother in law that had all the kids pics and a picture of all three of them that they could display on their shelf or something with a message from the kids so I thought a zig zag card would be great so I folded the paper into half so it was 8 1/2 x11 (on the folded side) and then cut it in half at 5 1/2 to make a regular A2 size but folded twice card.

I designed the front with a layer of Glimmer paper- the older silver version which is now between the current white and silver-  No matter what I use, they are all SO PRETTY!   I put down a piece of All is Calm DSP to fit behind the framelit piece, put a tiny piece of silver 1/8" ribbon before I attached a photoframe diecut with the On Film framelet.  I embossed the ornament on Shimmer CS using Silver EP and Versamark and used dimensionals to attached the ornament.  Very easy and classy looking cover to my card.
This is what the card will look on a desk with their little messages to the viewer.  Enjoy!
Lynda


Thursday, December 25, 2014

Merry Christmas!


 This is the Christmas pop-up box that I sent out this year.  I started with the box forms that I cut and scored during a trip. I made the tabs for the middle of the box and stamped the sentiment and colored it in during another trip with my new Blenderabilities that I had gotten.  I then stamped and punched all the trees and punched them out.  I knew I wanted to do a hanging ornament and I tried strings, ribbons then with diecuts and it was all too much and then I got the 25 Days set from the Holiday Catalog and at real size the ornament topper (day 11) was perfect size so I cut it and stamped it using versamark and embossed it using silver EP.  I used the Small scallop Stamping Trimmer rotary cutting blade to cut a strip of red glimmer paper and used 1/2 inch circle punch to punch out the ornament and voila!  2 inches by 1/2 inch strips of white glimmer paper to imitate box ribbons.  I was pulling my hair out putting snail individually until I realized how easy it was to use transfer adhesive sheets!  I used less than 2 sheets to adhere all the strips for 98 cards so bargain to boot.
 The thing that took the longest was trying to get a decent picture of the kids- I finally ended up having to bride them and the whole time Dylan was asking- why do you want me to hold this stupid red paper for? when I asked him to pose this way- he finally got it when he saw the card all assembled...  Cutting them out took a lot of watching of Masterpiece Mysteries then rewinding a lot because I couldn't pay attention and cut out the darn fingers on Tyler- Next time, keep the fingers together!

The backside has our only reasonable family picture I could find.  Notice the little red bag on my side- it was our cute little bag from convention!  It was the perfect little travel bag holding my phone, camera, ID a little money and the room key with a map! That bag  has gone everywhere.  Thank You Stampin' Up and
Happy Holidays Everyone!  Lynda

Tuesday, December 23, 2014

Christmas Cafe Gift bag

 One of the projects for December at my Tags, Bags, and Boxes class.  I took the Petite Cafe Gift Bags, stamped the snowflake and Very Merry from the December Wonder -Project Life set in red and Pear Pizazz onto whisper white and the bag as shown and punch out the sentiment and snowflake using the Circle and Artisan Label punch and mount on a strip of Under the Tree specialty DSP . Tie the Cherry Cobbler Bakers twine and tie a knot and leave ends uneven and long.  Take a strip of typeset paper- it's a little thinner so works beautifully - I think I used 2 high x 3 wide piece and used the Fringe scissors then used a swipe of snail across the top - rolled it around the end of the baker's twice and an easy peasy tassels. 

I wante to attach the whole thing to the bag then wrapped the twine but then it would have shut it closed.  so I taped a piece of doily across the top of the opening and stapled the banner onto the handle of the bag so that it would flip up to open- I hope it makes sense- anyhow- enjoy!

 Lynda


Saturday, December 20, 2014

Tags, Bags and boxes - Tags

My 'Tags, Bags, and Boxes' workshop usually has tags that I want people make however they want to have it- so I left out a bunch of DSP, punches and papers and make some samples for people to try.

These were some of my samples.  The Cherry Cobbler tag was stamped with Dotty Angles in versamark and embossed with White EP then Endless wishes on the white banner tag.  The Ornament tag was stamped with the ornament from Ornamental Pine in Soft Suede then used a 1 3/4 inch circle punch to punch out the circle part- put a 1 7/8 inch square piece of DSP behind it, stamped the sentiment and put another 2" piece of paper behind it.  You can also punch the other side using the template from the front piece to match the hole, stamp the hanging - dilly-bobber- not sure what the real name is- and sandwich the DSP to make a double sided ornament tag- too cool.

Season's Greeting is the easiest of them all but still so classic- snowflake in Soft Sky and Season's Greeting from Watercolor Winter Too set in Real red.  You know I bought the scalloped tag topper first and debated about the Angled tag topper but once I used it I was hooked.  Yeah, yeah, you can cut the angles your self and the hole in the center- but it is done perfectly everytime with just one push of the handle- How many ways can I tell you how much I love Stampin' Up punches? 
I had some leftover trees from my Christmas tree so I made some tags using the trees.  The star on top is from the Confetti Stars punch using the silver glimmer paper.  I believe Margery thought of that one and of course we all had to copy.

Make a bunch of tags for those holiday gifts- I always need more than I think so good to be prepared!


Lynda

Friday, November 21, 2014

Endless Wishes Holiday notecard


This was one of my make and takes this month using the notecards and envelopes.  It comes 20 to a pack with prescored and cut card with matching envelope for 5.95. No preparing needed- love it!

I was trying to put the washi tape on the bottom but could not get it straight at the bottom edge so I just put it down and folded over the edge which was just fine. 

Took All is Calm Specialty DSP 2 inch strips and punched just the tops of the Tree punch, flipping it back and forth to minimize paper wastage.  You need 3 pieces to make one tree.  Score each into half vertically and put tape on the side you want to hide and tape the sides together to make a 3d shape tree (it can fold flat for mailing)  Add a strip of Sahara Sand  for the trunk of the tree. 
Stamp the snowflake using Sahara Sand but stamp off first to get a more faint image then the "celebrate the" using full strength ink.  "Season" is stamped with Soft Sky.

Don't forget to decorate the envelope!

You can easily rip out a dozen of these in no time for your holiday needs...... Any holiday DSP with ink to match.

Enjoy,   Lynda