Thursday, August 27, 2015

Halloween Witch's hat kit and all the extras


 I saw the sample of this hat at convention and knew I wanted to use it to display during the holidays.  It's good size and really cute.  What surprised me when I got the kit was how easy it was to put together and how much extra supplies you got.
It came with everything you needed and I think it took less than an hour to put together.  I did not have the leaf stamp so I originally put it together plain which was still really cute after I sponged the leaf edges with soft suede ink.  But stamping with the leaf stamp does add an additional detail.   Love the bell at the tip.  The hardest part was crinkling the hat body to make the curve with the body of the hat. I think it's super Cute!
 The base has this subtle embossed spider web which is really great and it is really sturdy.
I did use all the fringe to make it full but only used one of each leaves and they give you three packs of each leaves in all the different colors.  I have so many leaves left over that I am planning a leaf banner.
I used cajon craze to stamp the leaves on the different diecut cardstocks or soft suede depending on the cardstock color.
This is one of the cards I made using the extra supplies.  The bats and spider web was stamped n black on Old Olive cardstock. The diecuts are already cut so nothing else to do. Spiderweb doily was left over too as was the 31.  I did stamp the raven on a different cardstock left over and embossed it in black embossing powder and used dimensionals to make it pop although I did not cut out the claws of the feet.
I probably have enough supplies to make another 10 more cards at least.  What a deal!

Sunday, July 26, 2015

Inspire. Create. Share. Convention 2015 highlights

 Margery and I had the chance to go to convention this year with Mercedes and Jim Weber (StampinStud to you all) and it was a lot of fun.  Thought I would share some of my favorite pictures with you all.  I loved these big giant flowers that they used to decorate the stage and the little photo booths they set up. With the Christmas lights in the branches they were so pretty. 

Check out the felted bags we got  for attending- very gender neutral messenger bag like for both men and women.

 One of the banners shown on Main Stage using the foil doilies.
 This was absolutely gorgeous in person - I had been debating getting the Leaflet Framelit but after seeing this wreath I am committed to it.  It was a bit of unexpected color  combination but really beautiful.  The cones were little balls of styrofoam covered with paper.
After Awards night the party was themed  the Roaring 20's and it was a spectacle to behold with all the costumes and cars.
 My kids would have loved the mounds and mounds of cakepops that was flowing over all the tables at the party.
 The samples on the Main Stage after the Holiday Catalogue reveal were super cute!  Love the BOO! on this sweet little bag.
 There were walls set up to put up your swap and I took some pics of some of my favorites- I did not pick it off to take pictures of the names of the creators but know that we loved them!

Is this not the sweetest punch art ever?  Love the use of the oval punches and heart punch for the vellum wings!
 This gorgeous sample from the main stage uses my favorite accessory from the Idea Book the Expressions Natural Elements.  It just adds so much to any card for oh so little.  What did I say about the Leaflet Framelit?  Gotta have it now after seeing this!
Surprise was that the base cardstock for the left oak leaf was pool party - see the little blue peeking through?
 Such a fun idea for the Sprinkles of Life set.  Love the fold, the little tabs of color below the center square and the splotches of spilled ice cream using Gorgeous Grunge.  What a humorous card!
 Another fun punch art card.  I think Dylan will really love this Doggie card for his birthday.  What a clever use of the Oval punches again.
 This one I took for my nurse Mary Lou- her granddaughter loves Frozen and I had to take a picture of this in case I wanted to case it for a card to use for her.
 Love the Bokeh effect on this and the jellyfish floating by. This is another set that I had been debating about but I really loved the samples I saw using this set.  So creative. I always need masculine cards and this just fits that bill.  Just floating by to say hi!
 Really pretty red door for the holidays- the Red Glimmer Paper makes the ribbon and the ornaments just POP!
 A sample from the product playground using the Oh so Cool Spider Web Doily!  Comes 24 for $4.50.  So so cool looking!  See how they covered the clothes pin with the Washi?
 Oh, Yes! Yes! Yes! ( imagine Meg Ryan in that orgasm scene in "When Harry Met Sally")   How long have I waited for SU to come up with a window die? with a matching Happy Scenes stampset to boot?  Have I died and gone to heaven?  It's just perfect!  They got a fireplace stampset and diecut to match as well- I had thought of that as my holiday card and now I have SU products to make it happen.  Doing my Happy Dance now.
 Well, you have to love it that this is a flower made with a punch.  When I have a lot to cut, love the ease of a punch.  The stampset that makes the leaf pattern is great and I want to use it make the leaves for the basket card I was making with the strawberries from Market fresh. It neededs some leaves but I could not find a current leaf that suit.  I think this will fit the bill.

And check out that music paper DSP.  I want a whole pack of just that and the Woodgrain too, by the way, Stampin' Up if you are listening!

And what about the Pillow Box framelit?  Perfect size!  I have other dies and tools to make longish ones but love the square shape.  Can't wait to get my hands on that one.

 And the Perfect Pines Framelits? how many times can I say Cool?  Does that date me?  Three different sizes and little dies for a pot and the ornaments and star....
and the new Christmas Greetings Thinlits and the Seasonal Frame Thinlits - perfect size fonts and the holes in the letters are cut out (did you hear that Makani?)    Put these tags on a card and it would be a darling holiday card.

 Now these cards were a suprise how cute they were- couldn't see that they were so sparkly and cute in the catalog but in person, they were super sparkly and pretty.  Definitely a kit to try- although the crooked line on the ornament holder sstamp bothers my OCD.  The silhouette stamp on the To You & Yours Too set would be super cute inside the Sparkly Season snowglobe, eh?

 We had some time the last morning to walk in the gardens of the Mormon Temple. They were so beautifully kept.
We were all wondering what we would do with the horn stamp from Wonderland and they showed several sample and I could not help but take a picture to share with you- It cracked me up!

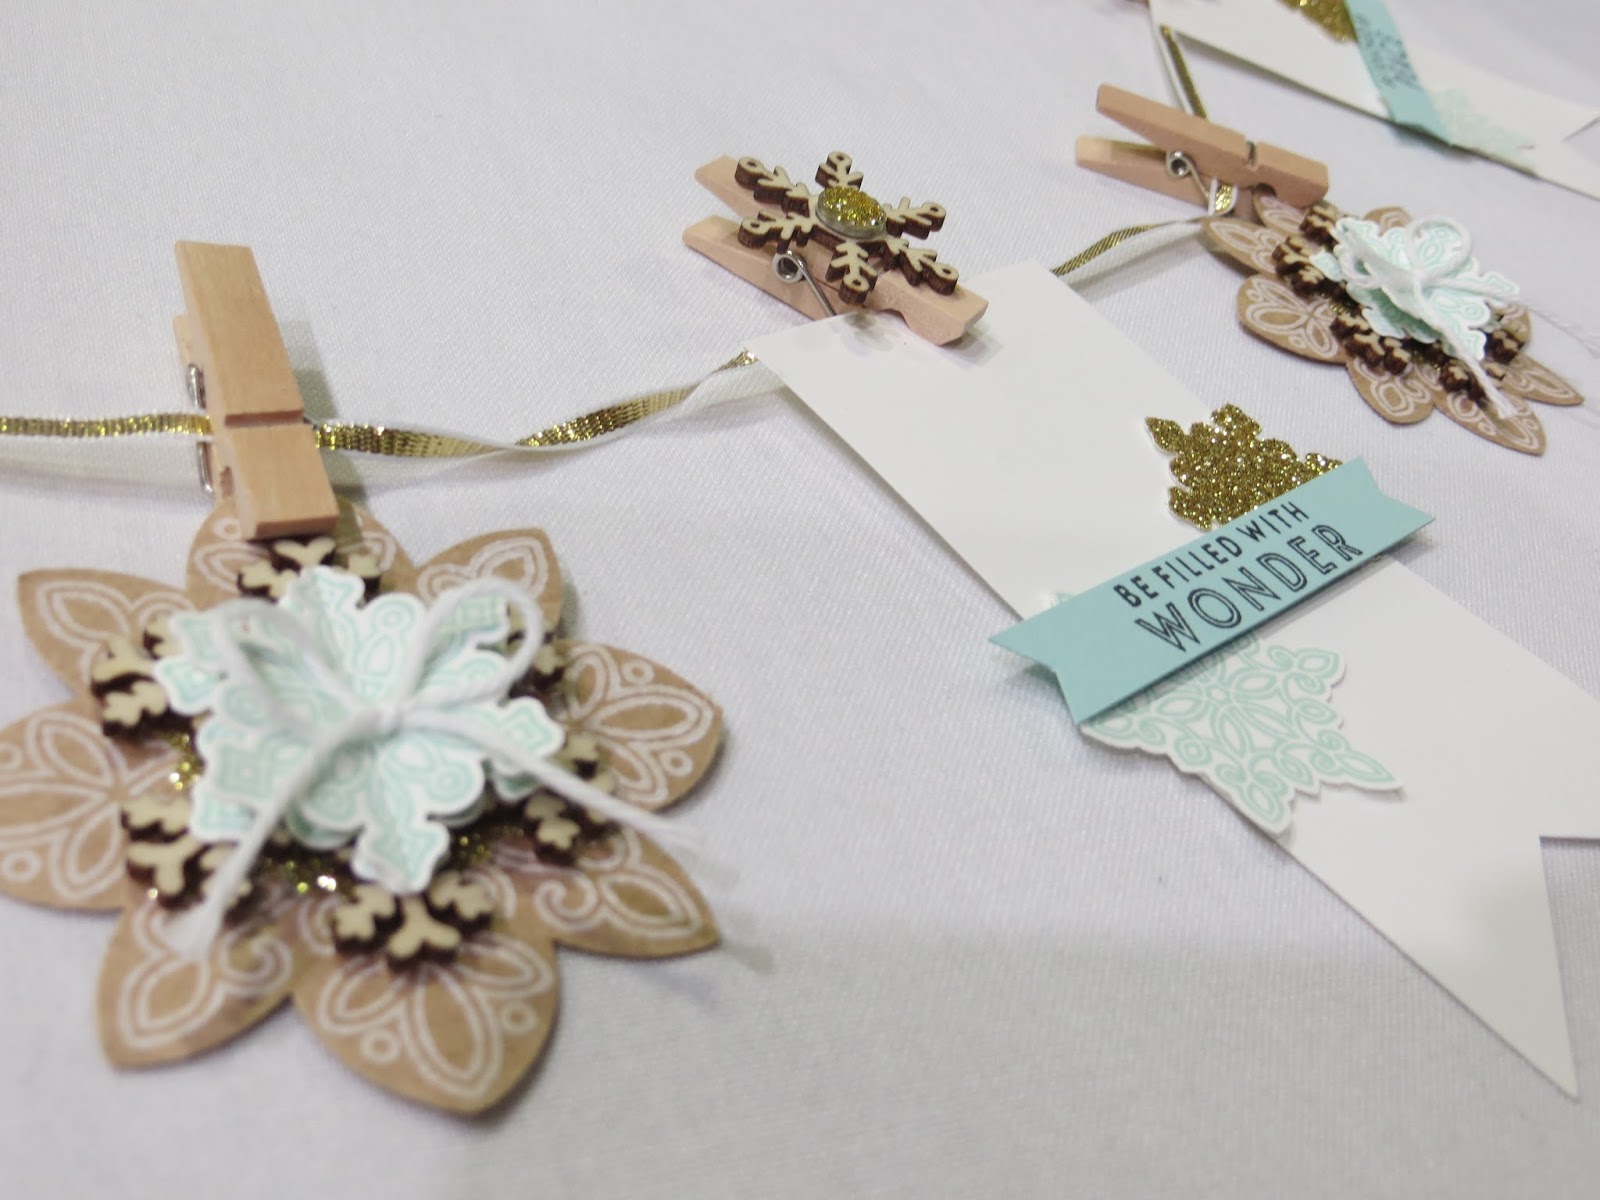
and this is the sample banner that our own Sharon Tong- Robinson won from Pam Morgan using the Flurry of Wishes set that Margery won as a giveaway.  The snowflake wooden elements add so much texture.  Gorgeous in person.

Hope you enjoyed this little slice of our convention fun!    Lynda


Saturday, June 27, 2015

Birthday card for Max

 Kyle was invited to one of his classmate's birthday party and this is the popup card I made for the occasion.  They don't seem to want presents at their age- they all seem to be asking for money and this has a pocket in the back that hold it just perfect.

Balloon Framelits fit the sentiments perfectly
I had stickers, rub-ons and acrylic embellishments (non-SU) to decorate the box and it was a sweet little card that popped up to say Happy Birthday to a little boy- the size was not normal A2 so I had to make the envelope using the envelope maker to fit the off size card- Gotta love the envelope maker!
 What did we do before this little gizmo?  In matching DSP to boot.

Wednesday, May 27, 2015

Sheltering tree with heat embossed bicylcle frame


I just love how the bicycle frame just POPs with its bold colors on top of the tree trunk.  I had planned on doing it with Pool Party EP but it retired so I used Cherry Cobbler EP instead and I love it!

The base card is Blushing Bride with Pear Pizazz on top.  Stamp the tree from Sheltering Tree with Early Expresso.  Then ink Blushing Bride for the leaves then "rock and roll" it using Cherry Cobbler to accent the edge of the leaves.  I then used the little dots to add extra pear pizazz leaves randomly.   I then stamped the grass then the bicycle with Memento black because it dries quick.. I then tapped the embossing buddy to make sure the card was dry then inked the bicycle frame with versamark then heat embossed it using Cherry Cobbler embossing powder which just makes it a stand out.  If it had an accessory stamp for a little tiny basket in the front with options for books, flowers or bottle of wine and bread, it would have been a perfect set! I just love bicycle stamps and have been known to buy every one I find and this one especially is so sweet with the tree.....
Maybe they will make a Sheltering Tree accessories set with a bicycle built for 2,  baskets like I said, a park bench to put under the tree and a little sled to lean against the tree in the dead of winter.... I could just go on and on!

Monday, May 25, 2015

Rock and Roll'ed Painted Petals

This was a reasonably quick card we had for the May Stampin' party.  Basecard is Rose Red embossed with woodgrain EF.   I then layered a strip of  Painted Blooms DSP - scored 1/4 inch in and folded over to show the other side and used multimono adhesive  in a fine line and attached the venetian lace.  Wild Wasabi CS distressed around the edges with my nails, and the center panel was stamped with the sentiment first in Rose Red, then added the leaves in Wild Wasabi and then used the stamp positioner to stamp the flowers but  inked first with Daffodil Delight then used Rose Red around the edge of the stamp in the Rock and Roll technique to get the dual color look.  Distress the edges - I think the more the better- then layer over the Wild Wasabi piece and it was the easy card of the evening.

Lynda

Saturday, May 23, 2015

Tap, tap, tap

 I was surprised to find this stampset that I really adore make it into the next catalog and when I needed a card for my May workshop it was perfect.    I unfortunately did not have a new DSP that fit my card design so I used the Moonlight DSP which I am hoarding - I love it's color combo- a gender neutral/ slightly masculine pack perfect for this type of card. 
 The base card is Sahara Sand ( my new neutral favorite!). with a 1 inch strip of Typeset DSP and a 1/4 inch strip of Blackberry bliss. Piece of Shimmer paper was used to stamp the typewriter in Memento Black.  Then made a mask to cover the typewriter then stamped the notepaper stamp in Sahara Sand.
Then used Lost Lagoon ink to watercolor in and Hello Honey marker to add some accent.  The banner was stamped in Memento and sentiment stamped with same ink.  I used the banner die to cut out the Note banner and the piece of DSP .  The banner is cut at the top to make it fit and then I used the stapler to attach the note banner.  But after all that it still looked unfinished.  It just needed a little something.  I got the metal buttons.  I used one the letters in the long stamp to see if I can make an alphabet typekey but it was the wrong size and how could I make the card fit everyone's needs?

Well, the answer was to try the Hi sentiment.  The one on the right used 1/2 inch punch and put on a big button.  Because I had too many people in my class of the amount of buttons I had so I tried and alternate button - the circle is the larger eye circle in the owl punch but inside the smaller button with the raise lip and I think I like it even better- it really looks like one of those old fashioned type keys.  Use glue dot to adhere it - works the best.
Just change the message to Happy Father's day and it would be perfect for that too.......

Enjoy.
Lynda

Thursday, May 21, 2015

Beautiful Bunch Gift certificate Holders


With MDS retiring, I wanted to make sure I download all my digital purchases from the website before it disappears and it was a good opportunity to upgrade the look of my gift certificates.

I love the ease of MDS and am sad to have it go away but have to admit I did not buy as much of the digital downloads as I did the stampsets and paper supplies.

I get 4 gift certificates out of one sheet of 8 1/2x11 sheet and use my hoards of DSP from the past to make the trifold envelopes.  Use the envelope maker to make the perfect center indent on the inside, round the corners in the front and use the same DSP backwards to make the belly band.  The Beautiful Bunch flower is stamped in Smoky Slate 3 times for each flower and then onto the DSP to punch out the center then an extra large pearl in the center (retired)- each layer is separated by dimensionals and 2 leaves are added using coordinated DSP.  My favorite way of making long envelopes.....

Enjoy,
Lynda

Tuesday, May 19, 2015

A little flower box topper

 I got the Bouquet Bigshot die when I saw the bouquet on the occasion catalog cover but the largest flower in the set was really huge - a bit too big to use for the projects I had in mind but the rest of the die was really quite useable and I wanted an easy way for people to make the flower so this is how I set it up for my workshop.

Each person got a sheet of whisper white CS.
They are cut longways into 2 1/8x 11 inch pieces as shown on the left.
 I stacked 2 of the pieces and cut them 1 1/4 inch piece rectangles as shown.
The other two strips are cut into 1 3/4 inch pieces.  I used 8 of each on my flower but this will make lots more for people to play with or make fuller flowers.

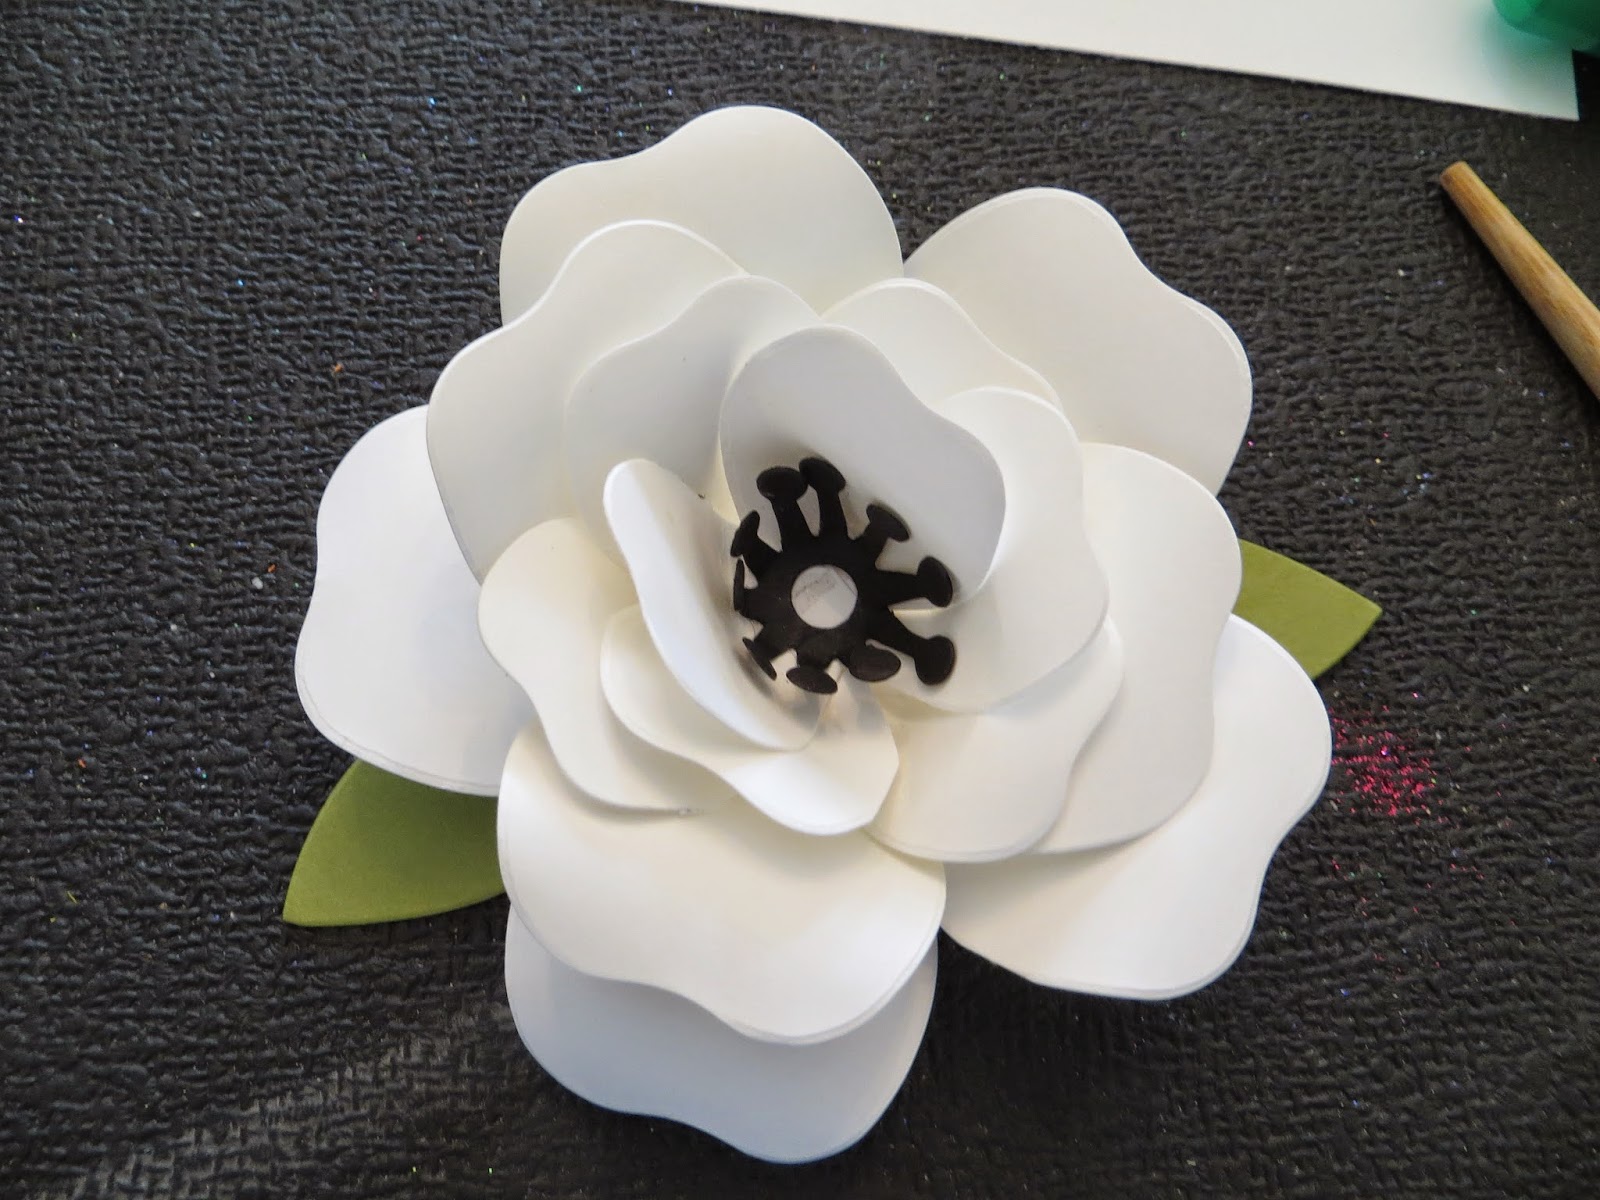
You can put a stack of 4 larger rectangle over the bigger flower and 4 thinner rectangles over the smaller petal as shown. Then you only have the run it twice to make all 16 petals. Really speedy.  Then run the black for the stamen and the Old Olive for the petals.

 Here are all the ingredients to make one flower.
8 Big petals, 8 smaller petals, 2 green leaves, a black center.  I used one 1 1/2 inch circle as the base to build the flower and a daffodil delight 1/2 inch circle (the clear faceted button shows what is underneath and the daffodil circle helps it look better)
 The outside petals are folded over but less severely than the ones that go in the center.
 Use a chopstick or some rounded stick to curl the petal edges.  This step is crucial to make it look a little more realistic.
 Use the circle to tape down the 5 petals as shown.
 I then added the 3 left over petals in the center as shown.
 Then the smaller petals are placed, 3 petals per layer in 2 more layers. 
Then I put the 2 left over petals in the center- you could put 3 which may make it easier then add the center stamen.


This is how it looks from the back.  I initially made it without the base and it was all wonky after it was made - with the base it is more sturdy and easier to attach to the box anyway.
These are the flowers I made with 2 different size faceted buttons- both really pretty!  Enjoy and try it yourself.  You can make the box with the boxmaker from Stampin' Up in different color for a more masculine look, texture the box, or stamp on the box  to make it your own. 
Lynda