Friday, January 27, 2017

Easter Basket bunch


 This set is so adorable, I can't stand it.  The base is whisper white with Daffodil Delight embossed wtih Sparkle EF.  Add a layer of whisper white stamped with sentiment on the bottom and grass in Mint Macaron above the polkda dot DSP.  Diecut the solid and decorative basket with Sahara Sand- layer the solid basket behind the perforated one and add the handle behind it.  Layer the eggs as shown - use some with dimensionals, add the peep and the bunny stamped in chocolate chip.  I used the white gel pen to make white of the eye which makes a big difference.  Added some extra eggs and flowers, colored in with Soft Sky, pink pirouette, daffodil delight and Peekaboo peach to create that soft pallette.  Hoping to make someone happy for Easter.....

Tuesday, January 24, 2017

Sealed with Love Card by Consensus


This was one of my projects for January Stampin' with Lynda - the funny thing is that I am usually so crazy busy that although I have four projects for the evening, I am usually working on the last one at the last minute.  I had this one in mind but something just wasn't right with it.  The base cared was really red with the vellum diecut with the heart border on the right.  I added the rhinestones on the white vellum between the hearts and that helped.  Stamped the sentiment in real red and added it in the center.  Diecut the pirouette pink hearts and crumbcake heart with stripes and gold foil heart but still something not right.  Hermelinda suggested the gold foil strip on the left and the big heart from the Sunshine wishes and that really made the card feel "right".    In cooking "too many cooks can spoil the broth" but in stamping- the more the merrier!
Thanks for visiting!

Sunday, January 22, 2017

Cool Treats Sundae with sprinkles

 I just absolutely adore this set- the DSP is so sweet and the dies are just the right size and so sweet.  The base is Soft Sky with a layer of Watermelon Wonder then another layer of Soft Sky.
cut a piece of DSP and put it across the bottom with little room on the bottom for the sentiment.

Diecut a stitched circle die and then diecut the bowl and the spoon with Silver Foil Sheet. I used the scoring tool to free hand the lines for the bowl.  Diecut vanilla, pink pirouette and Pool party ice creams and chocolate chip for chocolate syrup on top.  Diecut the cherry with the watermelon wonder and used chocolate chip marker to color the stems.
The little sprinkle die does come with the set but I was using the basket die from the Basket bunch since they have multiple pieces that you can cut at one time- so convenient that they are identical....
I made a pool of Tombow multipurpose glue and used a tweezer to touch the back of each sprinkle to the glue and voila, an easy birthday card.
I did use dimensionals for the scoops.
Enjoy!

Saturday, January 21, 2017

Taco truck birthday


With all the food truck movement going on I just wanted this Tasty Trucks set from Stampin' Up's Sale-A-Bration as soon as I saw it.  And the cute little stack of pancakes, hotdog and taco, who could resist it?   I had also gottne the Glamper Greetings and the proportions are just perfect for you to use in crossover which just adds to its versatility.  Base card is Watermelon wonder stamped with banners from Any Occasion, another Sale-A-Bration set in versamark to add a subtle background.
Add a doily and a stitched circle and 2 little banners, the bottom one is a washi tape over whisper white and a piece of DSP.  Stamp the truck in white and color in shown.  There is some glitter on the cupcakes and there is a rhinestone on the headlight and on the end of the banners...  So Cute!

Wednesday, January 11, 2017

Vertical versions of the Cool Treats Birthday card

I needed more birthday cards and I kept playing and this is one of the cards using the same idea as the one from 2 days ago but with rhinestones on the cones. to add some sparkle.
This is a version with banners for my friend Annette.  I just strung the gold cord from the cone and hung little banners stamped with her name  using the Labeler Alphabet  and it makes it special for that one person that you are thinking about!

Tuesday, January 10, 2017

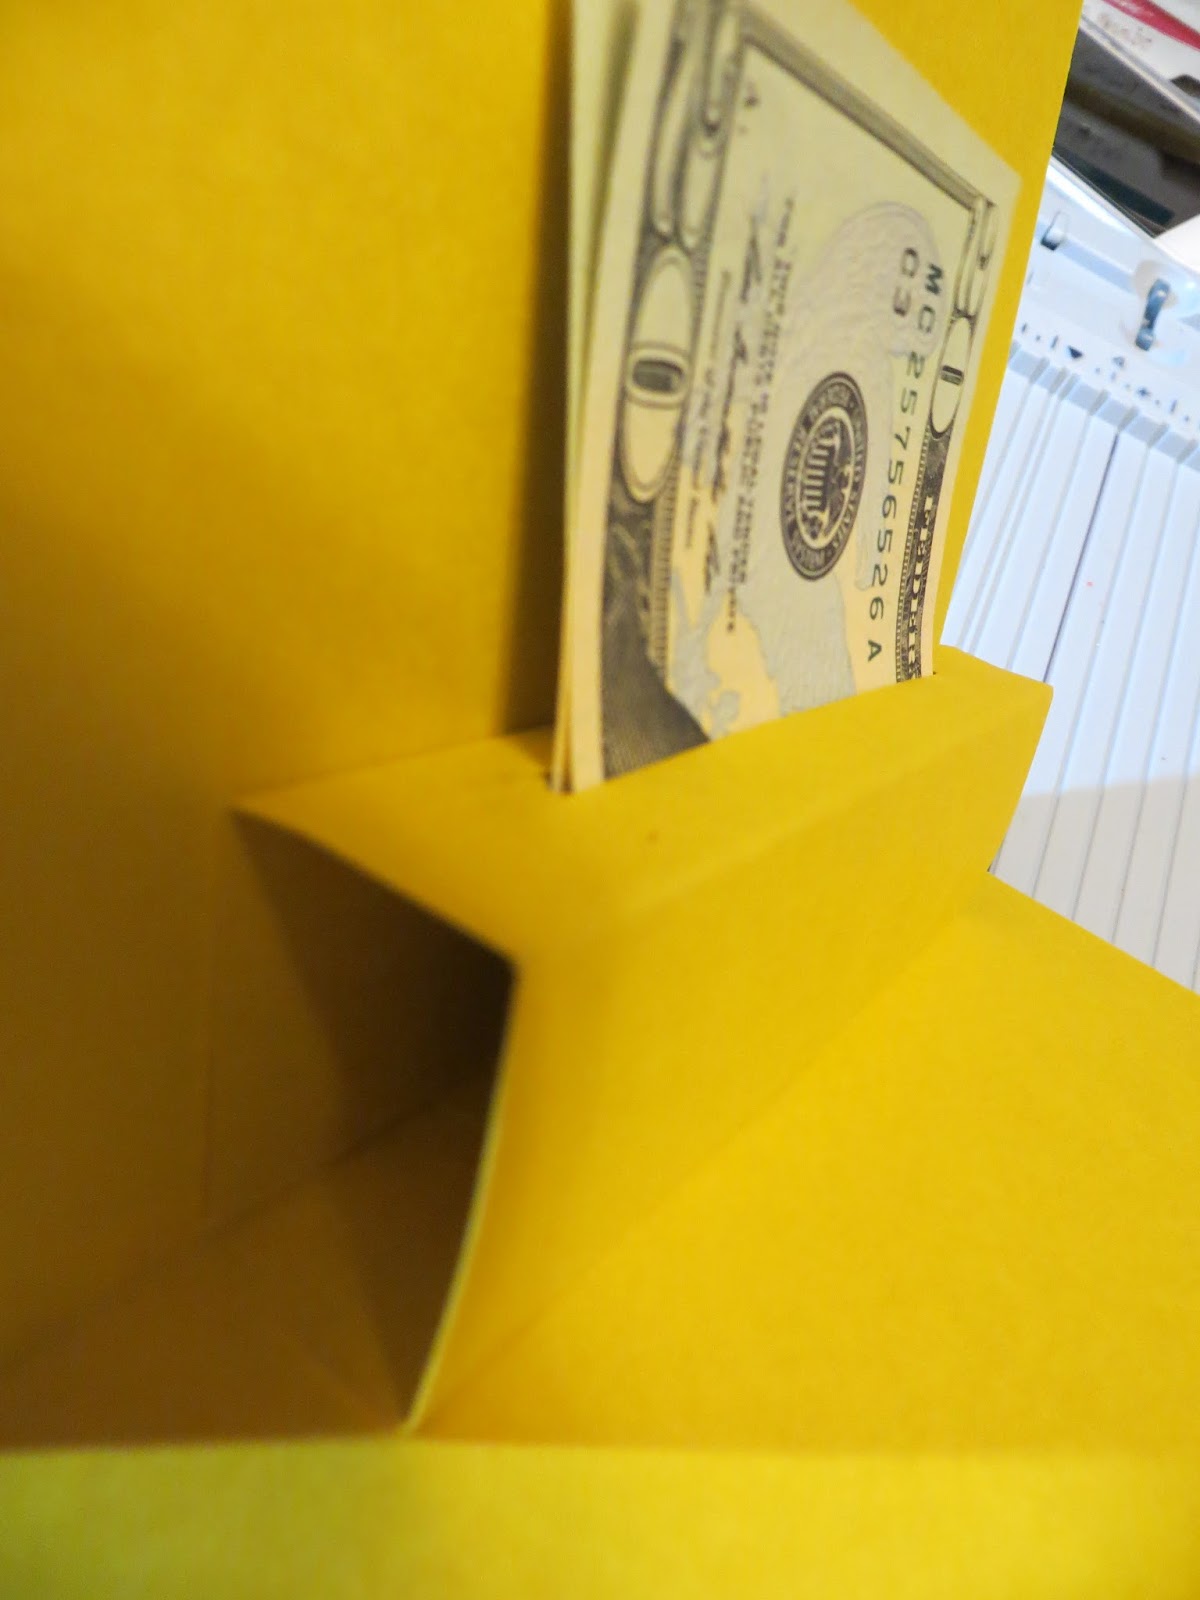
Pop up Money Slot how to Using Balloon Popup Thinlit


 This is the inside of the card I posted yesterday.
YOu can make any pop up by making a rectagular tube.  The left shows you how.  I made this one 4x41/2 inches but you could make it shorter or taller depending on what you want.  I scored it at 1 1/4, 2 1/4, and 3 1/2.  When you put glue on the top and bottom panel in the front and put it in the fold of your card, it makes an automatic popup like this.
I love the little slit or balloon stem die from Stampin' Up's Balloon Popup Thinlits  (Occasion catalog)  because it makes the perfect little slit for money or a check.

Have fun with it.
Lynda

Monday, January 9, 2017

Cool Treats Birthday for a special little friend

Is this not a fun card?
Base is Crushed curry with a piece of whisper white that has some holes punched that showed the Crushed Curry color through.  The dots are made by Nuvo Crystal Drops that I got from Cranberry Hill, my local craft store in Sunyvale and they are super fun and quick easy way to add a pop of color and dimension.  They dry like glass and just a festive note.  I will probably use it for all my birthday cards.  Silver glimmer diecut happy from Avery-Elle and banner using Stampin' Up banner punch- (retired) with Cherry on Top DSP.   Cone and Ice Cream from Stampin' Up Cool Treats- my favorite stampset and die from the new Occasions Catalog and "belated" sentiment from Sweet Cupcake set

Wednesday, December 28, 2016

Easy Birthday Blast stamped twice card

As soon as I saw this set I knew I wanted to add it to my birthday stack.  It is truly a blast and I love the matching die for a purpose I will show you.  Base card is Bermuda Bay with a layer of whisper white stamped with the birthday blast twice- once on top and turn around and stamped on bottom in Pool Party.  Stamped the Celebrate you in Bermuda Bay on Vellum, layered it on another strip of whisper white then a layer of Silver Glilmmer paper.  The stars are left over from the matching diecut I used.  It is very sparkly and elegantly simple- although hard to see the real sparkle from the photo.  Easy peasy birthday card - and who couldn't use one of those,eh?

Monday, December 26, 2016

Thank you cards from the kids

Trying to get the kids to write thank you cards is worse than pulling teeth-  I made these simple cards for them to write.  The dog was an undefined stamp I made using Dylan's drawing- the thank you on top is retired SU- the bottom thank you is from teeny tiny wishes with an image from PTI. The pig is from some Japanese company years ago- I am not sure as there was no label on the stamp and oink oink is handwritten with message inside that says- that means Thank You.  Really simple cards- using the thick Whisper white CS makes for great single layer cards.

Saturday, December 24, 2016

small giftcard snowman 4 panel twist and pop

There has been a lot of cards with twist and pop 4 panel cards that have been really cute- I did one for my workshop and everyone seemed to really like it. I did want to make a smaller version for a giftcard popup so I engineered it using the dimensions of the giftcard.
you can get 3 cards out of one sheet of 8 1/2 x 11 CS.- This is the inside of the finished card on the right. If you open and close the card really fast, he looks like he is clapping!

I have made this card with many different sizes but the basics of the mechanism is the same.

The base of this card is 11x smidgen more than 2 8/10  inches (1/3 of the 8 1/2) folded at 5 1/2 inch on the 11 inch side. (Long ways)

The pieces for decoration are as shown on the left. You need 1 piece 3/4" x smidgen more than 2 8/10 inches or so(width of card) 2 black buttons (this was a button punch but you could just use a 3/4 inch circle punch.  I took a 1 1/2 inch strip of tangerine CS and cut them by hand into long triangles to make a bunch of noses.  The big white curved white piece was for guideline for drawing the head of the snowman in the corner under the hat with a black marker.      The hat was made using black and red glimmer paper.  The base was 3/10 inch strips, the banc was 1/2 inch strips and the main hat was 1 1/2 inch tall.   I cut the piece twice as wide and cut it in diagonal to get 2 pieces. Make sure you cut the diagonal on the proper side, otherwise it will not fit (the glimmer paper is not double sided to be able to flip it).  The holly on the hat was a pack of pre-made stickers from Michael's.
This is the mechanism for the gift card popup.  I also sized this so that you will get the most out of a 8 1/2x 11 sheet of paper.  cut it by half  into 5 1/2 x 8 1/2 inch piece then slice them into pieces a little bit smaller than 1 3/4 inches.  Score in half longways and at 1 7/8 from each corner make a pencil mark and make a diagonal scoreline. It should cross in the center.  The is the mechanism part.   I used a black sharpie to mark up one of my score boards so I can do this easily.  see below.


You fold the mechanism like this and put sticky tape on the triangular part on top and bottom and this gets put into the fold of the card as shown.  I eyeball it but lot of people like to measure it which is fine.
When you open it it should look like this.
Take the other strip 5 1/2 x 1 3/4 and score at 7/8, 2 3/4 and 4 5/8 inches as shown.
put the center of the piece on top of the center of the mechanism piece.
You need to put tape or glue onto the opposite corners- either left bottom and right top or left top and right bottom.  It will twist differently depending on how the glue/tape if put but it does not matter.

Then open the the piece to adhere the 2 corners as shown.


I added red gloves (hand cut from 2x2 piece of red carstock to fit) and glued it as shown to the 2 outer rectangle corners.
Pop the center out and you have the twist and pop card.

I attached money by putting on a little bit of tombow tape onto the wrist area of the gloves while it was flat and the money folds into the popup.  It was a fun way of giving money for Christmas.
 This is how you mount the gift card- use 2 pieces of tape - scotch or packing works fine and fold them in half, place the first tape with the fold on the left of the center mountain fold and the second tape on the right of the mountain fold as shown on the right.


When you put the card on the tape it floats like this and looks like the snowman is holding it out.
If you want to give cash you put two tiny strip of Tombow monoadhesive on the base of the red mittens as shown- it is not terribly sticky and money can be easily taken off.
When you adhere the money- nice crisp ones would be nice- it folds up like this
It twists and fold flat inside the card so it does not show.
 I made little pockets that holds the cards- they are a little too fat to mail-
I took some DSP 6 1/2 x 5 1/2  - you can get 4 sheets out of a 12x12 paper if you cut it carefully - score it at 3 inches and at 6 inches along the 6 1/2 side and 1/2 inch along the 5 1/2 side.-cut out the corner and one of the 1/2 inch tabs as shown on the right and then punch the top with the envelope punch to make a little groove to complete the package.
Enjoy!