Sunday, May 27, 2018

Truly Tailored Graduation Easel Card

 I love popup cards.  For some young men in my life who are graduating I wanted to make them a special graduation card and what better for that than the Truly Tailored Suite?

 Take a 4 1/4 x 11 inch cardstock and score it at 2 3/4" and 5 1/2" as shown.
I made a template out of a piece of chipboard that comes with our DSP to make the collar.  Use it to cut out the sides on the 2 3/4 side of the base card as shown.
I used the same template but this time on a 4 1/4x 5 1/2 inch whisper white CS and just but the shoulder part- leaving the vertical lines without cutting as shown on the left.
Fold the cut pieces in as shown on the left into a V to create the collar.  I took a 3/8 inch strip and glued it down for the front.  I used small gluedots on the corners of the collar to secure it.  You can flatten the collar if you are mailing it or keep it sort of  rounded it you are hand delivering.
 Put the Tombow glue on the base card as shown to adhere the shirt on the top only to create the easel.

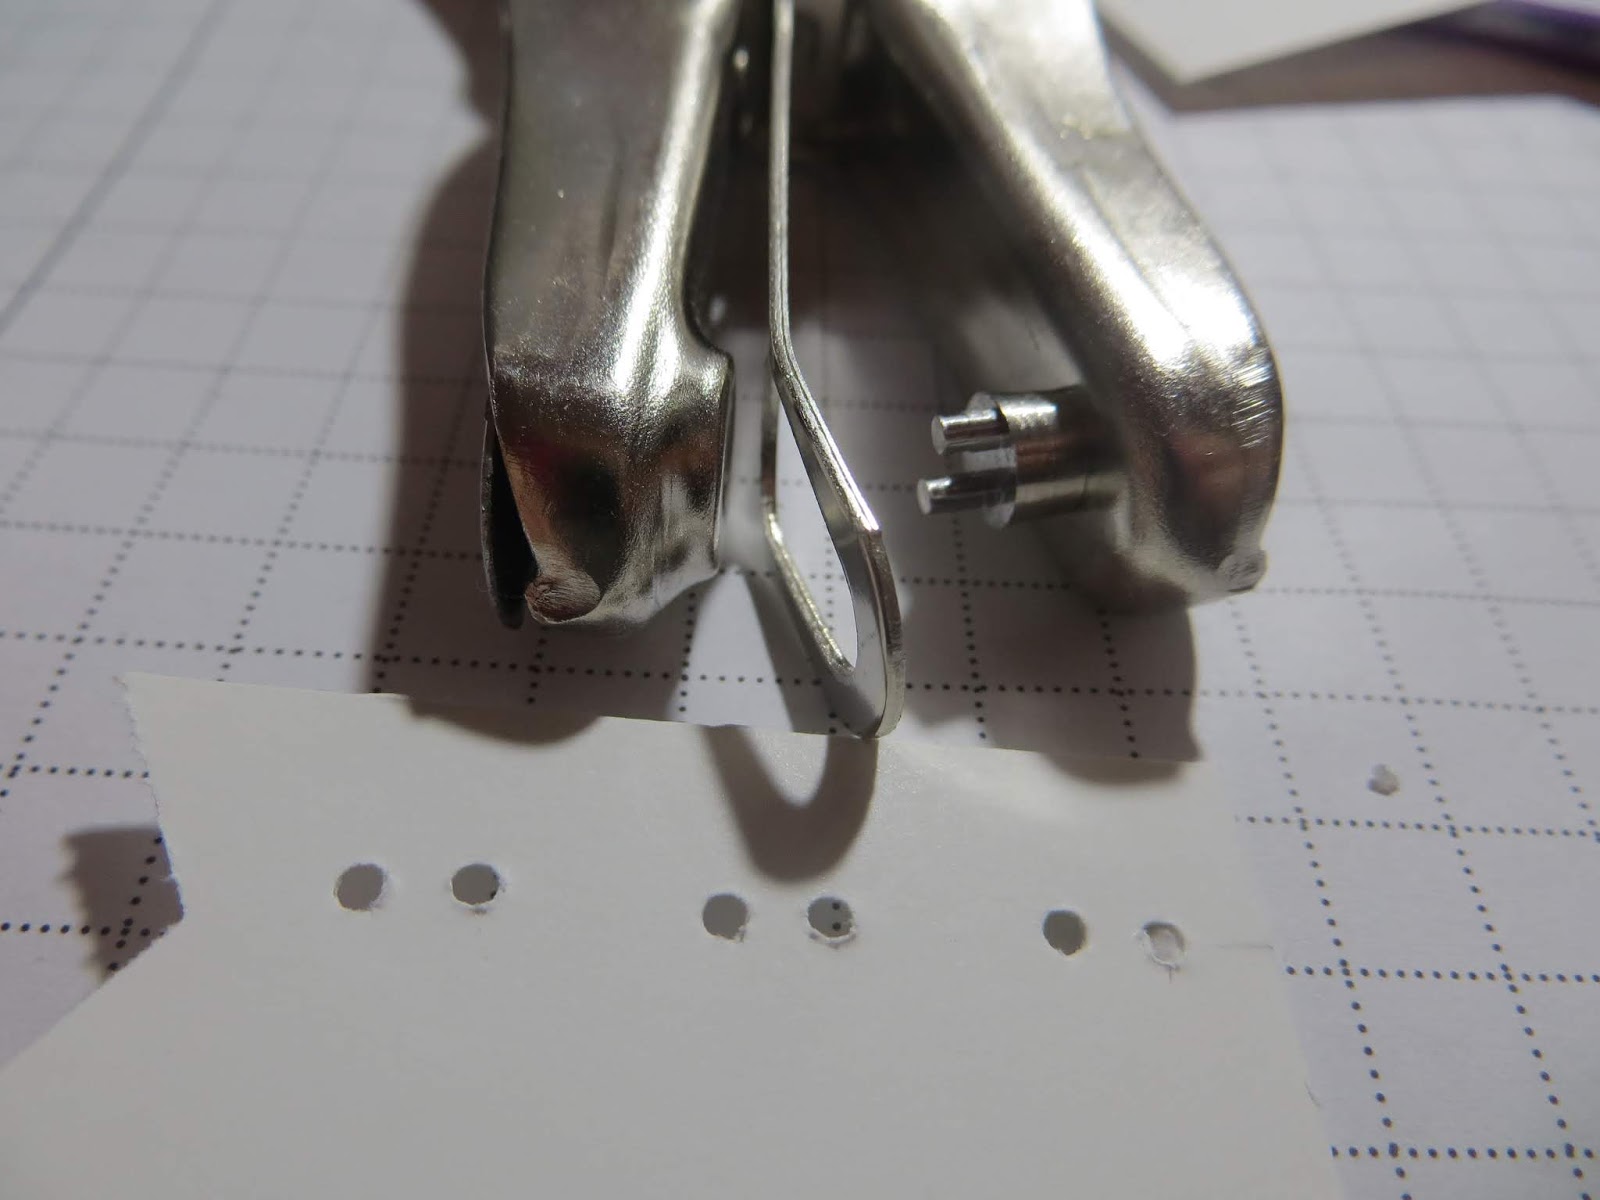
I did not have enough matching small buttons so I made them using an old punch that has 2 holes in it and then punched it out with a 5/16 inch circle punch.  Put it on the shirt with the mini stampin dimensionals- the perfect size!
The pocket is just a 1" strip of whisper white CS that I fed through the Tailored Tag punch to create the angle on the bottom. The Old hexagon punch will work too.
 You can use scraps of triagular piece of True Gentleman DSP to make the pocket squares as shown.  I took a rectangular piece of scrap, cut it diagonally and layered it side by side to make it look like this.
Stamp the sentiment from Truly Tailored set in Night of Navy and punch it out. Layer it with a piece of Basic Gray CS then again mount it with dimensional.  Put a piece of DSP on the bottom of the basecard on the inside as shown, mount the sentiment and you are good to go.
 I needed graduation cards so I used the congratulations from Stampin Up retired eons ago and the graduate is from another company.  But you could make it a promotion card, birthday card - it fits all occasions depending on what you say on the inside piece.

Tuesday, May 22, 2018

Charming Cafe triple fold


   I  can't believe that this set came out and did not make it into the new catalog.  I know - I know-  how pricey it was but I had to have it before it disappeared.  I love the sweetness of the image and the ease of the diecuts.
I took a 12x12 sheet of whisper white cs and cut it down to 5 1/2 inches and scored it at 4 and 8 inches to make a triple fold.   Start from the front of the card, stamp the image, diecut.  The front sentiment from Petal Palette.  I  like to use the Stamparatus for the next part.  Put the stamp where you want the next image and then let the lid stick to the stamp, then open the card and stamp.  then same thing with the next layer. The sentiment is from  Picture Perfect Birthday.  I stuck the card on a quarter sheet of tempting turquoise to make it out to A2 size  4 1/4 x 5 1/2 but also because the blender pen went through to the back and I wanted a nice and neat back of the card.


Tuesday, March 27, 2018

Paper Pumpkin 2018 February


I just love this kit-  I have been playing with the kit and the flower pieces that are supposed to be used on the envelope are so pretty I had to use it on the card.  Then the pieces that are left over from the letter I had to use in another card. So much fun. The card above had a layer of pink pirouette CS added.

 This one used the negative from the words

 I would love a whole sheet of these stickers to buy separate.
 The daisies were popped up to add more dimension.


 The is the celebrate card that I layered over a whisper CS embossed with Layered Leaves embossing folder.  It just seemed too plain without it.


 Since I had some pieces left over I wanted to use it to make some cards for birthdays- this is using the Star Blast Edgelit die ( SU retired) and silver glimmer paper behind the diecut for that sparkle and some clear rhinestone jewels for a little more masculine feel.


Friday, March 23, 2018

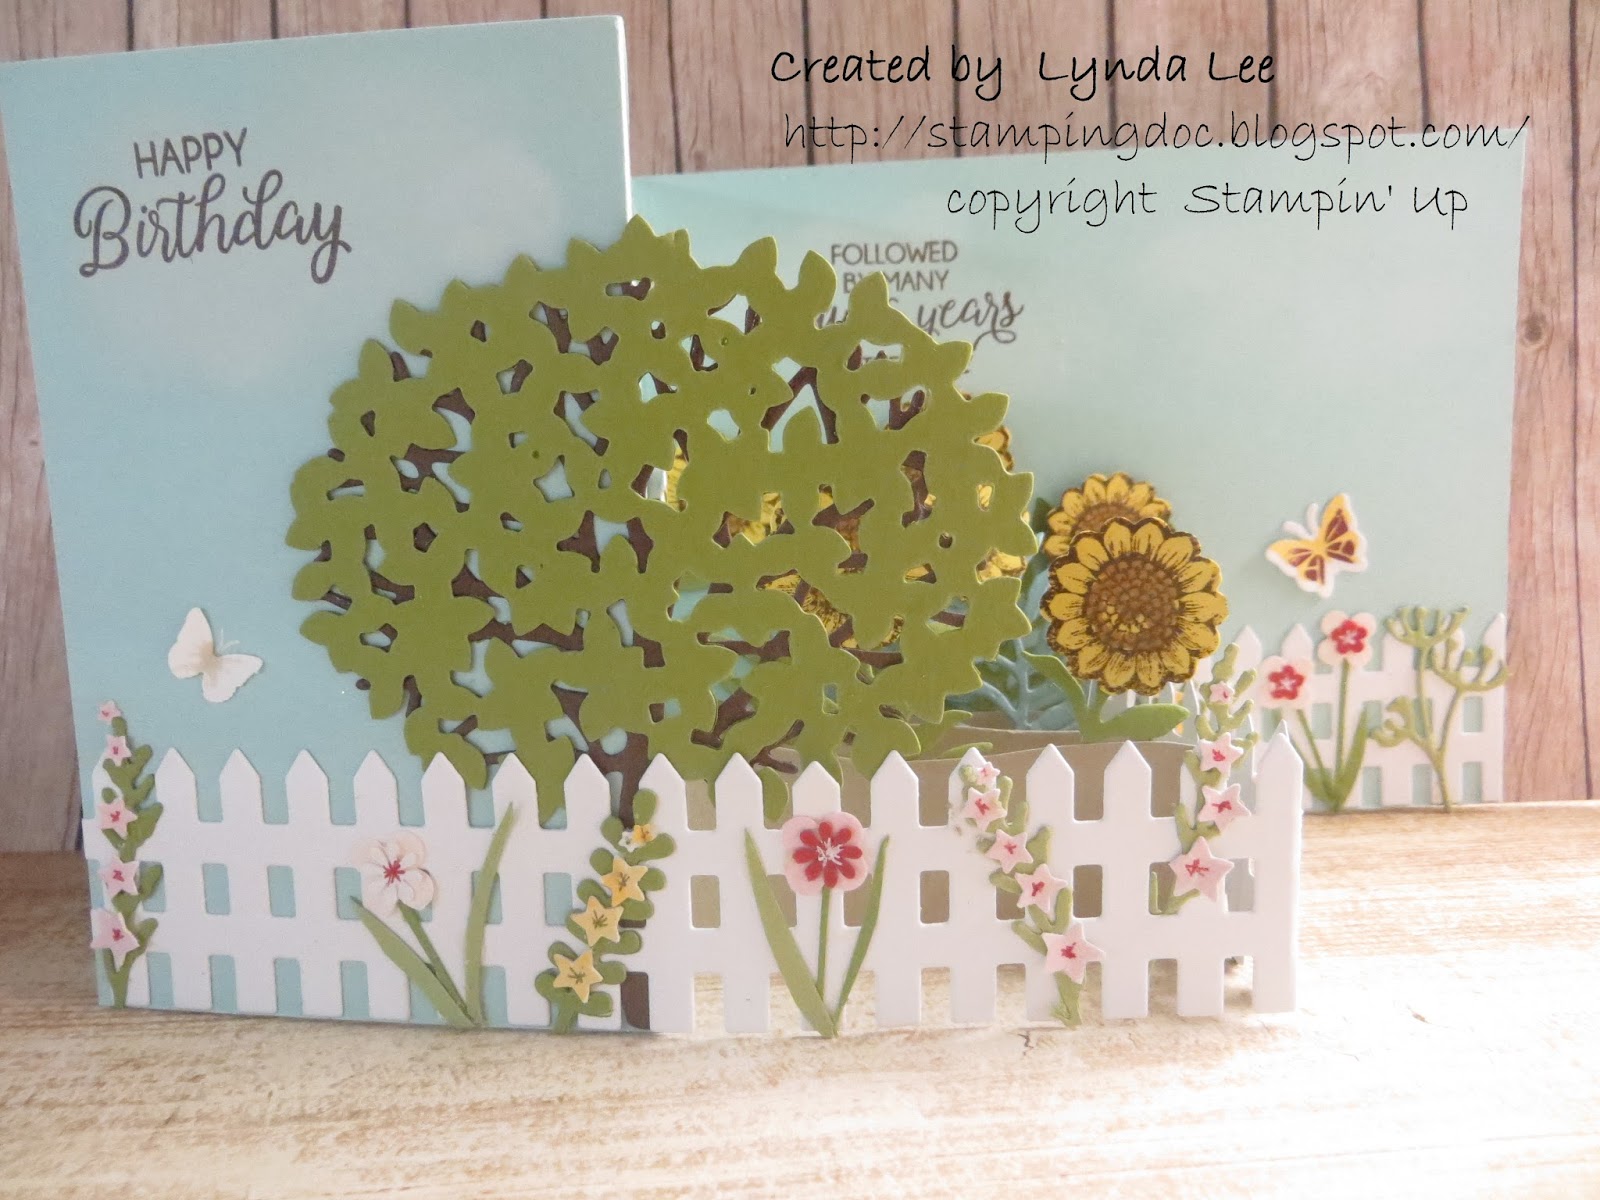
A little z box pop-up garden birthday card for someone special


 I have been thinking about this card for a while now-I thought a garden of flowers would be perfect using this z box pop-up template.

The base is Pool Party - I dauber'ed some whisper white ink to make some clouds in the sky although hard to see.  Stam the sentiment from Beautiful Bouquet in Soft Suede.

I diecut the fence-  I collect all these dies so not sure which company this is from- I let the end not cut so I could extend the fence the whole 11".    the tree is from the retired Beautiful Branches but I guess you

could use any tree die in chocolate chip and Old Olive.    Added strips of crumbcake to make the soil in the middle for the sunflowers to bloom from.
The little flowers, leaves and branches are from a Tim Holtz die, retired SU Botanical blooms framelit and little flower stamps I got from Michaels for a $1  over the years. 
 The sunflowers are the centers of the SU retired Beautiful Bunch stamped with soft suede on daffodil delight CS punched out with 7/8 "
scallop punch- see image end of this post.  I colored in the center with bronze Stampin Blends to contrast.  The leaves below are from retired Botanical Blooms in different green CS.  I used a 1/4 inch strips of clear plastic- cut from packages with glue dots on both ends to keep the blowers from drooping.  They are clear so pretty invisible.


My most favorite of all is the little graduated star flowers.   It's from the  Star Border punch- you punch once and you get all these little stars that fit perfectly on a little branch of leave to make such a cute little stick of flowers.  I did add a little starburst in center of each flower with real red and in case of the yellow flowers with soft suede to add a little depth.   Add some butterflies- the bigger butterfly is from You Move Me set- stick a few around here and there. Below is the card totally opened- This card has taken me a better part of a day to cut all the tiny pieces-  I love it and I hope whoever receives this will love it too.


the flower stamp with the center stamped- I use the little stampin spots for this- it's perfect for inking that little area.  The center of the flower colored in....

Enjoy!

Thursday, March 1, 2018

Playful background winterberries


I was goofing around and thought the round stamps from Playful Background looked like a bunch of berries- I stamped the branch from Beautiful branches onto whisper white- then stamped the berries in Real Red.  The new foam ink stays wet a little longer than the dye ink and I was able to sprinkle some clear embossing powder to add a little more dimension to the berries.  I cut one of the round circles from the big stamp and used it to stamp some more berries where I thought it needed it.  A real simple, kind of wintery card.  Love the big sentiment from Colorful season- stamped also in real red. Mount on real red CS then on whisper white base.

Wednesday, February 14, 2018

a little valentine's treats for my office coworkers


 Remember these?  I had bought these for my kids but I had a bunch I bought and they are not now too " grown up to take these to their friends so they are going to my Gorwn up friends at work.  Easy to make and it was well appreciated.

 These were some treats made by my friends, Diedre, Hermelinda and Mercedes- I always want to document these before I eat them because they are precious to me and I want to be able to look back and remember in case I want to case them for future treats.

Boy and Girl versions iwht different types of chocolates for people to choose


Sunday, February 4, 2018

Happy Super Bowl LII

 A little cake from my MIL Anne for our annual Superbowl Party- My DH makes his dirty rice and beans with sausages- so yummy and the usual party fare of grilled meats, chips dips, cheese and all sorts of not so good for you goodies!

During the first half it was sort of boring so I went into my craft space to Zone and make a card and this is what I made.

 The base card is whisper white. I took another whisper white and diecut HUGS with Large Letter Framelets. I stamped a bunch of flowers with Versamark with flowers from Cake Soiree set and heat set with clear embossing powder onto the base cardstock front.  Colored it in with Melom Mambo, calypso coral and some wisteria to mix the colors.  I then stamped a bunch of leaves in pear pizazz. I kept putting the Hugs diecut piece on top to make sure the flowers and leaves were going to show through. After I did it though the flowers did not pop enough so I daubered some soft sky onto the base card so it would contrast with the diecut piece and it looked better.  I then took a gold marker to out-
line the diecut words- it was a bit messy and I used an old marker that I had and I was not completely happy with it but it was ok-  but it was better than not having the outline.

I cut another piece of flower and some leaves as shown on the left and stamped the sentiment from Lovely Inside & out set in Melon Mambo onto a scrap of paper into a banner and mounted with dimensionals.  The diecut words were also mounted with dimensiionals and the whole card reminded me of those chintz fabric -   Not so overly lovey dovey but still lovely.