Monday, October 28, 2019
New Years Celebrations
It has been a long time since Stampin' Up put up a Asian stampset and I thinks this is a keeper. I love the abstract Mt Fuji image and all the little bits that make this such a great stampset. I was playing with some ideas not realizing that the actual stamps were a lot bigger than the image on the box cover, silly me. It certainly makes more a statement.
When I was playing with it I was wondering why the coloring of the mountain was too small. I actually ended up coloring the sides with the marker to make it meet up which is a good look too but making it sit a little off made it easier to stamp and it sits better with the bottom of the circle image. So you decide what you like better. I love that little bow to top the card. I may try different Asian sayings for birthday or thank you so I am not limited to the New Year but I love this set!
Images stamped using Lipstick, Peacock and Crumbcake onto very vanilla CS. I used the stamparatus to repeat stamp to get a really solid image for the circle and the mountain.
Friday, October 25, 2019
Stitched lace and Daisy Lane
Hhow lovely is this?
Love the sweetness of the stiched lace with all its fine details expecially with the matching edge diectu to make the scallop- have to love it!
Basecard is Daffodil stamped with the sentiment from a Paper Pumpkin stampset.
Stamped the Daisy lane small daisy with Melon Mambo 3 times and punched it out. Put the Perennial Essence Floral Center ( had to wait forever for these as they were on back-order but worth the wait- they make it so perfect!
Stamped the leaves from Painted Harvest and punched it out. Tied the whole card with the ribbon from Sale-a-bration and what a sweet little card - would be perfect for Easter or any little one's special event.
Tuesday, October 22, 2019
Birthday Goodness Popup
This was such a fun card- we made this for one of my Stampin' Parties.
The base card is 4 1/4 by 11 inch Coral Calypso Card scored at 2 and 7 inches.
The basic black square is 3 3/4. The whisper shite front panel is 3 1/2 inch square.
Stamp streamers in multiple colors- crushed curry, Granny apple green,. pol party, calypso coral.
stamp the donut on a scrap piece of whisper white and diecut using the circle from stitched labels ( it was the only one that would fit the donut! but find any circle die or punch that fits
that you have. Color it in as you wish. Mount it using a dimensional to raise it up a bit and allow for the card closure. I also stamped the sentiment and diecut using the Stitched nested labels and cut off the right side as shown.
I stamped the streamers from the Birthday backgrounds set using Calypso coral but you could use Versamark. Stamp the second sentiment and diecut with the Stitched Nested labels as shown.
The inner piece is 5x 2 3/4 scored at 1" across the top. If it is any longer it will not fit on the card. Stamp the tray of donuts and color in with the blends- I used the bold colors then used the color lifter to soften the colors a bit
The base card is 4 1/4 by 11 inch Coral Calypso Card scored at 2 and 7 inches.
The basic black square is 3 3/4. The whisper shite front panel is 3 1/2 inch square.
Stamp streamers in multiple colors- crushed curry, Granny apple green,. pol party, calypso coral.
stamp the donut on a scrap piece of whisper white and diecut using the circle from stitched labels ( it was the only one that would fit the donut! but find any circle die or punch that fits
that you have. Color it in as you wish. Mount it using a dimensional to raise it up a bit and allow for the card closure. I also stamped the sentiment and diecut using the Stitched nested labels and cut off the right side as shown.
Below is the side view as you open the card- This is an old template using a new stampset!
Enjoy!
Tuesday, October 15, 2019
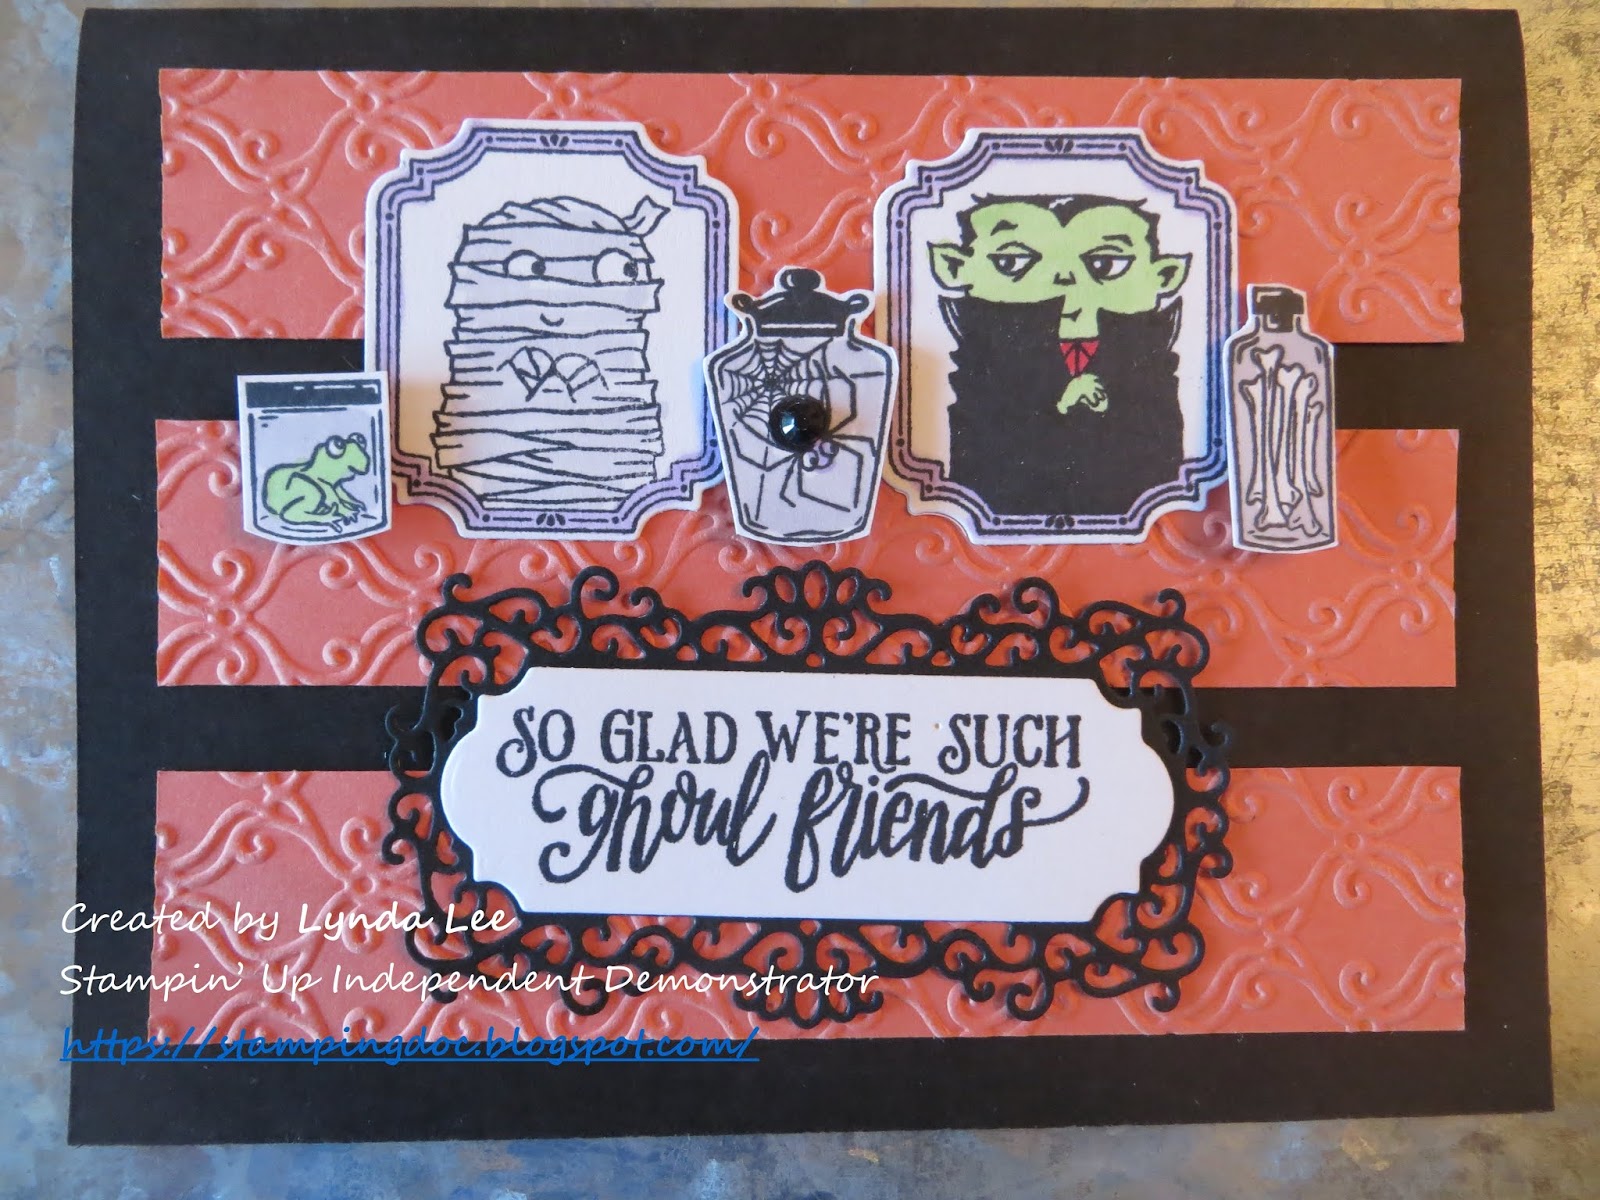
Monster Bash Ghoul Friends
This is a thank you card I designed for my friends who placed an order with me in September.
Took a base of basic black card with strips of Calypso Coral . Embossed the calypso coral cardstock with the Stylish Scroll Embossing Folder (in the 2019 Holiday catalog - page 53) hard to see in the catalog but beautiful nevertheless.
Use the Ornate Frames Dies to diecut the big scroll. I stamped the sentiment in black and diecut using the piece from the same Ornate Frames Dies set (fabulous set of dies- my
favorite die of the whole catalog) - I would definitely use the steel plate or a chrome plate to get the details cut well - run it through 2-3 times- it's better to do that than to try to pick out little pieces later- but it cuts beautifully and layers perfectly.
I stamped the images with Tuxedo Black Memento pad and colored it in with Smoky slate, poppy parade, and light Granny apple blends.
I wish there was another character image- I like things in odd numbers - although the two looking at each other is really sweet but I would have liked a Frankenstein or a wich image in the stamping set.
I just stamped the jars and cut them out and mounted them with dimensionals.
I did add a rhinestone that I colored using a basic black blend marker to add a little dimension after I colored the spider's body black.
Sometimes that little something adds what it needs to make the card.
Enjoy!
Tuesday, October 8, 2019
Spooktacular Bash make and take
Just one of the projects we made for this month's make and take. Base card is Pumpkin Pie (what else could it be? ) with a layer of Basic Black embossed with the Stylish Scroll Embossing Folder.
I added a layer of retired DSP -from Stampin' Up past- .
I stamped the vampire from the Spooktacular Bash stampset and colored it in with HIghland Heather light and real red (IN retrospect I think light Granny Apple would have been better) die cut it and layered it on the scroll frame from Ornate frames dies set.
Stamp the sentiment in memento Tuxedo black and diecut. Don't you just LOVE the tiny stitching inside? I rolled the Scallped Edge ribbon into loops and taped it behind the sentiment to add some more interest.
The droplets were from a Paper Pumpkin left over and it just added a little something extra that I always like.
Enjoy!
Tuesday, October 1, 2019
Sailing home catalog CASE
There is a card in the catalog page 144 which kind of has a look like this except it was water colored and the birds were handcut. For my class I wanted it streamlined and easier.
Base card is Tranquil Tide (how appropriate is the name?) and then I cut a piece of whisper white which I clored in slightly with pool party.
then a piece of balmy blue for the water and embossed it with the High Seas 3D embossing folder - you can see it on the left here.
A piece of crumbcake cut in a diagonal is used for the land. stamp all the images and diecut as shown.
Wrap a piece of Night of Navy/sahara Sand baker's twine before mounting on the label with the sentiment.
Thursday, August 1, 2019
Friendship treasuring Mermaid
I bought this die on line and I just thought it was darling. I have this thing for mermaids stamps. I lover her expression. I wanted to give this die as a gift to a friend but wanted to make a card with it too- to accompany it. The base card is whisper white with a layer of the blue- this is from a program from Stampin' Up convention years ago- I just loved the design so kept it - I just love using different findings to add an odd touch to my cards- I die cut it using a frame from MemoryBox. The Stamp on the bottom is from Stampendous - I colored it in and added clear rhinestone jewels and pearls to add some extra sparkle.
I diecut the hair in Calypso Coral and the body from Powder Pink. The bra is from a shiny purple Ghiradelli chocolate bag and the same for the body - from this Blue green shiny Ghiradelli chocolate bag too. Love the shine on it. I have amassed a fairly large collection of sequins- i used the colors that were sort of graded from light green to darker green then light blue to darker blue and somehow the last darker blue sequins were a perfect match to the chocolate bag color!
Added more watercolor sequins (These are more discs with holes than "sequins") I think I need some white ones to look more like air bubbles.... I think she is a doll! The eyes I replaced with some Early expresso punched out with 1/16 " circle punch (SU retired)
Tuesday, June 4, 2019
CAS subtle butterfly note
I was trying to tell people what the subtle folder looked like because in the old catalog you could not tell at all.
This was one of the cards we made at one of my parties few months ago.
Base is Lemon Lime Twist with a piece of whisper white embossed in subtle to create the texture which I LOVE by the way the sentiment can be stamped before or after I found out - it does not seem to make a huge difference thankfully. Laid down a piece of lemon lime twist ribbon.
Stamp the butterfly and used a dauber to color it in a subtle way. stamp the body and the antenna on the white CS where you intent to put the butterfly. Mount the butterflies with dimensionals and you are done.
Friday, May 31, 2019
Wonderful Romance
This is another set that is retiring at the end of this month- I thought for sure with all the delicate detailed dies they would keep it another season but no!
I love the leaves with the lattice that makes such a beautiful edging.
the Lemon- Lime twist cardstock is already gone!
You could use other combinations of green.
Base is Lemon lime twist with a layer of 5 1/4x 4 inch whisper white in the inside to show off the pretty leaves. Stamp the wonderful romance in Memento Tuxedo black and color in with old olive, granny apple green, Blackberry bliss
using watercolor technique- with pads- stamp the sentiment in blackberry bliss and die cut it with oval die, Die cut pieces with vellum and petal pink CS to add some accent.
Add pearls to the center of flowers and linen thread to the stem to additional interest.
Tuesday, May 28, 2019
Dylan Dog spinner
My son Dylan has a little stuffed dog that he has been dragging around since he was a little baby with a spot on his eye so when I saw Happy Tails I had to make him a card.
The base card is Soft Suede. I used a piece fo very Vanilla to stamp the dog house and the sentiment- I then used a scrap piece of vanills to stamp the dog and the bone, then punched it out with a circle punch. Added another layer of soft suede behind it. Punch out the dog and mount with dimensionals. take a pice of crumbcake and stamp the paws all over it. cut a window opening - (using Lawn Fawn die). take 2 pennies and add a small stampin dimensional in between and glue the bone circle on top to create a spinner.
how to do a spinner at splitcoast stampers: https://www.splitcoaststampers.com/resources/tutorials/spinner_card/
Subscribe to:
Posts (Atom)