Tuesday, December 21, 2021
25 days of Chrsitmas- Day 21 - Sweets & Treats Tag/Card
Monday, December 20, 2021
25 Days of Christmas- Day 20- easy tags for R & J Toffee
The tag is made from white cardstock cut with a 2 1/2 inch circle Layered onto a circle dietcut with the circle laying dies.
Sunday, December 19, 2021
25 Days of Christmas- day 19- sweet little gift bag from an envelope
Take an envelope- this is a Medium Vanilla Envelope from Stampin' Up.
Score the bottom and the sides however deep you need- here it was an inch on 3 sides.
I stamped candy cane in real red on the flap only as shown.
Pop out the sides as shown on the left on both sides.
Make the bottom flat as shown on the left
Youcan fold the corner triangle into the bottom as show on the left or up the side- it works either way- just secure it with glue dot or some tape.
Squeeze the sides as shown on the left to make the top of the bag more flat. It should look like the picture left below. Fill with treat of your choice.
Saturday, December 18, 2021
25 days of Christmas- day 18- Giving Gifts dies tags into cards
If you don't need a tag then put it on a contrasting cardbase with a 1/2 strip of cardstock with heartfelt wishes from the same name set stamped in real red.
Easy peasy Christmas card or tag.
Line with gold and it is gorgeous.
You can make any tag into a cards- Use a different color base to suite your needs.
Friday, December 17, 2021
25 Days of Christmas- Day 17- Easy envelop hack
Score the piece at 2 3/4 and 5 1/2 on the 6 inch side and at 1/2 inch across the bottom as shown.
Use a circle punch to punch a half circle across the top as shown to make easier to get the money out.
and put tape on the flap pieces on the right as shown.
Thursday, December 16, 2021
25 days of Christmas- Day 16 - easy gift box hack
This is an easy trick using so many beautiful christmas cards I get that I do not have the heart to recycle or throw away. Take anycardand split it in half so it is equal in size. score whatever you need- here I scored 3/4 inches on all 4 sides of both pieces of card to create what you see, cut side of the box at the corners as shown- I usually will cut horizontally on one side and vertically on the other cardpiece to reduce bulk when you assemble the box. This card was one I got from Stampin' Up one year and it was so pretty so I kept it for just this purpose. I did punch half rounds on the sides to make it easier to pull the box out. Put tape or glue onto the 4 corners at the X to make the bottom piece. i then use the box bottom to put the top together so I know it will fit. you may have to adjust it a little bit to make it fit.
Wednesday, December 15, 2021
25 Days of Christmas - Day 15 - Christmas Trees Dies
Tuesday, December 14, 2021
25 Days of Christmas- Day 14- Christmas Seasn
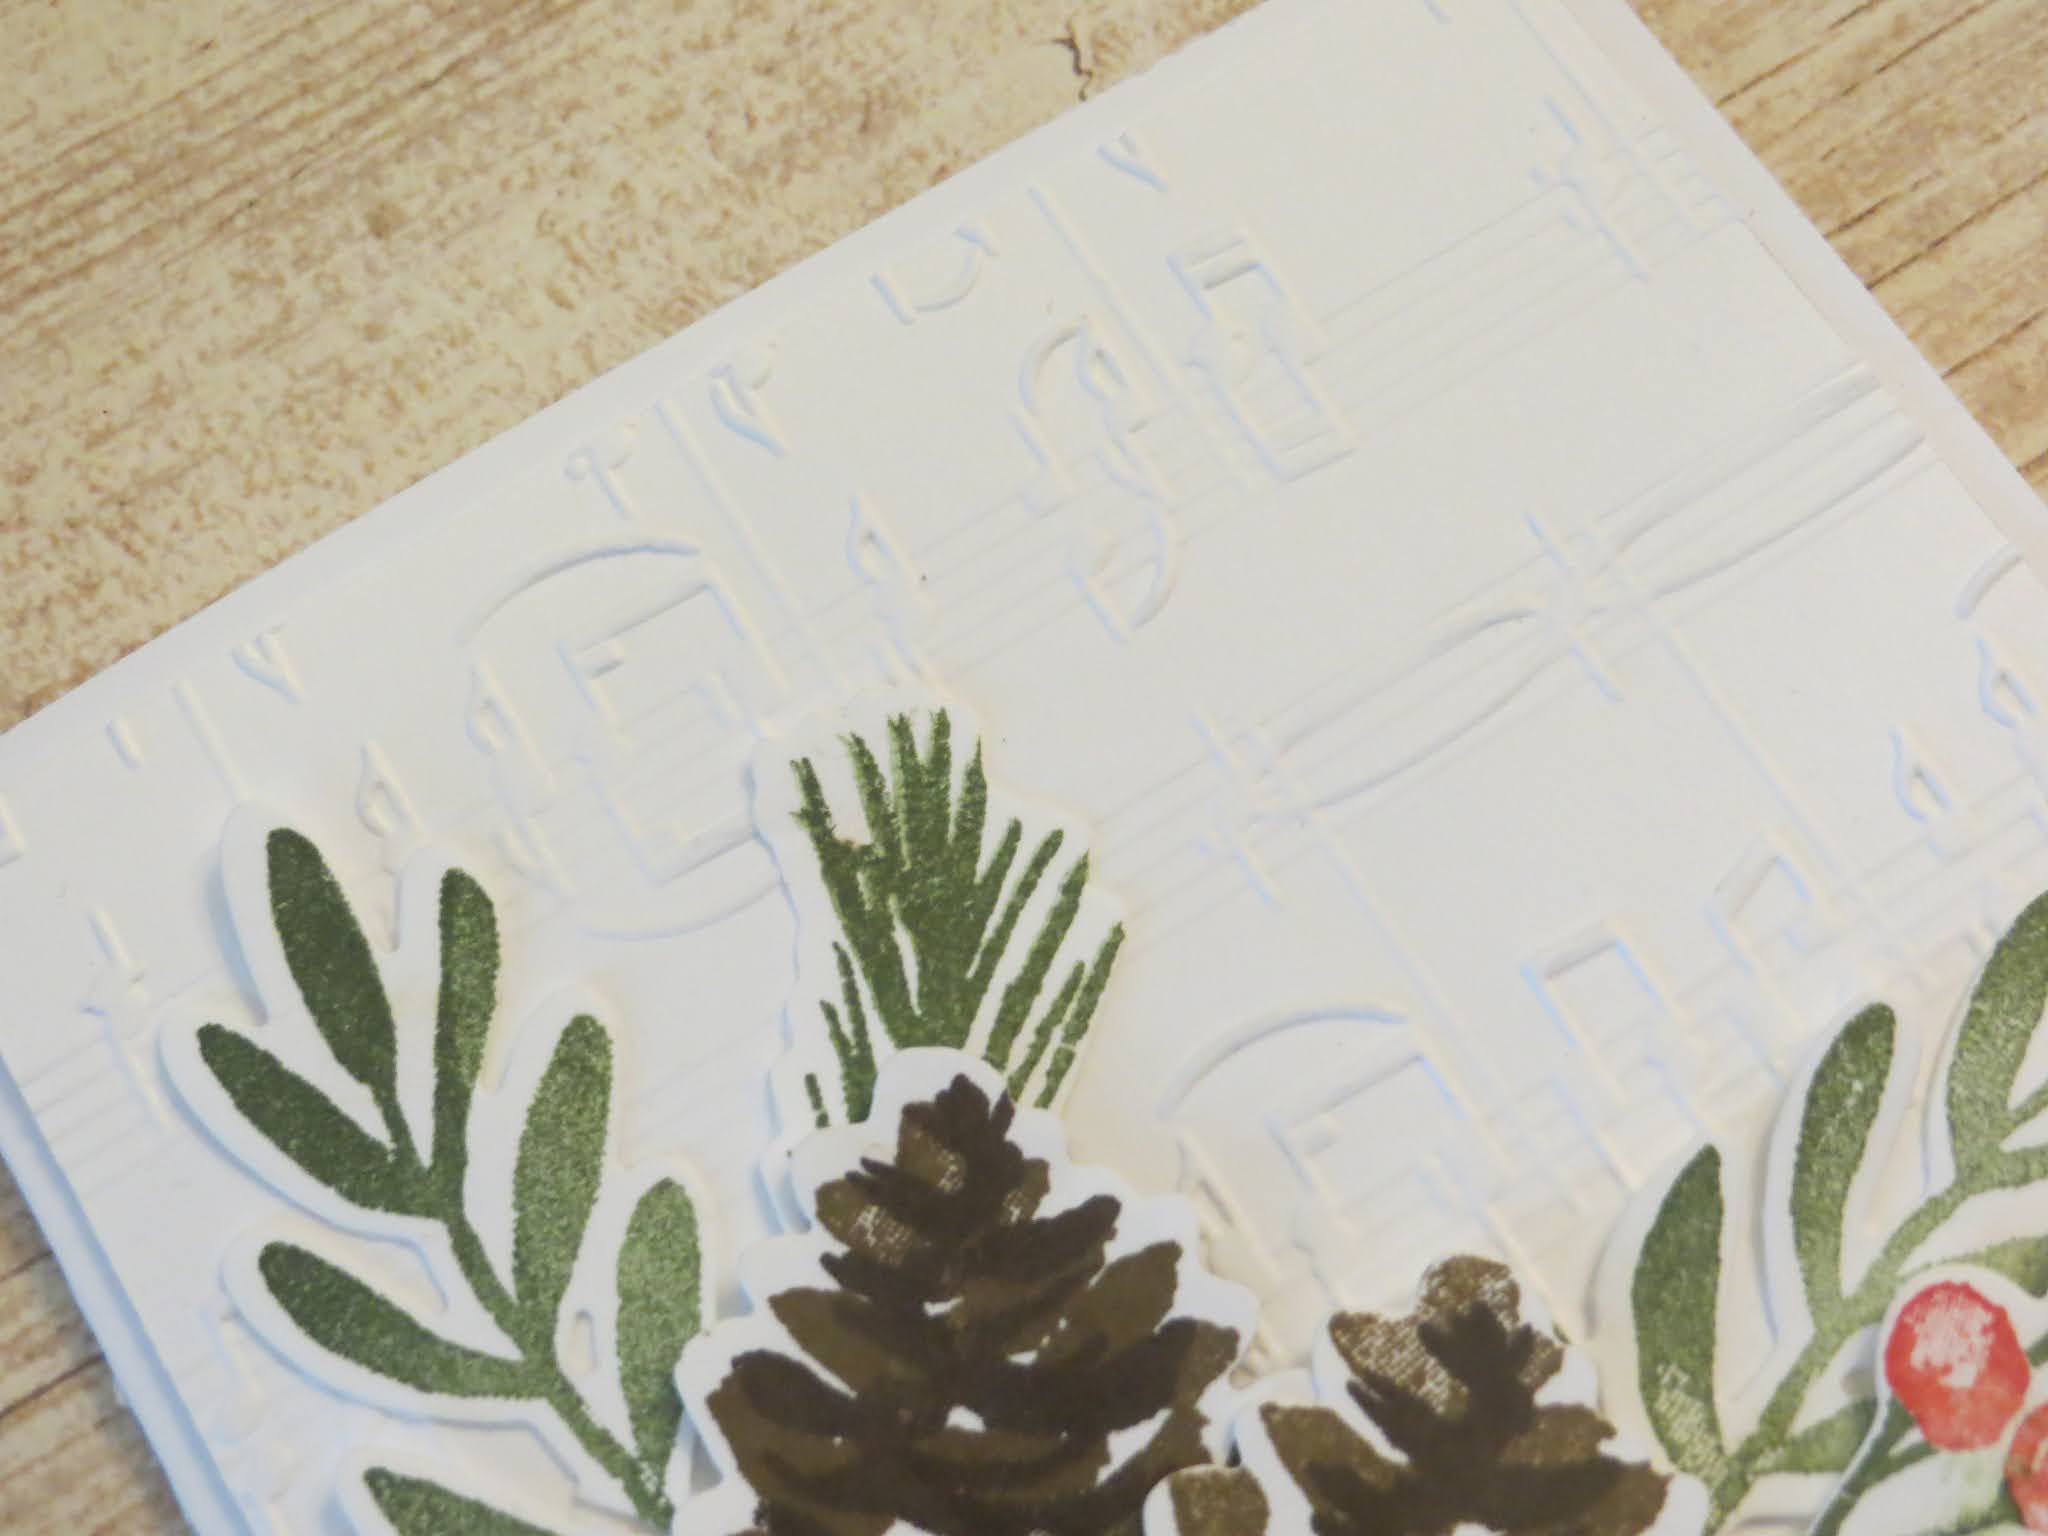
I love pinecone stamps and dies- Had to have this one too- Thick basic white CS for the base- now that we have it I would not use anything else- although the basic card stock is fantastic for stamping on- card base using regular cardstock feel too flimsy to me.
take another piece of basic white CS and emboss with Merry melody 3D embossing folder to add a little interest and texture to the background but only down to the last 1/ 1/2 inches so you can stamp the sentiment from the Heartfelt Wishes set - I just LOVE the font in script.
I took a piece of 1 1/2 Metallic Mesh Ribbon- SOOOO gorgeous and shimmery- hard to appreciated here. tied the center of it with the Silver Simply Elegant trim to make it more bow like and then adhered it under the cone as shown.
Enjoy!
Lynda
Monday, December 13, 2021
25 Days of Christmas- Day 13 - Inspiring Canopy spring variation
Inspiring Canopy dies have been so much fun to play with. this is a spring version of it.
Take a thick basic white CS and use blending brush with Balmy blue with a diecut from the Basic borders die - the cloud one to create a stencil - to create a soft sky look. I took a strip of 1 1/2 inch pear pizazz cardstock and used the ground die to split it in half to get two piece of ground - one used for top and another used for the bottom. sponged the edge a little to create a little shadow. Glued the back ground piece - make sure keep it low enough to be hidden by the front piece- then mount the trees diecut from crumbcake CS. I diecut the leaves using pear pizazz cardstock and used old olive and and Mossy Meadow inkpad with a dauber to create shadows in the leaves. Mount some flat and others with dimensionals to pop up. Add a strip of white white with the sentiment from Welcoming Woods and really an easy card but I think it looks fabulous - like you put so much effort into it....
Sunday, December 12, 2021
25 Days of Christmas- day 12 - Inspired Canopy Autumn scene
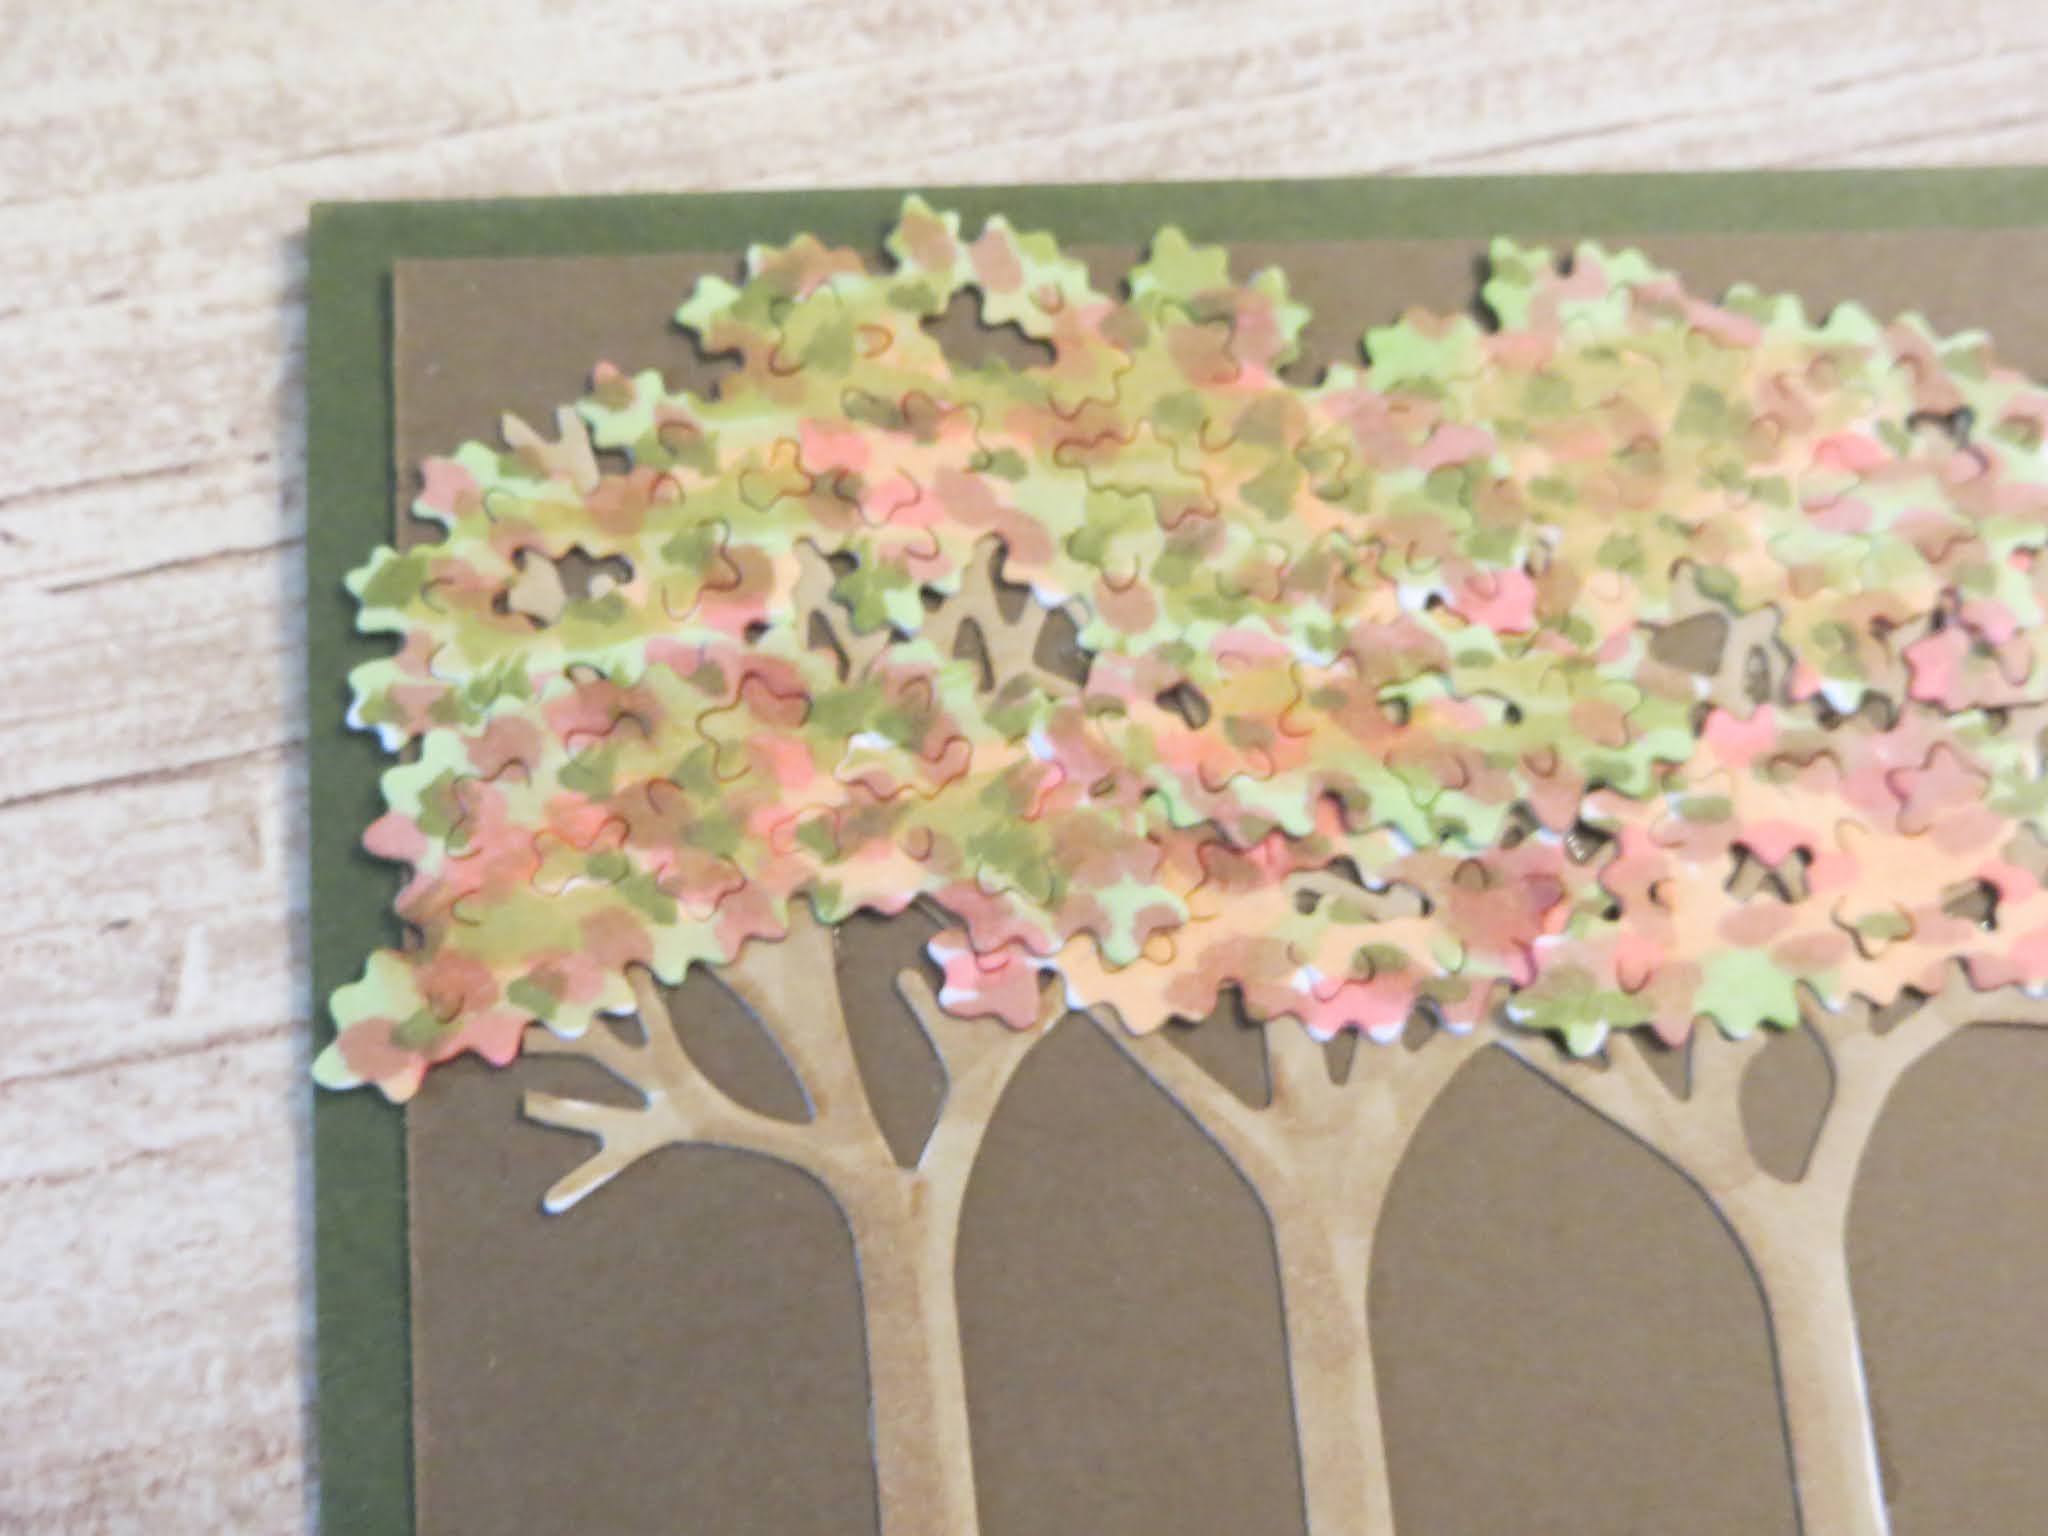
Basecard of Mossy Meadow and a panel of Soft Suede. Diecut the tree and several leaves panels in Basic White CS - color in the tree with crumbcake.
the leaves were colors using a variety of Stampin Blends using sort of stippling technique to create the variety of colors- pumpkin pie, cajun craze, flirty flamingo, old olive, mossy meadow, granny apple green. the little pieces that fell out of the leaves panel were just glued down on the bottom of the trees to look like leaves that fell. The Hello Friend is from Welcoming Woods set onto a piece of 1/2 white strip and mounted with dimensionals.