Tuesday, September 14, 2010

Expanding my stamping zone


I have a certain stamping style- some colors and layouts are just more COMFORTABLE to me than others- I want to break out of it many times but I find that it just feels not ME- like my chest is all somehow pressured! So I find that some of the stamping challenges I follow MAKE me do just that- break out of my comfort zone-even if I don't want to. I think it is a good thing- as Martha would say- in the long run - to try new things, colors, mediums, and see what happens. sometimes I learn thiings I didn't expect that I might be able to apply to my comfort zone stamping. You never know if you don't try! (like the green eggs and ham)
I used the SCS F4A29 sketch for this card and used the CC288 Blushing Artichoke, Mist for the colors -rather victorian I thought. TLC 290 was lace sponging so I had to give it a try except the only lace I had was from the lace trim which did not translate well into sponging- the open area was too small to give a good impression of lace so I improvised and used the tattered angel glimmer mist stencil that looked lacy and sponged it on artichoke CS and ran the whole thing through PTI's woodgrain plate to add some texture and I loved the added dimension.


I then took a Marina Mist CS and used sticky tape to run the victorian lace ribbon in an accordion fashion. I don't know why my pictures came back sideways but you can see what I mean. Tied a loop and put a SU antique brad through the center and put it through the hole I made in the marina CS using the crop a dile.
I did not have a outline flower I wanted from SU so I used Larkspur from PTI which again has that victorian vintage look. Watercolored it using the lid of the classic ink pads, marina mist and artichoke using a blender pen- it always give more translucent watercolor look than just using a straight marker to color it in. Used spellbinders long ovals to cut it out and layer it using next size for the artichoke CS.
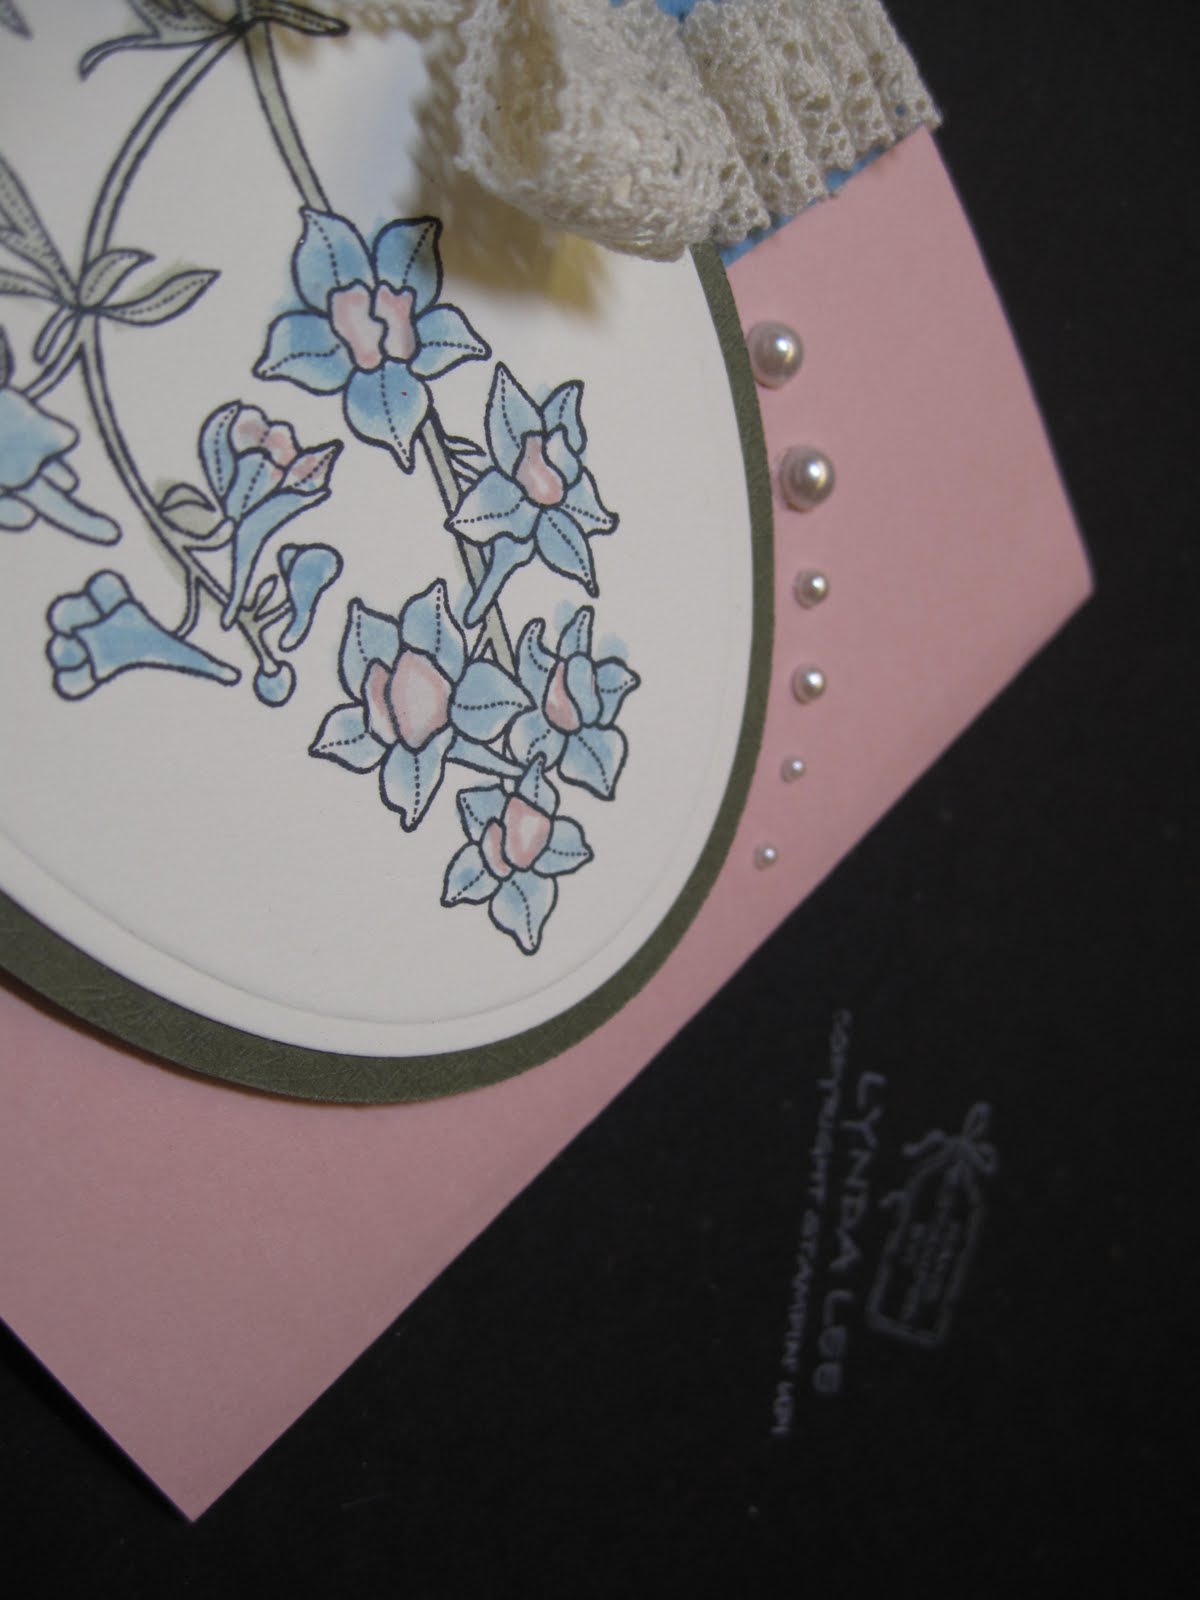


It still did not look finished and I contemplated putting a sentiment around the oval frame on the left but it looked busy. I wanted to reiterate the cream color that I was using so I chose creamy pearl jewels to accent to finish and I thought it looked reasonably finished. Again, victorian, vintage and shabby chic is something I love to look at and admire people for doing it but I know is not my forte but hey I gave it a good college try- I don't think it looks too bad but I will leave it up to you to judge.
Lynda


Monday, September 13, 2010

Marisa's Candy wrapper treat


At my last demo get together Marisa (check out her blog here http://bellaconfetti.blogspot.com/ )had us make these cute little candy wrapper boxes and I was strapping my brain to come up with a candy wrapper for a make and take and thought perfect! She use the Halloween Hoot set which I do not have yet so I had to improvise for my workshop and this is what we did.
Took the razzleberry CS and diecut it with the new candy wrapper die (another LOVE IT- think Miss Piggy saying this in high falsetto- moment!)
then stamped the spider web and Spooky from the Wicked Cool set in black to add some interest to the box, assembled the box then wrapped 1 1/2x 6inch Wicked Fun DSP around the center.

I needed a sentiment that would fit inside a circle and I know I wanted to use the witches shoe from the same Wicked Cool set so I was searching for a sentiment and came across the perfect sentiment on Batty for yOu set-" trick or treat, smell my feet".
I already clingmounted my sets in the past so it was no big deal to use the craft knife to separate the words from the image. Now I have more uses from the same set!


I inked the shoes using pumpkin pie and crushed concord markers onto whisper white then stamped the words in black, punched it out with 1 3/8 inch circle punch then layered it onto a celery CS punched with the scallop circle punch, mounted the whole thing with dimensionals. Using the CS as the base, the candy wrapper is sturdy enough to hold in the candy without any tie at all so you can twist and untwist to get the candy out.
I am just loving this die!


This is the final project! Thanks Marisa for the inspiration!
Lynda

Sunday, September 12, 2010

Builder Wheel with a punched border


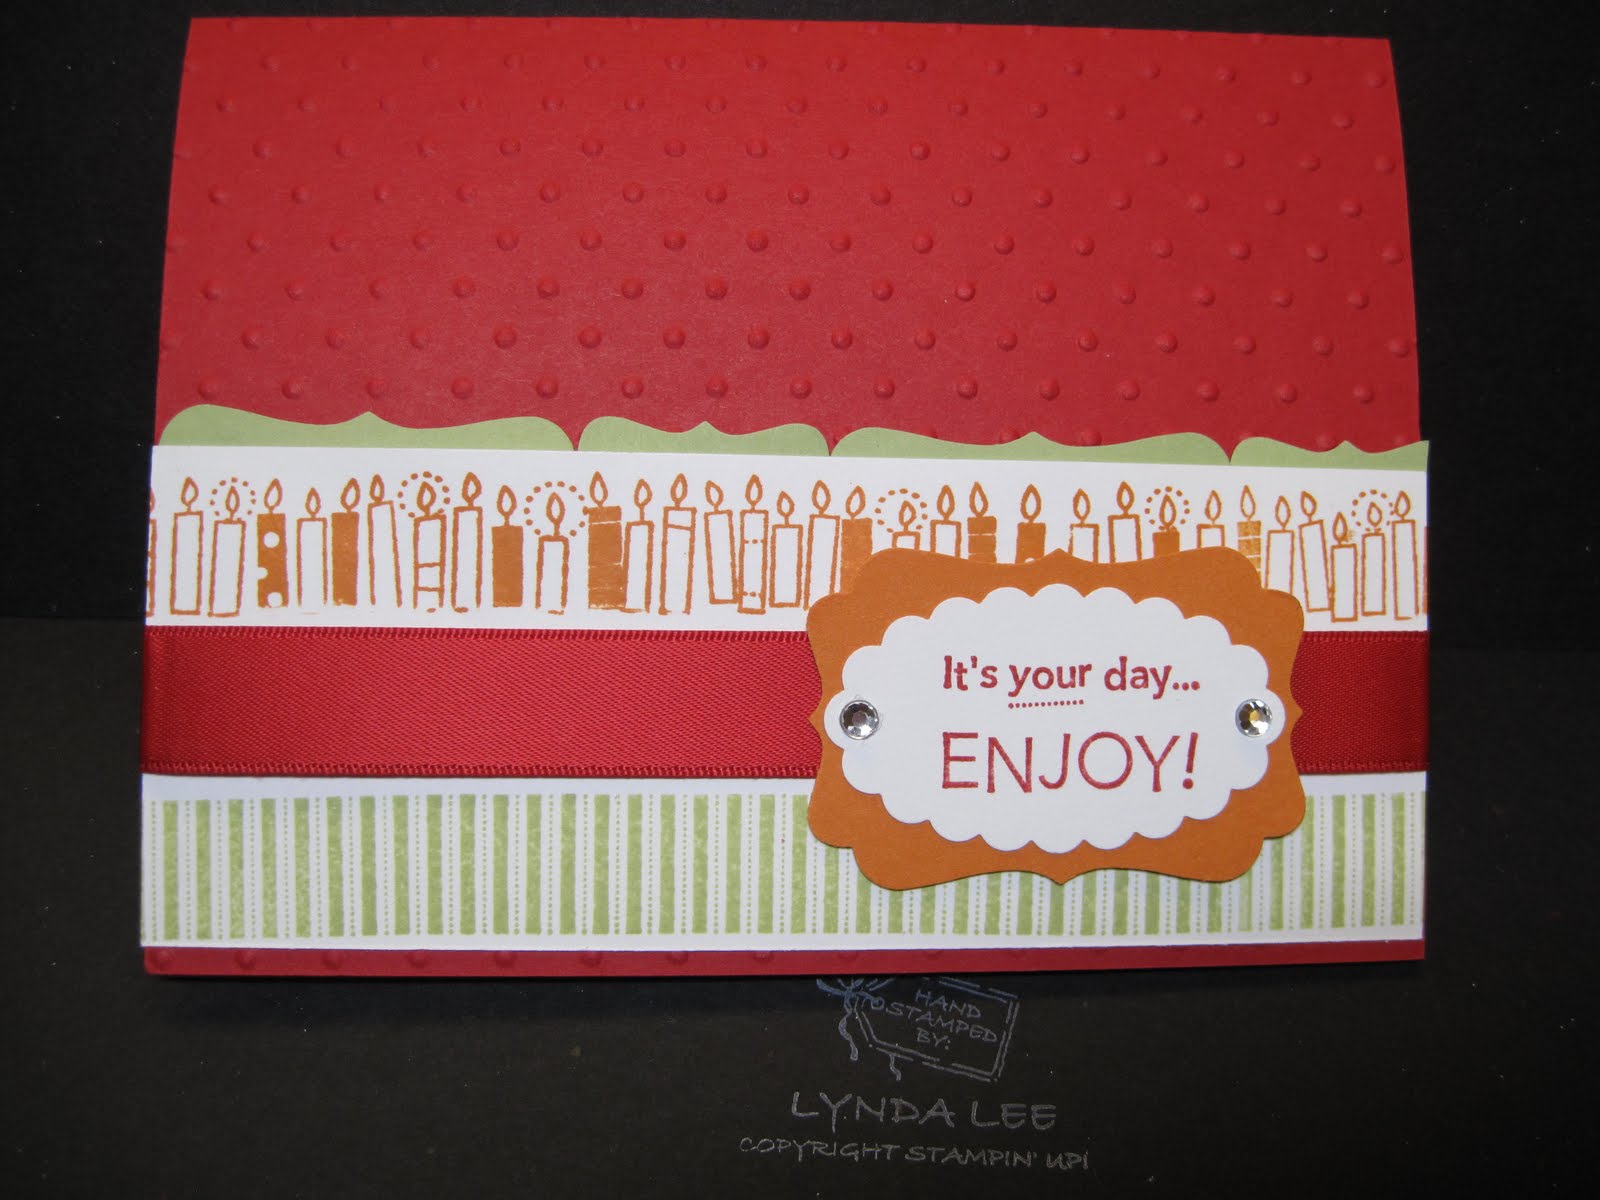
Someone asked me to demonstrate a card using the stampin wheel and I thought it would be fun to show the builder wheels. This a really easy card that has a lot of drama. Take the base real red cardstock and embosse it with the polka dot embossing folder. Take a piece of whisper white CS. Take the builder wheel, add the candles and stripe builder with a gap in between. I have one triple cartridge that has pumpkin, melon mambo and celery in it (I thought long and hard on this one- these are sort of pricey and I wanted to make sure that it was a combo I would use a lot). I added the red satin ribbon in the center.

I wanted to have a celery border to repeat the color on the wheel but was using the dotted ribbon punch I wanted to use on another card at the workshop. So (neccesity being mother of inventions) I used the same punch as the accent piece, cut it as shown and adhered it behind the wheeled white piece to make the accent on the top border- FUN! Use the same decorative label to punch out a piece of pumpkin pie CS. Used the sentiment from the On your birthday set to stamp it in real red onto whisper white, punched it out with the scallop oval punch, added a few rhinestone jewels and Voila, another easy peasy card. You could make a whole mess of these using different color base cardstock and ribbon to match- I think it would look good with chocolate chip, pacific blue, concord grape, to name a few.
Thanks for visiting my blog!
Lynda


Saturday, September 11, 2010

What a week!
I hadn't had a moment's time to stamp with just goings on of everyday life and Friday I have had it- there was an incident that tip me over the edge and I came home all boiling over mad - I knew I had to enter the Zen stamping Zone- does it ever work! I was thinking about this layout and that layout and soon, I felt so much more peaceful. How can you be mad when you are creating something so cute?

The challenge on splitcoast for Friday Free for all:
http://www.splitcoaststampers.com/forums/free-all-f45/f4a29-circles-rectangles-09-10-10-a-t505497.html was this layout so I changed up the card I designed for my workshop and you know what? I think I may like it even better!

The base card is Pumpkin Pie which I stamped the bats from Wicked Cool set at the top.

The center image is from Greeting Card Kids stamped in stazon black onto shimmer paper (although hard to see here- takes color better than whisper white for watercolor or Cop*c type applications) then colored in with concord, pumpkin pie and various greens using blender pen with the ink lids. I punched it out with the new 2 1/2 inch circle punch then used the number 2 scallop bigshot die to cut a large scallop in Crumbcake.

I used the 2 way glue pen to add the champagne glass glitter around the edges. A layer of Crushed Concord, embossed with the spider web folder - the coolest!- followed by a piece of whisper white that I wheeled the Stripe builder wheel in celery twice, added Raven 1/2 inch lace trim in the middle.

The center image was layered using dimensionals to make it pop then added few bats punched out with the new bat punch that I added using the stcky stip but just along the core leaving the wings to flap up and down.


This is the deatil on the bats, glitter and the ribbon.


This is the detail on the spider web.


This is the original card that I had people make at my workshop - same idea but turned around and added a strip of dotted scalloped ribbon punched in celery which I thought was darling as well.
Enjoy!
Lynda

Thursday, September 9, 2010

Candy wrapper die - four fingers is the key!


This is a little CASE I took from the SU catalogue. I liked the candy wrap die but had some trouble figuring out how to work it but now I have it down.
The most important thing is that you have to have good fold lines to make it easy and I reinforce it by pre folding it before I tape it together.
Once I crease everything and tape the box, then grab the end as shown, using 4 fingers in each of the corners (I lifted my index finger so you could see the other fingers)


Then TWIST it like a faucet handle in one direction.


It should at least look like this. It keeps closed secure even without a tie!. You could even flatten it out completely.
I had used the die to emboss the spider web on one of my first projects using this die and it was a complete failure because the embossed lines kep getting screwed up with the fold lines. So, if you emboss, maybe only emboss the center panel may make it possible- better yet, take another piece of CS, emboss IT then wrap it around the candy box. DSP works well but I think regular CS works best for this project.


This is the final project using the witch from the fangtastic set. I took a pumpkin pie CS diecut it, then stamped the images in black, stamped another image onto white and cut it out to make this sweet little treat.
Enjoy!
Lynda


Tuesday, September 7, 2010

Sweet and Spooky Halloween for CAS83


Clean and simple challenge this week was a sketch by reqbarbie- a classic! I made it one layer by using 1 3/8 inch square punched on a cardstock to sponge on some layers of colors - pear pizazz, pumpkin, and crushed concord then stamped the images from wicked cool into the box then the broom and the little witch from Fangtastic to create the accent element on a separate piece of white cs colored then cut out then added with dimensionals.
Really simple clean card!

Sunday, September 5, 2010

Inspiration Challenge


I need to take a deep breath and go to my peaceful place right now. Last night I got home to have Tyler tell me that Kyle kicked the computer off the table and this morning the screen won't work and my brilliant IT brother thinks that the backlight is blown and my laptop is now toast. I have to take a deep breath and try not to kill my own child.
Relax, chill, it's just a computer! In 20 years I will have forgiven him but for right now I am so mad I am boiling from inside and have to make some cards to keep me calm......
Well, I have been toying with the idea of a cake card made of beautiful SU ribbon and for Saturday's Inspiration challenge they had Elizabeth embellishments and thought I would make it in honor of this card http://www.elizabethsembellishments.com/Wedding-Cake-Kitchen-Towel.html. The basecard is melon. Celebrate everything in melon ink as well-and layers of ribbon sewn down the middle and little bitty flower punched with pearls in the middle. Easy peasy card but I thought pretty. See? I am feeling better already. Who needs a psychiatrist? Not me. a handful of stamping supplies and I am so happy..... I am less mad already!
Hope your day goes better.
Lynda :-(

Friday, September 3, 2010

Makani's chain gang Halloween


Another card Makani made during our little stint was this one- We just LOVE Halloween! funny though- as many cards as I make for Halloween, none of them seem to ever leave my home! She xxxxxxxxxxxxxxxxx
made the base card in lilac, then layered a DSP. She punched the MS halloween fence then cut out all the dillibobbers on top and the bat wings from the bottom to create a clean lined fence ( I thought maybe the guys should be behind the bars but it did not look as good- I am playing with a owl behind bars ideas as well so come back soon to check it out as soon as I get it done! ) She die cut the tag from Cuttleb*g in black and used this awesome white marker to letter it in and then diecut another in orange and colored it in with Cop*cs to layer on the pumpkin.


Stamped the jailbirds in white and colored them in as well before cutting them out and mounting them on the card using dimensionals.


These guys crack me up 'cuz they remind me of my 3 little rascals.

Well, you know what they say- If you obey all the rules, you miss all the fun!
Raise some ruckus this long weekend!
Lynda

Thursday, September 2, 2010

Makani's spider card- embossing plastic packaging


Recycling should be my middle name. I have been one of those fanatical recyclers even cutting out the windows of envelopes to recycle the paper even before recycling was mandatory. Part of it was to save the environment for our future and part of it being frugal- there are such cool envelope liners, beautiful papers in advertisements, wonderful packagings.

Punches and embossing folders are reusable tools that make any paper something special. when I got some new embossing folders, they came with perfect clear plastic covers it would be really cool to emboss it and repurpose it. I mentioned this to Makani on one of our play dates and she embossed the spider web folder. It was too clear so she added some ink to make it pop out, stamped a retired SU background of spiders and diecut a really spooky spider and layered it with crystal effects to add a sheen. dangled a black hemp twine (reetired SU) and put it all together to create this creepy crawly card.


Here is the detail of the spider web. The embossing makes it kind of bow out making it more 3D which is kind of cool as well.


Here is the detail on the spider. This would be really creepy to find this on my wall or bed......Yecch!
Now, imagine this technique using bubble type design embossing folders on acetate like this to create water scene to put fish behind it to make an aquarium or something. I think it would be so COOL! I know you all have zillion clear plastic packaging that you are all tossing into the landfill. take some of it out and use it creatively!
Happy recycling!
Lynda

Wednesday, September 1, 2010

I'm in a Halloween sort of mood


It's not even October but when school starts and weather starts to chill, I start to get in a Halloween sort of mood. How can you help it? There are all sort of wonderful halloween stamps- I guess I go from one stamp holiday to another and there are no real good Labor day or Columbus day stamps!
This is for the SC296 using the unconventional colors for the color challenge 286 using mustard, melon mambo and baja breeze. I even dry embossed the black with the spider web folder but it was too much so I changed it back to the plain black base card. Added a layer of baja stamped in black with the spider web from Wicked Cool set. The mustard piece was stamped with the bats from the same set. I stamped the witch, cat and sentiment from the darling Fangtastic set and colored it in with SU markers and Cop*cs to match some of the challenge colors, then layered it with melon and voila! truly a ten minute card- easy to demo and make lots of if you need to- hardest part is coloring around the stars in her dress! Happy hump day!
Lynda
Lynda