
a simple card- base card is Orchid Oasis with a layer of white cut with Fancy Frames diecut
stamp Ranunculus with old olive for the leaves and orchid oasis for the flowers and color with a little pink in the center of the flowers
stamp Ranunculus with old olive for the leaves and orchid oasis for the flowers and color with a little pink in the center of the flowers


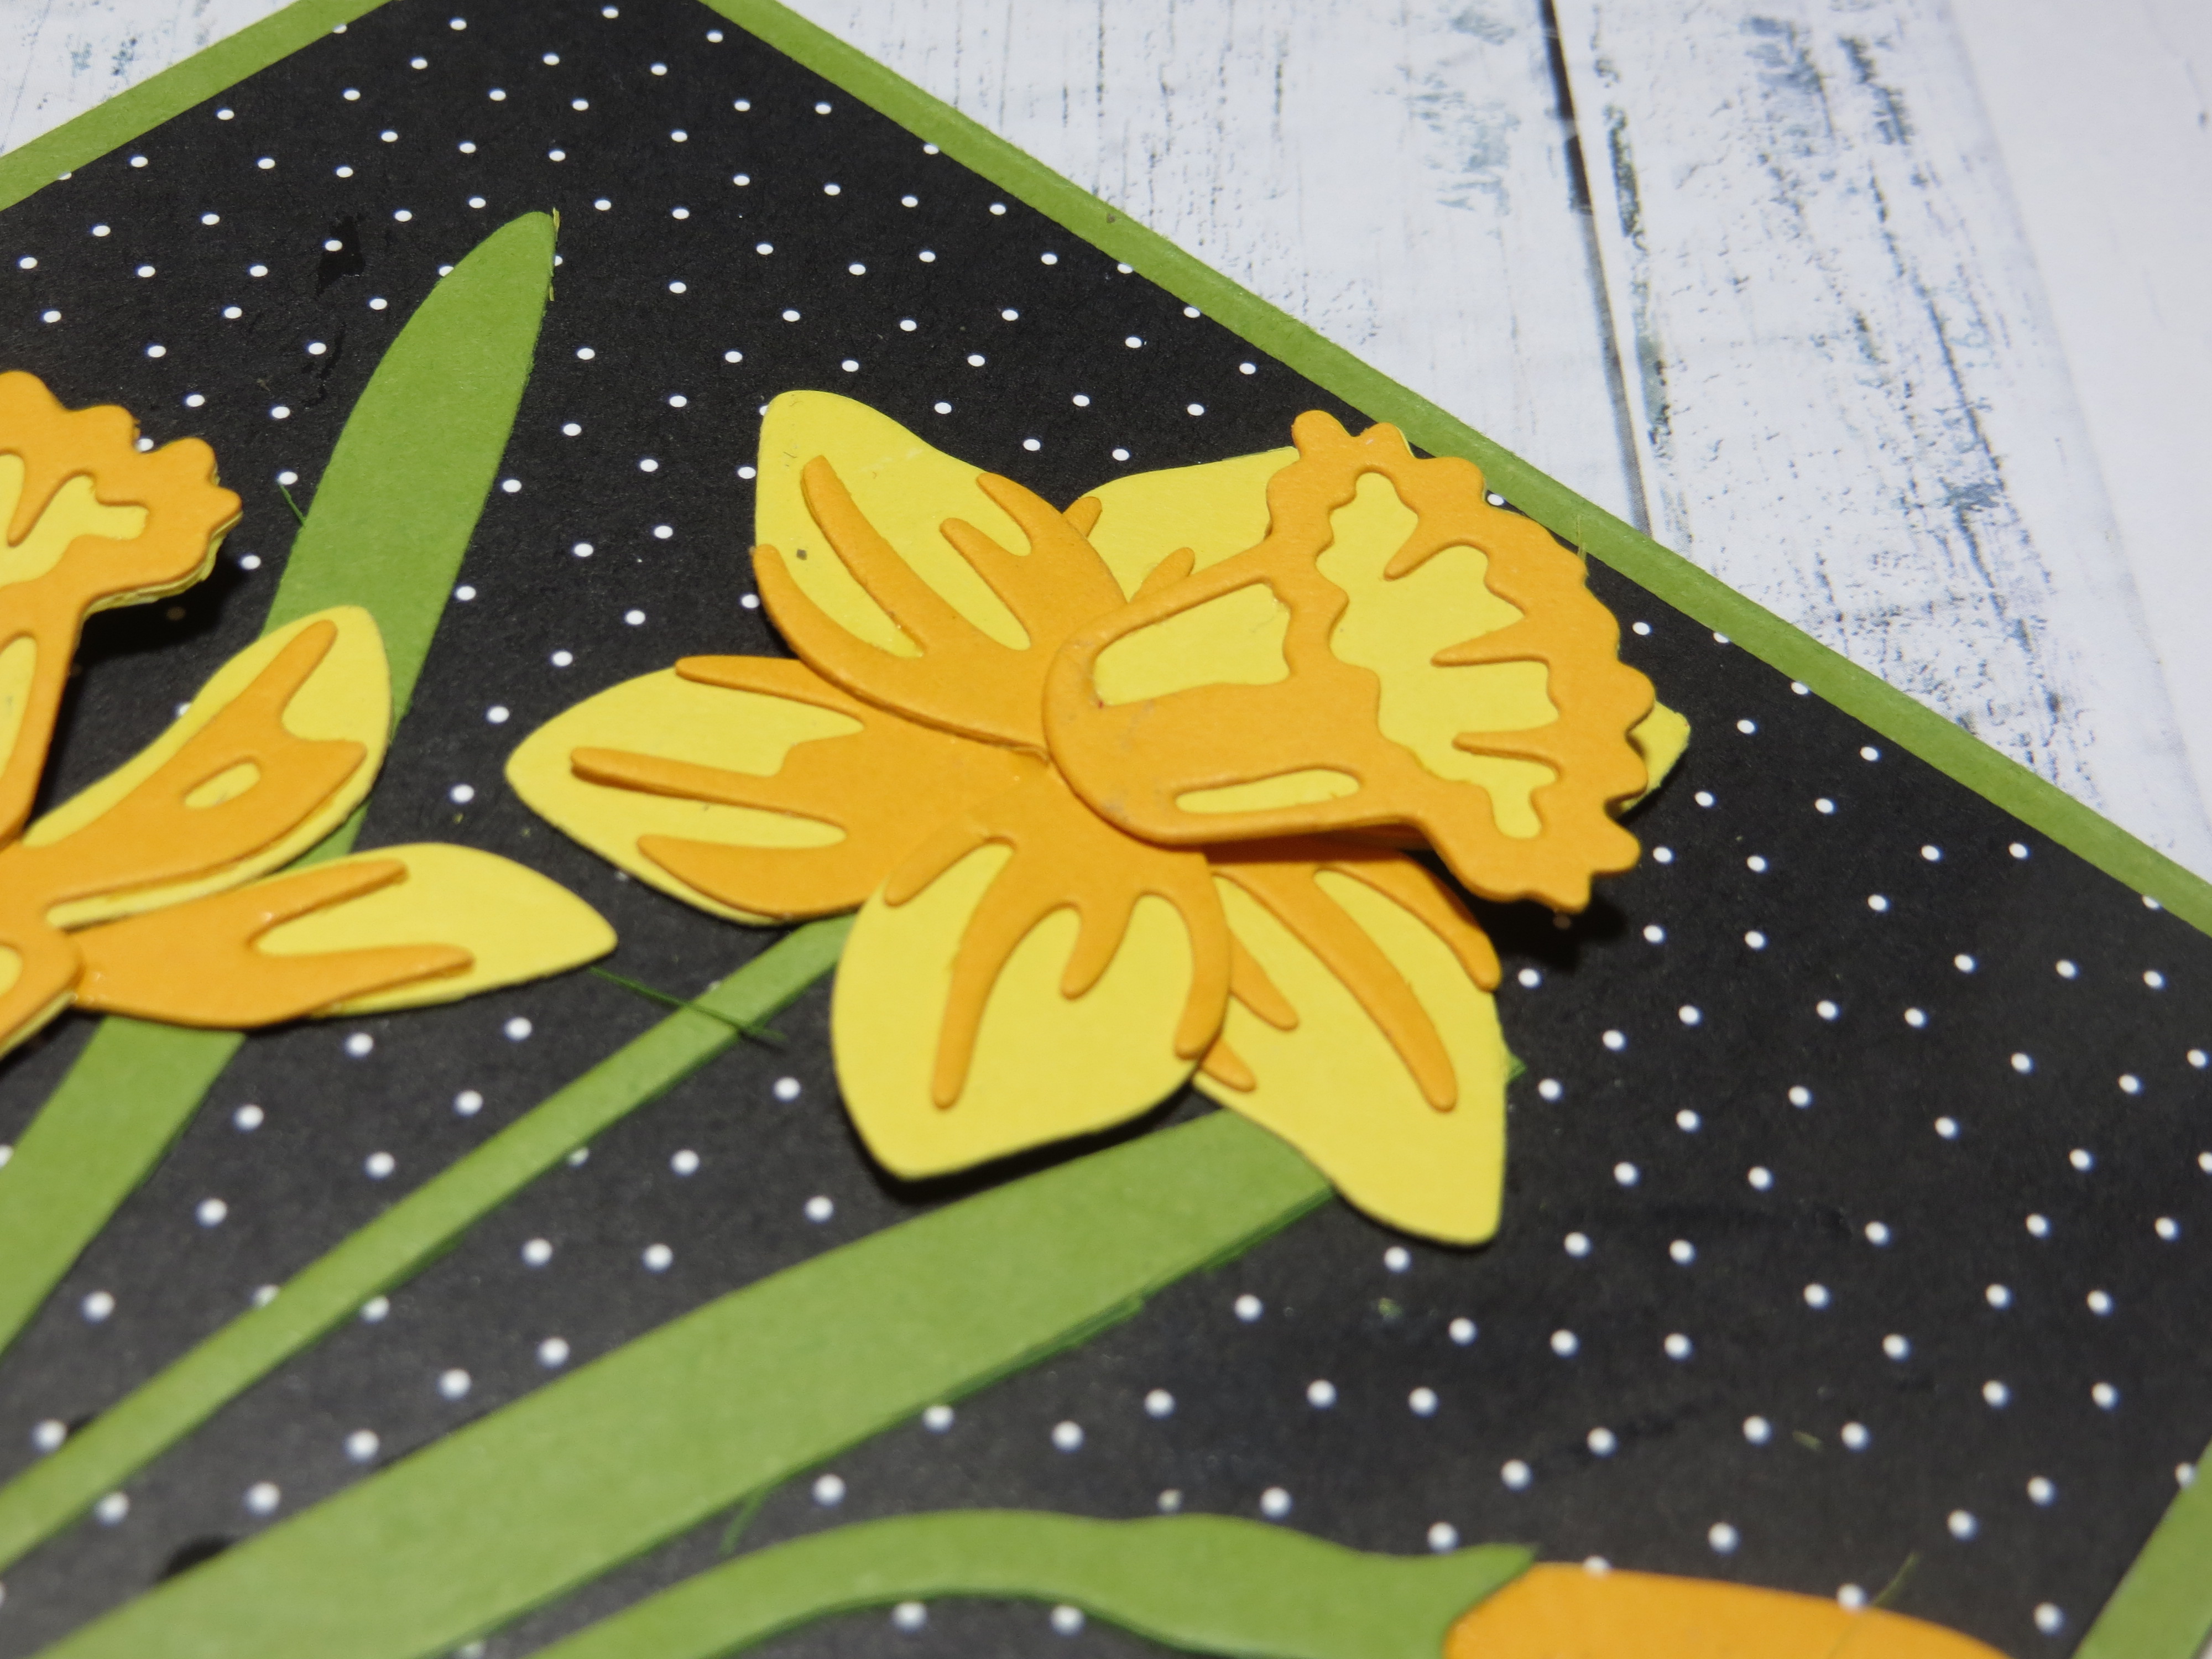
This is the variations I made for my Stampin' with Lynda May 2022. Used the daffodil dies and Nature's Prints die and sentiment from the stampset.
This is the flower diecut hack I use all the time. I did this for the tulip dies and anything that can be cut together from the same color cardstock.
The daffodil dies make one set of 2 flowers and 1 bud so I separated out the base dies and put them together close together and put packing tape on it on the backside so it would cut all the pieces at one time- it saves paper and aggravation since I would normally make all 3 flowers at one time so I only have to diecut it once.

I put all the accent pieces together as well and again put clear packing tape on the backside to keep the dies together so I can diecut all the accent pieces at one time- as shown on the left.

I did the same for the stems- taped the stem pieces together using clear packing tape on the back- make sure there is no overlap -so you need a tiny gap between the die pieces- you cut out all the stems at the same time saving time and paper. Funny thing about the stems is that you need to keep the stem dies close aligned and when you die cut it you get these long skinny stem like pieces in between that I use for other stems as well-so more pieces from the same diecut!- I used some of the pieces to put a stem on one of the flowers -see picture left.


take a cardstock- here I used Early Expresso.
cut off 1" from the 11 inch side to make a 8 1/2 x 10 inch cardstock piece- save this 1" piece to use for the belly band.
Score the cardstock with 11' horizontal at
2", 3 1/2", 6 1/2 " and 8"
make a mark on the 7 " at the very top and bottom of the 7" line to mark the center of the diagonal mark you will need to make.
turn 90 degrees with 8 1/2 inch horizontal and score at
1 1/2" and 7"
Cut out the diagonal hatched marks- (the 4 corners but make sure you keep the 1/2 inch tabs on either side of the center top and bottom panels since you will need them to tape them to make the box pop)
use the 7" mark to make the score the diagonal marks as shown on the top and bottom center panels.
I would recommend that you decorate the center of the box panel before you put the box together
I stamped the trees from Campology stamp set. I stamped the tent on a scrap piece of white cardstock and cut it out. I also took the happy Father's day and stamped it on the smallest of the Tailor made tags. You could stick a gift card and pop it up if you wanted and it would be super cool.
to make the pop out elements:
- to pop out 1/4 inches- take a 1/2' x 3 inches and score at 1" 1 1/4", 2 1/4' then 2 1/2 inch and put the ends together to make a rectangle piece you can use as a mechanism for a popout if you wish.
- to pop out 1/2 inches -if you want it to pop out more you can take the 1/2"x 3 1/2" and score at 1", 1 1/2", 2 1/2" and 3" to make it pop 1/2" if you want more dimension.
put tape on the bottom and the side you want to stick to side of the box - make sure it does not get in the way of the box closure though.
To put the box together, fold the top down then fol the angles up then put the tabs down and put the tape on the tabs facing you and when you close the card it will form the box.
same for the bottom center panel, fold it up, and then fold down the diagonals, then fold the tabs up then put tape the tab facing you and fold over the front panels to make the box.
decorate the front panels with DSP 5 1/4 tall x 3 1/2 wide, cut in half to decorate the left and right side of the front panel. put the belly band on with the seam in the front and put some decorative element to hide the seam. Here I put the piece from He's all that diecut with the scalloped circle die that is really sweet


Take a piece of white cardstock and emboss with Fern embossing folder (hard to see I know but it is there) . Take a piece of white CS and real red CS and diecut using circle cutter and layer as shown. Use blender brush to add some balmy blue to the white cardstock circle to make the image pop a little

add to the circle using dimensionals to make it pop a bit. a simple but easy simple stamped card.
the set comes with 4 different images so swap it out and it will look just as good.