Tuesday, October 24, 2023

Bag of Bones and Glow in the Dark paper


I love this Glow in the dark paper - I used it for the big giant moon and put some bats in front of it and if you put it under a bright light for a minute then go to the dark room it glows eerily- super fun!

Base card is basic black with a layer of Starry Sky cardstock embossed with timeworn type embossing folder. 

stamp the dog, cat and skeleton onto black cardstock using Versamark pad and heat emboss using white embossing powder then diecut out,

stamp the sentiment with versamark and heat emboss again using white embossing powder onto Pebbled path cardstock and diecut out using the tomb and grass die.

Happy Halloween!


Saturday, October 21, 2023

Reach for the Stars card variations

I have been a fan of Star Trek and many outer space fantasy for a long time so when I saw this set I thought it would be cool to make sure cards with it and the designer paper - is really out of this world! 
I took a basic black basecard and put a piece of DSP on it that I embossed the sentiment in white. then circle diecut one of the planets - (there is sheet with the entire page of planets for you to diecut out!) took a piece of bakers twince and wrapped it around and taped in to the back of the DSP before adhering it and put the astronaut popped up on ti - I did not want him floating in space without some attachment to the ship that is off to the side right?

I saw a card with the circular moving rocket and I had to try it. Basic Black basecard with the circles diecut in the center- Heat embossed the sentiment on the DSP in white. 

I popped up the center circle with dimensionals and the next ring flat onto the basecard- I didn't want a black-hole !  and the rest of the DSP popped up- but make sure you stay away from the ring so the penny spinner has room to move around.  I used one of the planets on the DSP that was going off the page and I did the same on this card - no point in wasting a whole planet image, right?


Stampin' Up has a background stamp- It's in the stars- and I tried it as a background using a variety of embossing powders, white was too stark, silver too sparkly but the gold was subtle enough to not compete with the ship.  The label is from Something Fancy dieset
I love this sentiment. so even if you don't have the DSP you can still make a cool card...
enjoy.


Saturday, October 14, 2023

flip flap card


You know you see something somewhere and it was such a great idea and then you can't find the source when you try to look for it? that was with this card- I apologize profusely to whoever came up with this idea. I wrote down the dimensions so I could try it out then for the life of me cannot find the source- it was on youtube one night was up watching - 
I have made similar version of it before from instructions on Splitcoast Stampers but this was more modern looking - mechanism instruction here: Flip Flap Card Tutorial - Splitcoaststampers    

My smart sister thought it should have said you are so - "twisted" or "Knotty" since I put a pretzel image in the front - I just liked the pretzel image but she is right - I should have put the soda bottle image or ice cream to say Super Cool. 
you can put the gift card on the panel if you wish or you can put another messge instead. 


Saturday, October 7, 2023

Pick of the Patch and Abundant Beauty Stencil for Embossing


How fun is this card? When I saw the new holiday catalog this was on the first order. Love the little crow.
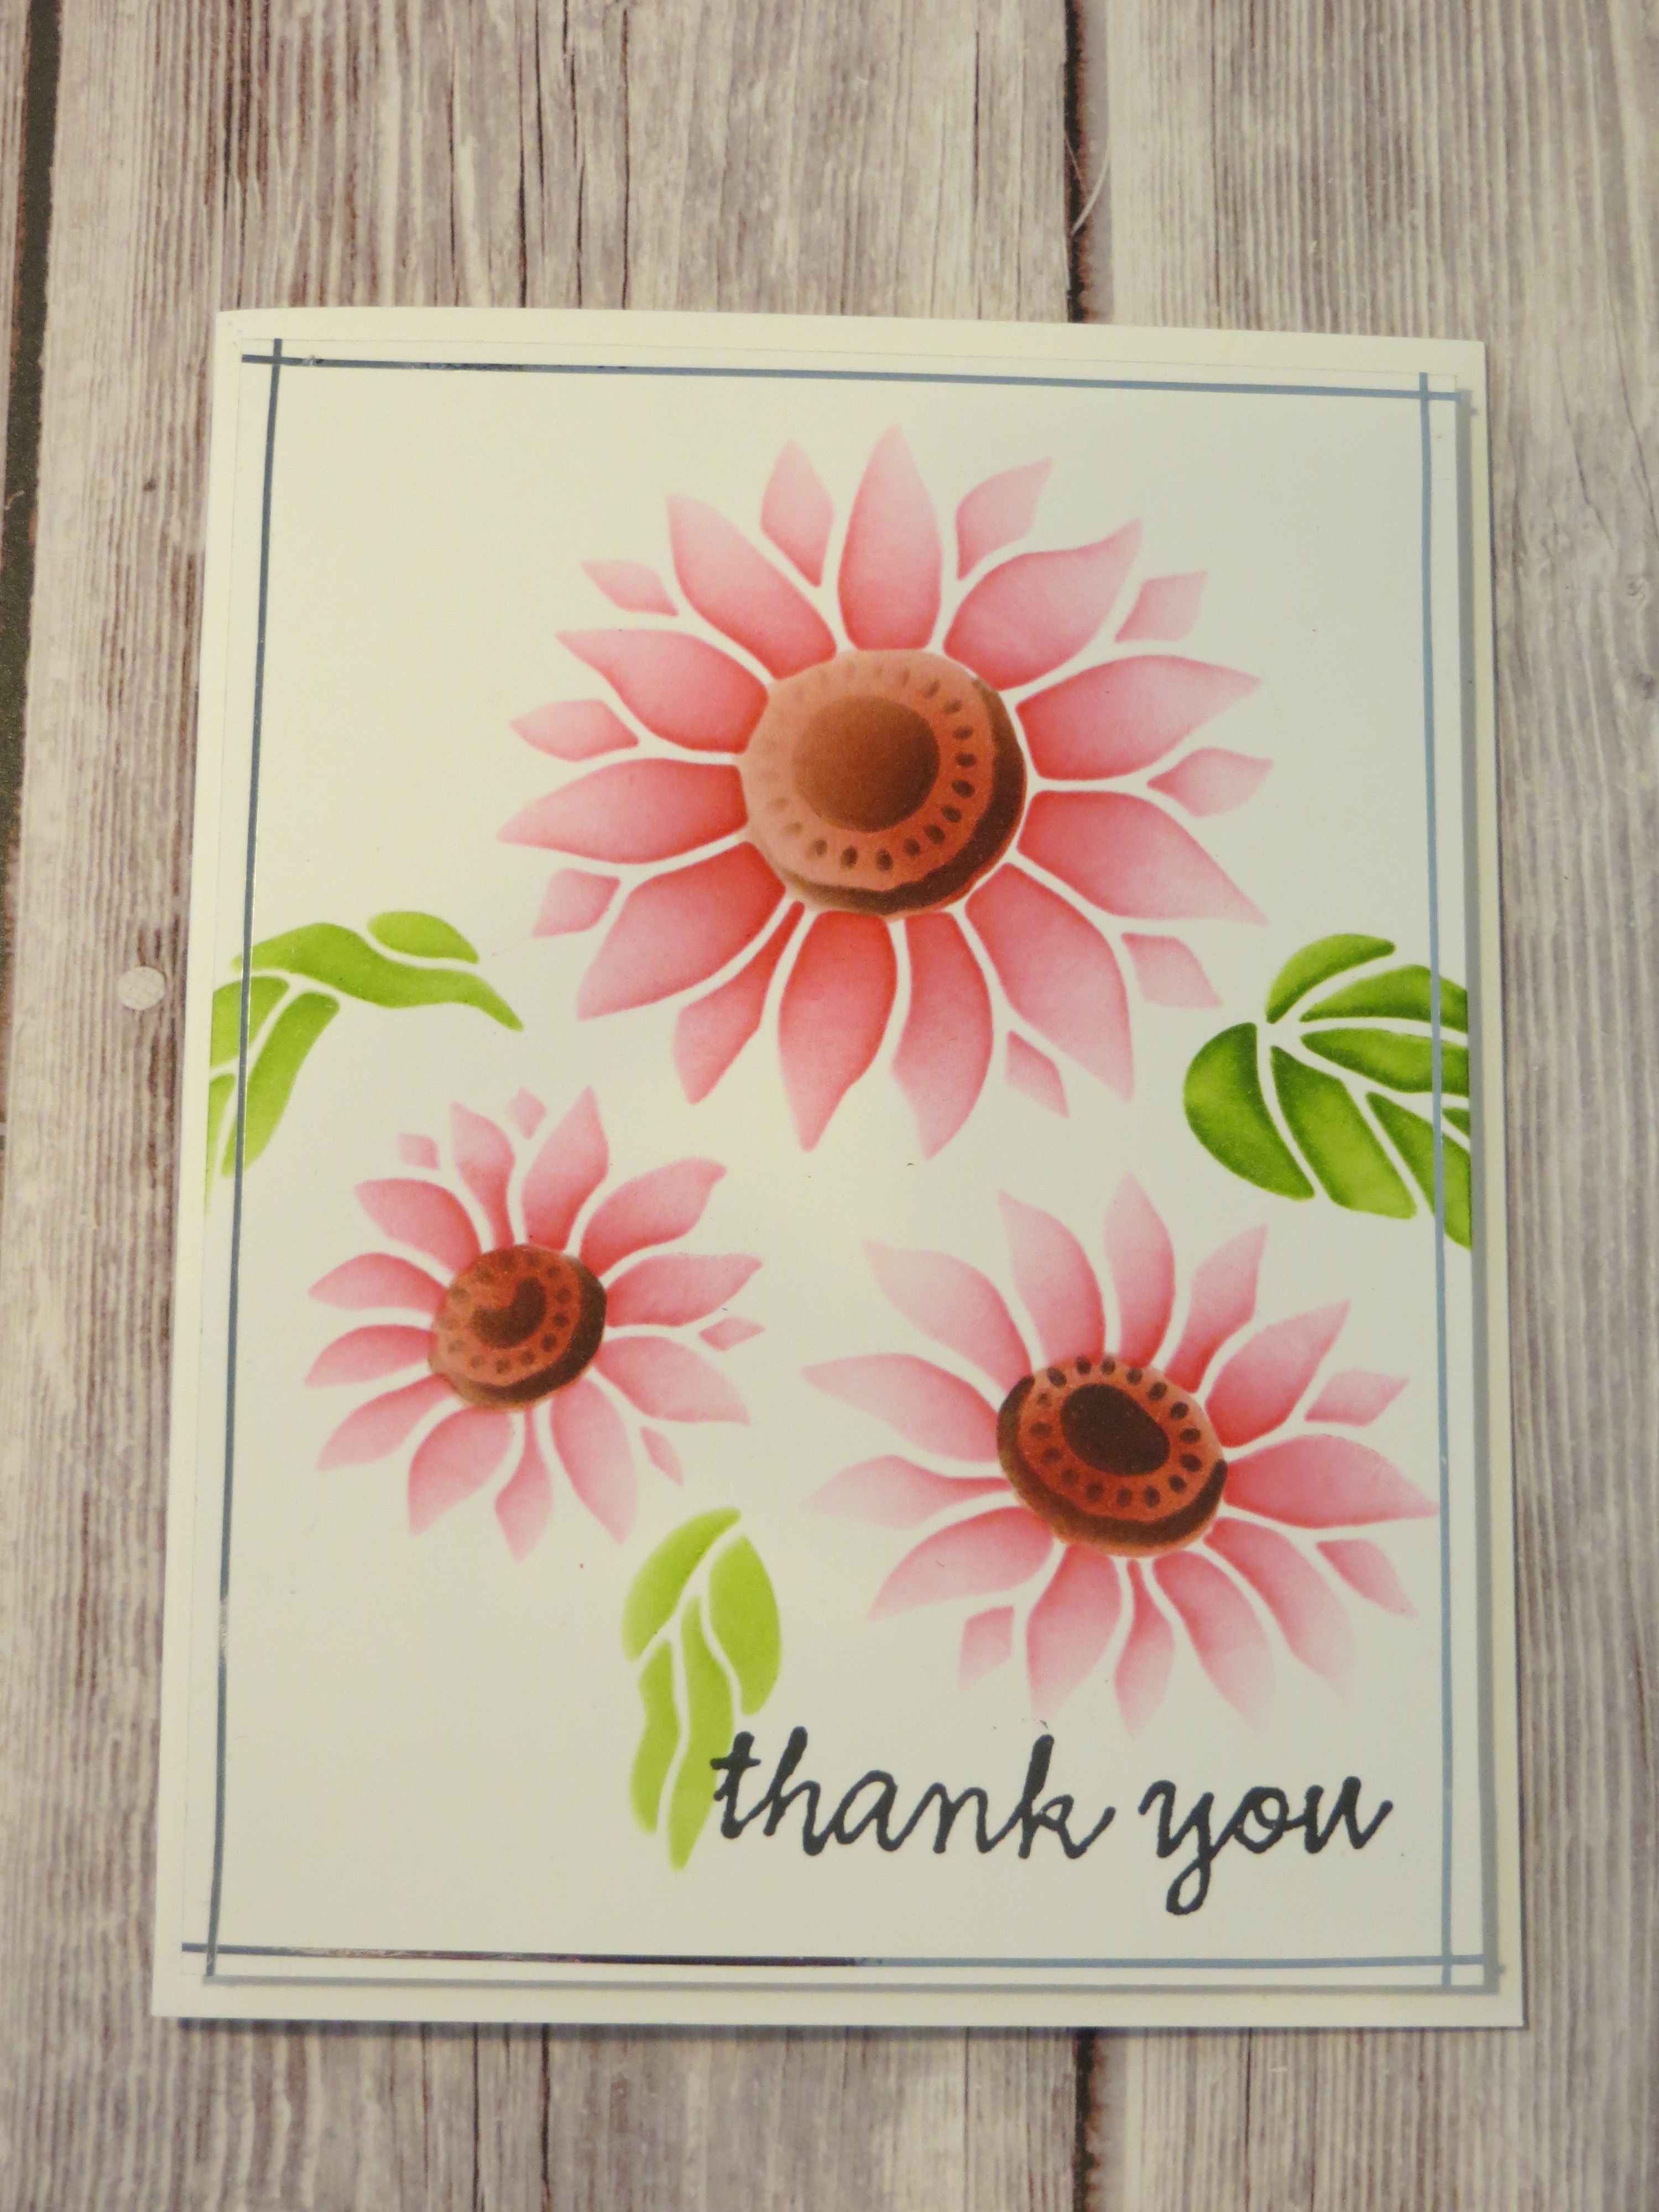
Base card is Calypso Coral with a layer of Old Olive and basic black embossed with the Abundant beauty stencil. I stamped the sentiment after since I changed my mind about stamping it on the side of the white panel but it still worked fine thankfully.
stamp the 3 pumpkins with calypso coral on a scrap piece of white cardstock and the leaves in Old Olive- punch out the leaf, stem and the 2 pumpkins using the Pick of the patch punch. fussy cut the last small pumkin- I stamped the crow on it before i cut it out so it was just one piece.  stamp the vines and cut it out and you are read to put it together.
I had actually stamped the pumpkins on the white cardstock so I could figure out where I wanted to place the punched out pieces but I made this one without doing any punching at all. - I used masking to stamp the stem and the leaves and vines where I wanted it. so more of a one layer card- sorta.  this is how I visualized the card when I was first coming up with the idea.
This is a total case from Dena Rekow- she was doing unconventional colors and I loved her card- I did tweak it with a strip of DSP on the left but it is really straight from her. 
Calypso coral, Fresh Freesia, Petal Pink and pumpkin Pie- who would have imagined a purple pumpkin!

This is what the embossed cardstock look like.  I used the embossing rubber in my diecutting machine with the stencil to make the embossed cardstock.  I did use a little white  pigment pad to rub my fingers over the raised area in the black leaves embossed to make it pop a little- shown below.  The current stampin' Cut and Emboss machine does not come with the rubber embossing mat but you can buy it on line- spellbinders have a 2 pack for way under $10 

This was the houndstooth pattern but someone suggested it looks like bats and I have to agree!
There are multiple stencils: houndstooth, autumn leaves, snowflakes as well as the multiple layering stencils for the flowers so the stencil set is definitely a bargain.
 

Tuesday, October 3, 2023

Abundant Beauty Stencil


This is the first flower stencil Stampin Up has done and it is really gorgeous. It would be super fun if it had matching dies with it but it wasn't too hard to cut out - although with all the matching dies now scissor challenged person like me have gotten a bit lazy. I did cheat and stenciled the right side middle flower so didn't have to cut that one out! The sentiment is from Season of Chic set - all the sentiments in that set is so useful- I've used it so many times.

This was my practice stenciling using the stencil as is.

It was so easy using the blender brush from the center out to create that gradation. Just Lovely.


The center of the flower was with Copper Clay and the outline in Early Expresso.  It was super easy.


I put in some silver metal strip adhesives (normally used for nail art- they were super cheap and adds such a sparkle I love using it although it is a bit of a pain to apply as it is really flimsy and hard to keep straight.