Saturday, April 14, 2012

Faux Crocodile Petite Purses

I have been really happy playing with the summer smooches suite that I got especially this little Petite Purse Bigshot Die. I mean- what's not to love?
Grant you I have only boys and no one in my whole family seems to share this little joy of mine but look at it! Is it not the most stinking cutest thing you've ever seen? I guess I am in my little happy bubble and it just makes me smile every time I look at it- so I look at it A LOT!

Anyhow, a while back one of my friend demonstrator had shown me how to do a faux crocodile technique and I thought it would be PERFECT for this and I think it works!

I used chocolate chip CS on this wone with gold brads and punched 5/8 inch circles and embossed those too and added little gold brads through the bottom to make this one- bit of a pain in the butt to add the brads on the bottom and to versamark this one (It words best to use the versamarker to ink it up after to glue the piece on the corner otherwise the embossed circle gets all cracked and ugly. Certainly not a demo or make and take project!)
This is one using the Pacific Point CS. I decked it out with some silver chain that my friend Margery gave me a while back as well as the Ice circle brads (retired SU). It is so faux Chanel!
This is the back of the purse.


This works with any color cardstock so use whatever color you have on hand. This is using Cherry Cobbler and gold brads.
It is really easy technique to master. This is how I did it.
Diecut your Petite Purse in any colorstock of your choice.


Versamark the area you want to have the faux crocodile. You could use the versamark pen or dab the area on the pad like this if it is a big area.
This is what it looks like.
Put clear embossing powder over the versamarked area.
Scratch a design like a crocodile- free form, using a scoring tool, a toothpick or a old dried up pen. Toss the clumped embossing powder that forms on top - do not put it back into the clean powder. Heat set it as shown.
It words for all color cardstock beautifully so try it out!
Lynda

Thursday, April 12, 2012

Bright Blossom CASE


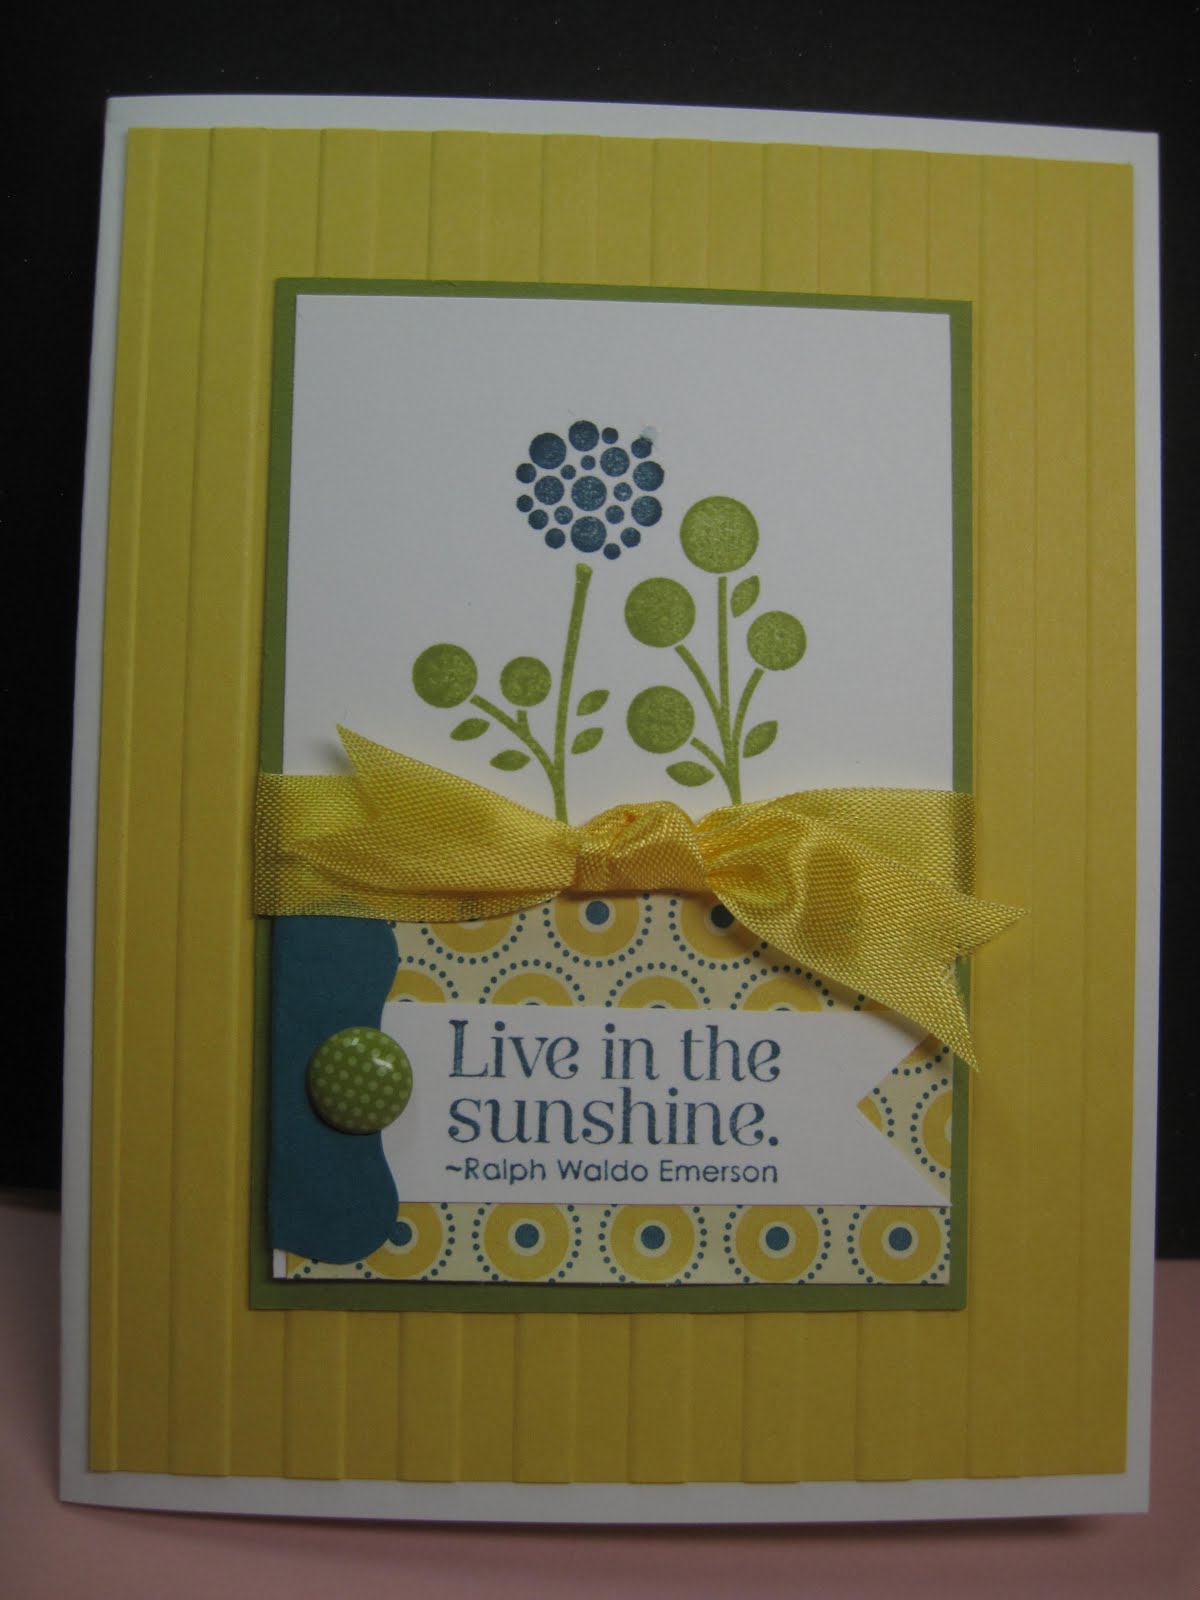
I saw this card by Connie Tumm and had to Totally CASE it. Changed the way the ribbon was tied and that was it. Love the color combo!
In case you need the instructions: Take a Whisper White base card. Layer a Daffodil CS embossed with stripes. Stamp leaves and branch in lucky limeade, stamp the flower ball in Island Indigo. Stamp the sentiment from Pursuit of Happiness (one of my favorite sentiment sets also) in Indigo on white CS, Square punch the corner at an angle to make a banner. layer it over a 2 1/2 "wide by 1 1/2 "tall piece of DSP, punch a curly label in Indigo, and wrap around the left side. punch a hole and insert a Designer printed brad - any of the colors work. Layer it over the white CS piece then onto a Lucky limeade piece. Wrap the new Daffodil seam binding ribbon- perfect for spring! Lovely- Thank you Connie for sharing!

Wednesday, April 11, 2012

Bright Blossom variations


Another play on the Bright Blossom set. I wanted to find a different way to play with the sets to create a border. The circles are about 1/2 in diameter so I used a ruler as a guide- about 3/4 in in from the left edge to stamp the circles in a row using Poppy Parade. Then I stamped just the vase part of the rectangular vase image along the left. I used the stamp lined up using the Perfectly Placed Guides on my acrylic blocks and it was pretty easy (I am not that compulsive so I eye-balled it mostly).
Stamp the vase and the branches three times as shown in Lucky Limeade and sentiment from Pursuit of Happiness in Poppy.
Punch out the flowers from Poppy CS with the Itty Bitty shapes punch pack and place a tiny pearl jewel in the center of each.
Have fun playing with your stamps today!
Lynda

Tuesday, April 10, 2012

Bright Blossoms Border


Another play to create an interesting border using the Bright Blossoms stampset. Using Lucky Limeade and Poppy Parade markers ink and stamp as shown. Tie Everyday Enchantment 1/8 in organdy ribbon (sale-a-bration) in Calypso Coral. Using the Labels Framelit, diecut a scrap piece of paper using the size desired. Sponge in Pool Party to create a frame. Stamp the sentiment from Pursuit of Happiness in Lucky Limeade. Hardest part is making the border with markers but even that did not take long. Enjoy!

Monday, April 9, 2012

Bright Blossom Short & Sweet


I was trying to find a way to use a sentiment from the Short and sweet set and use it to continue the line and create a frame. I stamped the image, then stamped the sentiment below and tried to draw the frame around it using a ruler and the Concord Crush marker. I was trying to do a one layer card but it sort of went off center so I cut it out and then layered it. I embossed the Concord crush CS with the heart Adorning accents EF and that was layered over the Lucky Limeade base cardstock.
Pretty simple.

Saturday, April 7, 2012

Bright Blossom CAS


Gosh I am having so much fun playing around with this set- I was playing with the idea of creating a frame around the image using different techniques and I really like this one. Diecut a scrap piece of cardstock wtih the Labels collection Framelit and use the negative space to sponge in Pool party from the edge to create a soft frame. Stamp the vase and leaves using Concord crush and Lucky limeade then the flower in Poppy parade. Stamp the sentiment from Pursuit of Happiness in Concord crush and I can tell you this is a two minute one layer card- but I love it!

Thursday, April 5, 2012

CAS Bright Blossom


One of my most memorable challenge in my short creative life was one where my upline Tami had a bunch of us sit in groups and she gave us a picture, couple of sheets of paper and told us to make a scrapbook page in 15 minutes. You should have the seen the amazing pages the groups made with nothing but that. I was reading a splitcoast posting about 'cafeteria syndrome' where we have so many choices of do-dads that we become paralyzed from the overwhelming choices. So I have been challenging myself to come up with easy make and take cards using the new Bright Blossoms set. I almost feel more free. I have some more ideas so stay posted!
This was made using a mask on the left side. I suggest stamping the stems for the flower first in lucky limeade, stamp the flowers in poppy parade then fill in with the all green stems. Tie a little vintage ribbon from sale-a-bration and sentiment and another easy peasy card.
Lynda

Tuesday, April 3, 2012

Bright Blossoms abound


I stopped browsing for a while- I just didn't have time and then when I wanted to make a card, that card image stuck in my head and stifled my own imagination from blossoming. I also got upset when people cased my card and never credited me. Better for my blood pressure if I don't know about it. Let them fester in their own guilt and I will live happily in my ignorance. I always try- the critical word her is try- to make a card for each customer who places an order from me but with my lack of time, it has to be easy to make. I love simple one layer card and this was it. Using the new Bright blossoms image, stamp the stems in lucky limeade and the flower balls in calypso coral along the bottom of the card. Stamp the sentiment in Concord Crush, then punch a 1/8 hole about midway below the sentiment. Put the ribbon through the cardfront to the back, wrap it around the side to the front and around the back and through the same hole again. The ends should straddle the ribbon. Tie it make a bow that stays put! Love this technique! I then made a matching money envelope using same stamping style. Tied a limeade Cardstock strip, then white and then tied the ribbon around that. Easy!
Enjoy!
Lynda

Monday, April 2, 2012

Easy one layer card


You need a quickie card? I made 5 of these in 30 minutes- that's PDQ once you make a flower cut out to allow for layering.

Stamp the flowers on a scrap paper and cut it out roughly.
Take a base whisper white CS.
stamp the flowers and sentiment in black using stazon or memento black. Cover the flower with the scrap piece to cover then stamp the border twice in black as well. Color the image with pink pirouette, pretty in pink and regal rose and leaves with pear pizazz, add the little pearls and voila. I changed the sentiments for different occasions. Perfectly Penned is a nice versatile set with a very artistic font that dresses a lot of things up.

Lynda

Sunday, April 1, 2012

"My time has not been my own."

This is what Anne Elliot, the heroine of Jane Austen's 'Persuation' says to a friend to explain her long absence.

This is how I have been feeling for so long- life circling around 3 kids, school, swim, ski, piano lessons, dealing with the whinings around having to do homework every night after a full day at work. It is totally exhausting! So I let my blog and even my stamping falter.

Then my grandmother- who was almost 100 - God bless her soul- passed away and the whole clan came together in Los Angeles. It was the first time I had seen all three of my siblings in one room in almost a decade.

When I asked my older brother Pete- who I think is one of the smartest and nicest guys I have ever met- if there is something I could do for him, he asked for some nice gift envelopes in which to gift money or a check.

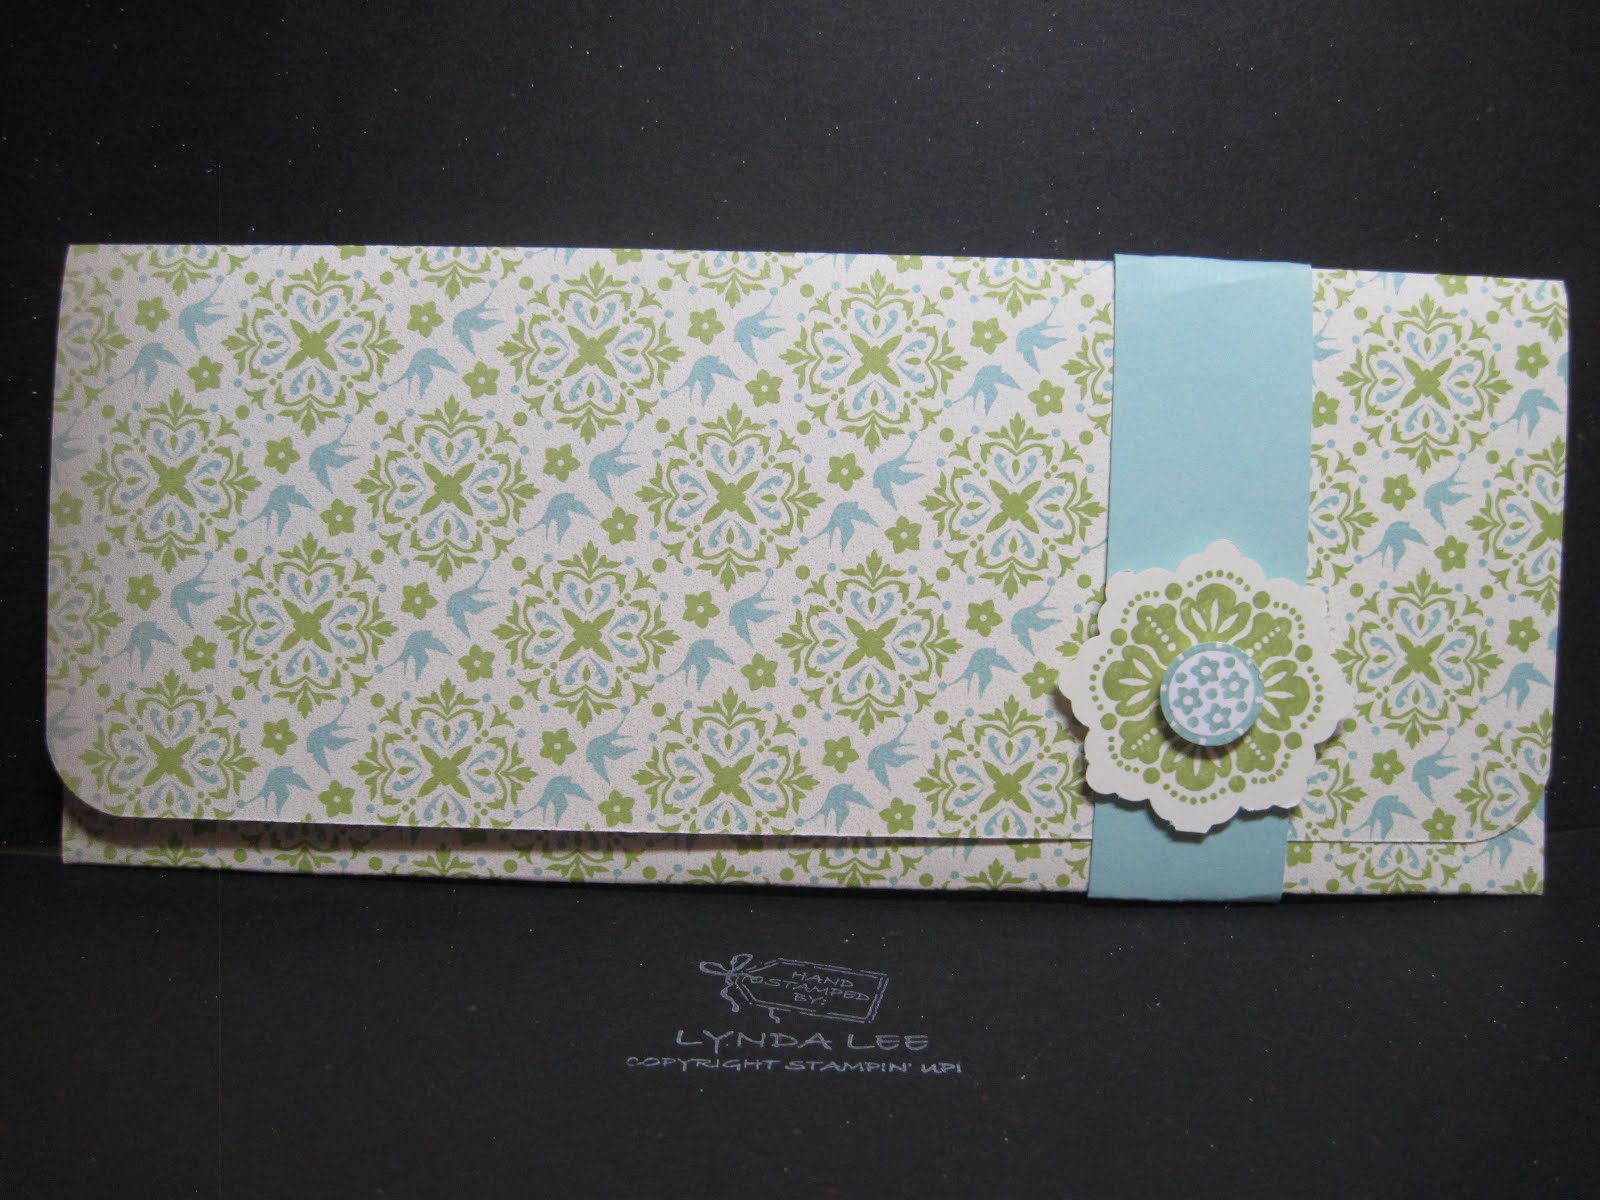
So I've been dreaming up a bunch of ideas to do this for him. With Sale-a-bration almost over and since I am totally in love with this paper I wanted to make a whole pack of pretty gift envies for him.


It's a pretty simple design. Take a 9x 7 1/2 inch paper- DSP is preferred. With the 9 inch side across the top, score down at 2 7/8 inches and 6 inch. punch out a half circle from the 3 inch side (on the right in the picture) and corner round the left side. Use sticky tape to adhere the right side to the center panel.
Create a band using a contrasting CS
You can only get one out of a 8 1/2 x 11 CS or 12x12 CS but with plenty of scraps left over.
I stamped the image from Fresh Vintage stamp set from Sale-a-bration ( isn't it delicious that it lines up with the triple layer doily punch so perfectly? ) twice in 2 different colors to coordinate- punched the small circle using 1/2 inch circle punch and layered both using dimensionals on the band.
My plan? is to use up as much of my hoarded (gasp!) DSP as I can. I think he would appreciate some neutral and manly papers so I am making a bunch.
If you are giving a large denomination of cash and want to show it off, you can punch/diecut a large oval in the center of the inside flap to show off the picture instead of the little semi-circle too, BTW.
Lynda