Thursday, April 26, 2012

Zebra Petite Purse


You can find inspiration in lots of different places and I saw this bag in an ad for Nordstrom for this zebra bag I went nuts.  Looked for a zebra paper (you would think with the years of DPS I have amassed over the years there would be a zebra print I could use but NO! The ones I had had too big a print and would not work.)  I had an old Ellison texture plate and tried to ink it up with black to create the texture but that didn't work either- it just made a huge mess on my silicone rubber that I used to layer the template.  So I thunk and thunk and thunk... and this is how I did it!    

Diecut the Petite Purse with whisper white CS.  Take the texture plate and ink it up with Versamark pad all over. 
Put the whole diecut onto the texture plate (the positive, negative and the handle) and emboss the whole thing making sure the edges are all in the plate (it does fit but barely!) Emboss using black embossing powder (if you are not using SU then make sure it is a detail embossing powder). Try to be careful handling it because you don't want to rub the powder off.  Heat emboss  and this is what you get.  I used the white gel pen to outline the edges and it really makes it pop.  Added a little white brad for the closure.  I really racked my brain for this one trying to figure out how to do it.  I am thinking I should work on cards using the retired sets for the next few weeks....

Lynda


This is the texture plate I used to create the texture on this project. (not SU).


Tuesday, April 24, 2012

Another Crocodile Petite Purse

I was cleaning out the house and found a bunch of shopping magazines and I was perusing before I recycled the magazine and this page from Loehmann's caught my eye. Cool texture and I liked how the purse was edged with another layer of crocodaile and stitching.  I thought I could do that!  and this is my version.
Diecut 2 Petite purses from the crumbcake CS.  Ran one of them through the Cuttlebug EF then sponged it using mustard, crumbcake and soft suede to add some texture then took the second purse and cut the edges about 1/4 inch wide as shown.  I sponged that too. (When I tried to use the crocodile folder on that it did not have enough contrast and without the embossing, it looked better I thought). Added the stitching with the pen part of the chocolate ship stampin write marker.  Added the brad  (retired SU) and the handls with the mini brad and I thought pretty darn close, eh?

I am having such a ball with this die, can you tell?  Enjoy my madness!  Lynda

Monday, April 23, 2012

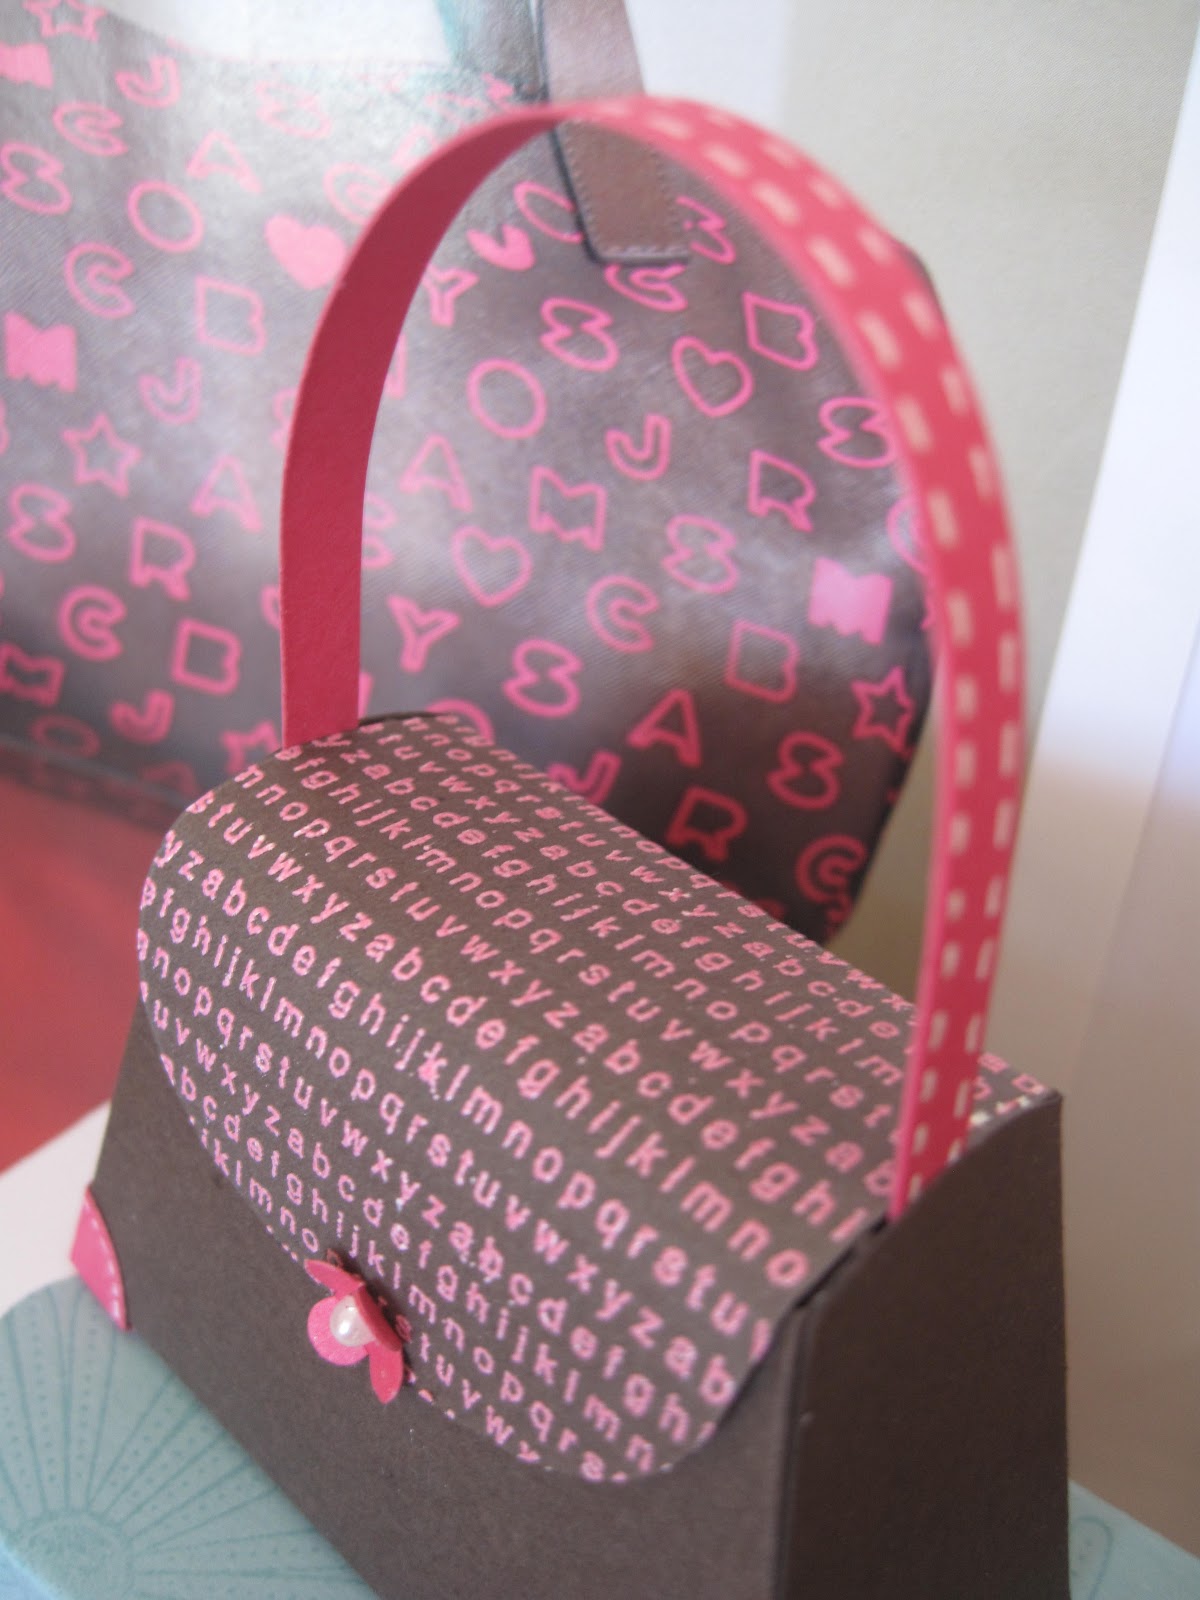
Faux Louie Vitton Purse in melon


 I saw an ad in a Nordstroms catalogue for this chocolate purse with little symbols printed all over it and I thought it would translate well into our Petite Purse using the Melon Mambo embossing powder.  I wanted something small so used A to Z (soon to retire) stamp with the versamark pad and embossed it  with the embossing powder. Added the handle and corners and central flower with melon mambo CS.
I added s little line of stitching  with the white gel pen and a little pearl in the center of the itty bitty flower and it is a sweet little purse that I would not mind carrying this around myself!

Enjoy!

Lynda

Sunday, April 22, 2012

Petite Purse Upside down Picnic Basket

I must be crazy- I have been dreaming about this all night- I flipped the Petite Purse down upside down and and was dreaming how I was going to make this picnic basket.  It is a bit unorthodox but I thought it worked well.  You need 2 Petite Purses cut out from Crumbcake CS.  Emboss one of the purses with the square lattice EF (you do need to run it through twice to fit the whole purse.  I used a sponge and some Soft Suede ink with a sponge to add soime dimenstion and tesxture. Cut down the rounded edge from the side and cut apart the part that would be normally the bottom to make the lid.  Score what would have been the top at 1inch from the edge to make a crisp edge and glue the lid to the inside.
I made reinforcing strips as you would see on real baskets with a 1/4 inch strips and a 1/8 inch strip on top of that. added little dots like little nails you would find on real baskets using chocolate chip stampin write markers and sponged the whole thing to add some distress.  I made the closure using the natural Hemp twine and used linen thread to tie a little piece of toothpick that I cut and sponged with Soft suede to match (like a toggle).  Then I used the mini brads to add the handles- again sponged with soft suede.  The slit for the opening I put to the back and with the texture hard to see that it is even there...
The top of the basket was also covered with strips of 1/4 inch and then 1/8 strips on top and then sponged again.  I thought it would be fun to add wine bottle and glasses, and maybe the bread from Studio Sketches to add some realism but didn't have time... but wouldn't it be fun?

Enjoy


Saturday, April 21, 2012

Just Believe SCS IC333

Today's inspiration challenge IC333 from Splitcoast was awebsite called BHLDN and this simple napkin image http://www.bhldn.com/explore_the-look-party-print-novelty_the-look-decor/undersea-cocktail-napkins-12  stuck with me so I used it to inspire my card for today.
Take Whisper white CS and emboss with the houndstooth folder.  Take another piece of whisper white stamp Just Believe flowers tiwce and sentiment as shown in Tangerine Tango. Edge the layer with the ink from the paper direct to paper and tie with calypso coral twine. Layer with dimensionals to raise it up a bit and a really simple easy to demo card. 

Lynda

Thursday, April 19, 2012

Totally A-mazing


I think this set is so cool- I have been collecting stamps of all kinds for years now and I have never really seen a set like this one before so I had to have it of course. I bought a whole bunch of the mazes that match the stamp so perfectly and at $2.50 for 4 it is cheap! for such a cool toy! So, for my last stamping party I brought it all out and had a ball with it. This was the project. Base card is pool party with a piece of Lucky Limeade embossed with the adorning accents EF. Then layer some DSP- this one from Sweet Shop which has raised polka dots and heart- too cool! I stamped the maze in Wisteria and the heart in red and then punched it out with the 2 1/2 inch circle punch that fits the maze perfectly (do you even doubt that there are higher powers at work here?) Remove the backing to the maze (careful with the little metal balls) and replace it with the stamped version. I used glue dots on the 4 corners that hold the paper in to secure the maze to the background.
Take a 3 inch piece of wisteria ribbon and poke a hole in it and the limeade CS and put the brad throught it( Jelly Bean Brad from the Occasion Mini ).
Stamp the sentiment using Wisteria ink and punch out with modern label punch and adhere using dimensionals.
A little tricky but a cute card for maybe one of my boys!
Reminder to self: buy more mazes in case it does not make it into the main catalogue next year!
Wishing you an a-maze-ing day!
Lynda

Wednesday, April 18, 2012

A happy birthday Popup


I got a card like this for a swap at Leadership in January and didn't think much of it until I opened it up and thought WOW! Cool little popup- The card did not have anything in it to identify whose card it was- I took it apart to figure out how it worked and I wrote it up for whoever wants to make it- If you know whose idea this is, PLEASE let me know so I can give credit to the cardmaker.... this is so clever!

Take a cardstock 4 1/4x 11 and score it 2 1/4, then at 7 1/2 inches along the long side. scallop punch the short side on the left and emboss with square lattice folder or some other folder of your choice up to the first score line as shown.
Take a piece of 1 1/2x 4 3/4 strip of CS and score it at 3/4 inches.
Take a triple flower punch and punch 3 different colors to make the bows. Attach one for the center bow centering it on the score line using sticky strip on the short scored side only as shown and then again on top of that. The right side should not go over the score line on the right (see first picture). This is the pop-up mechanism.
It should look like this when the fold is open.
Take 3 - 1 1/4 inch squares of coordinating DSP and little strips of cardstock and the triple punched flowers and adhere as shown. Make sure you put tape only on the middle mechanism and not on the whole back so it will glide back and forth well.
Add more sticky tape as shown and attach a 2x3 inch piece of carstock with your sentiment ( or gift card or picture or ....whatever you want to pop up!)
Be sure to stamp the sentiment before you stick it on to ensure a clean stamped image. Then sticky strip the front sides up to hide the mechanism and let it slide!
This is what it looks like when it is being put together. Decorate the front however you wish!
I thought it would be fun to do balloons, birthday cake, pictures etc!
Have fun with this!
Lynda

Tuesday, April 17, 2012

Petite Purse with First Edition DSP

Patty Lee made a darling purse a couple of years ago using black base and using word printed DSP which I loved and kept as a sample and I used that as a guide to make a similar purse using our Petite Purse die and First Edition DSP.

I love the color combo. I diecut Lucky Limeade CS using the Little leaves sizzlet, glued it down and then punched Cherry Cobbler CS with the Boho blossoms and layered all three flowers, crumpled it up and used a mini silver brad to hold it altogether!

So classy!

Enjoy!

Lynda


Monday, April 16, 2012

There is no place like home....


I am cleaning my craft area for the first time in MONTHS and I ran into this little bag of sequins that I was meaning to use for a little purse card and I decided to use it for the Petite purse- Just laid down a line of tombow multimono (the liquid one in the green and white bottle) and laid the sequins down using my tweezers and it went on in no time at all.
Do you think it would match Dorothy's red shoes?
tee hee....
Lynda

Sunday, April 15, 2012

Petite Purse Variations using DSP

There are lots of ways you can play with the Petite purse die especially using the great DSP choices we have. I did a fussy cut a piece using the Sale-a-bration Everyday Enchantment paper so it would be aligned in the middle and it is very simple but pretty. I tucked the handles on the inside for this one but you can have it out and decorate that as well. Or decorate the front panel only and use a decorative filigree brad like the one I did on the pacific blue bags using the delightful Summer smooches DSP.

Change out the handles with the Dotted scalloped ribbon and decorate with all the pretty brads, Pearls, rhinestones, buttons, ribbons.... Bring out all those doo-dads that you have been hoarding and use some of it for this. Fill it with hershey' nuggets (fits 5 - four on the side and one on top) or Ghiradelli square chocolates (fits 3 perfectly!) Do the Stampin Up marketing people know us or what?

I tell you, this is the EASIEST little gift I have ever made! Now if I the candy can make it out of this house ........... Take some time to play today!