Saturday, November 7, 2015
Sweet Stack birthday favors
Monday, October 26, 2015
Paper Pumpkin October 2015
I cut up one of the watercolored panels to use on all 3 cardfronts.
I cut little pieces and stamped the flower on one of the panels before mounting it on the little card.
I stamped the flowers in Crushed Curry then used a little Aqua brush with Watermelon ink to add a tad of color before adding a rhinestone. The little bit of flower is stamped on a little left over piece of the colored paper that was left over after making all 3 cards.
This is my favorite of all three. I like the colors and the flower was cut out after stamping on the colored paper from above. Very CAS. Maybe I am getting my mojo back.....
Sunday, October 18, 2015
Amazing Birthday
My kids came to me the day before their birthday and tells me that they need cupcakes for the next day for their class- by the time my oldest was in fifth grade they did not seem to do birthdays in classrooms but these guys are a little younger at heart and wanted to celebrate it with their classmates. They wanted half chocolate and half vanilla so of course I had to make a run to the grocery store at 9 o'clock to get the supplies to make the cupcakes.
With all the allergies in classes, I thought best to make it then buy - but it was really that they did not have enough in the store for both their classes!
So I got done around 2am making all the cupcakes and frosting it all but it just looked plain. I needed something to jazz it up a bit but what to do- what to do.
Then Amazing Birthday set to the rescue-I stamped little images of birthday cake in different colors then these guys after they woke up in the morning punched it out and we taped front and back together over a toothpick and it was super cute although it was super easy. We did the whole thing in less than 30 minutes and they were very pleased with what they took to school for everyone.
Thank the Lord that I had these aluminum pans from some catering event a while back- they were perfect for 26 cupcakes- stable and tall enough for them to carry each batch to their classroom. Whew! Crisis averted.....
Saturday, September 26, 2015
Card for Ed with Vintage Leaves
One of my co-workers recently passed away and we wanted to make a card for the family. With the end of summer at hand, it seemed appropriate to use the Vintage leaves for the sympathy card. It also was more masculine than the flower type cards I make for sympathy usually. The card is full cardstock scored in half so 8 1/2x 5 1/2.
The base is Tip Top Taupe with a layer of Mint macaron.
I took a sheet of whisper white, and embossed the woodgrain on the top half using versamark then tip top taupe ink. You have to do it twice because the stamp is not quite wide enough to get it all across- check out the left side second wood panel and you will see a darker midline inking but when you see the whole thing, it is not that noticeable.
Then I embossed it with clear embossing powder.
I stamped the vintage leaves and on this one I actually cut it all out because I did not want any white outline- took me less than a half hour TV show so no big deal. I just wanted it perfect. Used a dauber to ink mint, Cajun Craze, and tip top Taupe on the leaves. Curl the edge of the leaves and adhere with dimensionals. I added some Tip top Taupe DSP on the bottom and wrapped linen thread around a few times, tied it into a bow then mounted the whole thing onto the mint macaron layer as you can see.
I used some left over ink on the dauber with tip top taupe to rub over the wood grain to take the shine off and make it a little more vintage.
Remember these brads? these are retired SU- for the life of me could not find my wooden buttons. None of the current buttons we had fit the way I wanted but these corduroy brads looked right. I took the shank off and put a dimensional on the bottom to stick it on like fall berries.
Stamped the sentiment from Thoughts & Prayers onto whisper with Tip top taupe and punched with Washi Label and mounted with dimensionals for extra depth- this will be hand delivered.
Took a piece of premium copy paper and cut it to size to line the inside of the card and stamped the sentiment in taupe so there would be room for everyone to sign.
The base is Tip Top Taupe with a layer of Mint macaron.
I took a sheet of whisper white, and embossed the woodgrain on the top half using versamark then tip top taupe ink. You have to do it twice because the stamp is not quite wide enough to get it all across- check out the left side second wood panel and you will see a darker midline inking but when you see the whole thing, it is not that noticeable.
Then I embossed it with clear embossing powder.
I stamped the vintage leaves and on this one I actually cut it all out because I did not want any white outline- took me less than a half hour TV show so no big deal. I just wanted it perfect. Used a dauber to ink mint, Cajun Craze, and tip top Taupe on the leaves. Curl the edge of the leaves and adhere with dimensionals. I added some Tip top Taupe DSP on the bottom and wrapped linen thread around a few times, tied it into a bow then mounted the whole thing onto the mint macaron layer as you can see.
I used some left over ink on the dauber with tip top taupe to rub over the wood grain to take the shine off and make it a little more vintage.
Remember these brads? these are retired SU- for the life of me could not find my wooden buttons. None of the current buttons we had fit the way I wanted but these corduroy brads looked right. I took the shank off and put a dimensional on the bottom to stick it on like fall berries.
Stamped the sentiment from Thoughts & Prayers onto whisper with Tip top taupe and punched with Washi Label and mounted with dimensionals for extra depth- this will be hand delivered.
Took a piece of premium copy paper and cut it to size to line the inside of the card and stamped the sentiment in taupe so there would be room for everyone to sign.
Thursday, August 27, 2015
Halloween Witch's hat kit and all the extras
It came with everything you needed and I think it took less than an hour to put together. I did not have the leaf stamp so I originally put it together plain which was still really cute after I sponged the leaf edges with soft suede ink. But stamping with the leaf stamp does add an additional detail. Love the bell at the tip. The hardest part was crinkling the hat body to make the curve with the body of the hat. I think it's super Cute!
The base has this subtle embossed spider web which is really great and it is really sturdy.
I did use all the fringe to make it full but only used one of each leaves and they give you three packs of each leaves in all the different colors. I have so many leaves left over that I am planning a leaf banner.
I used cajon craze to stamp the leaves on the different diecut cardstocks or soft suede depending on the cardstock color.
I probably have enough supplies to make another 10 more cards at least. What a deal!
Labels:
Holiday- Halloween,
Kits,
Stampin' Up
Sunday, July 26, 2015
Inspire. Create. Share. Convention 2015 highlights
Margery and I had the chance to go to convention this year with Mercedes and Jim Weber (StampinStud to you all) and it was a lot of fun. Thought I would share some of my favorite pictures with you all. I loved these big giant flowers that they used to decorate the stage and the little photo booths they set up. With the Christmas lights in the branches they were so pretty.
Check out the felted bags we got for attending- very gender neutral messenger bag like for both men and women.
One of the banners shown on Main Stage using the foil doilies.
This was absolutely gorgeous in person - I had been debating getting the Leaflet Framelit but after seeing this wreath I am committed to it. It was a bit of unexpected color combination but really beautiful. The cones were little balls of styrofoam covered with paper.
After Awards night the party was themed the Roaring 20's and it was a spectacle to behold with all the costumes and cars.
My kids would have loved the mounds and mounds of cakepops that was flowing over all the tables at the party.
The samples on the Main Stage after the Holiday Catalogue reveal were super cute! Love the BOO! on this sweet little bag.
There were walls set up to put up your swap and I took some pics of some of my favorites- I did not pick it off to take pictures of the names of the creators but know that we loved them!
Is this not the sweetest punch art ever? Love the use of the oval punches and heart punch for the vellum wings!
This gorgeous sample from the main stage uses my favorite accessory from the Idea Book the Expressions Natural Elements. It just adds so much to any card for oh so little. What did I say about the Leaflet Framelit? Gotta have it now after seeing this!
Surprise was that the base cardstock for the left oak leaf was pool party - see the little blue peeking through?
Such a fun idea for the Sprinkles of Life set. Love the fold, the little tabs of color below the center square and the splotches of spilled ice cream using Gorgeous Grunge. What a humorous card!
Another fun punch art card. I think Dylan will really love this Doggie card for his birthday. What a clever use of the Oval punches again.
This one I took for my nurse Mary Lou- her granddaughter loves Frozen and I had to take a picture of this in case I wanted to case it for a card to use for her.
Love the Bokeh effect on this and the jellyfish floating by. This is another set that I had been debating about but I really loved the samples I saw using this set. So creative. I always need masculine cards and this just fits that bill. Just floating by to say hi!
Really pretty red door for the holidays- the Red Glimmer Paper makes the ribbon and the ornaments just POP!
A sample from the product playground using the Oh so Cool Spider Web Doily! Comes 24 for $4.50. So so cool looking! See how they covered the clothes pin with the Washi?
Oh, Yes! Yes! Yes! ( imagine Meg Ryan in that orgasm scene in "When Harry Met Sally") How long have I waited for SU to come up with a window die? with a matching Happy Scenes stampset to boot? Have I died and gone to heaven? It's just perfect! They got a fireplace stampset and diecut to match as well- I had thought of that as my holiday card and now I have SU products to make it happen. Doing my Happy Dance now.
Well, you have to love it that this is a flower made with a punch. When I have a lot to cut, love the ease of a punch. The stampset that makes the leaf pattern is great and I want to use it make the leaves for the basket card I was making with the strawberries from Market fresh. It neededs some leaves but I could not find a current leaf that suit. I think this will fit the bill.
And check out that music paper DSP. I want a whole pack of just that and the Woodgrain too, by the way, Stampin' Up if you are listening!
And what about the Pillow Box framelit? Perfect size! I have other dies and tools to make longish ones but love the square shape. Can't wait to get my hands on that one.
And the Perfect Pines Framelits? how many times can I say Cool? Does that date me? Three different sizes and little dies for a pot and the ornaments and star....
and the new Christmas Greetings Thinlits and the Seasonal Frame Thinlits - perfect size fonts and the holes in the letters are cut out (did you hear that Makani?) Put these tags on a card and it would be a darling holiday card.
Now these cards were a suprise how cute they were- couldn't see that they were so sparkly and cute in the catalog but in person, they were super sparkly and pretty. Definitely a kit to try- although the crooked line on the ornament holder sstamp bothers my OCD. The silhouette stamp on the To You & Yours Too set would be super cute inside the Sparkly Season snowglobe, eh?
We had some time the last morning to walk in the gardens of the Mormon Temple. They were so beautifully kept.
We were all wondering what we would do with the horn stamp from Wonderland and they showed several sample and I could not help but take a picture to share with you- It cracked me up!
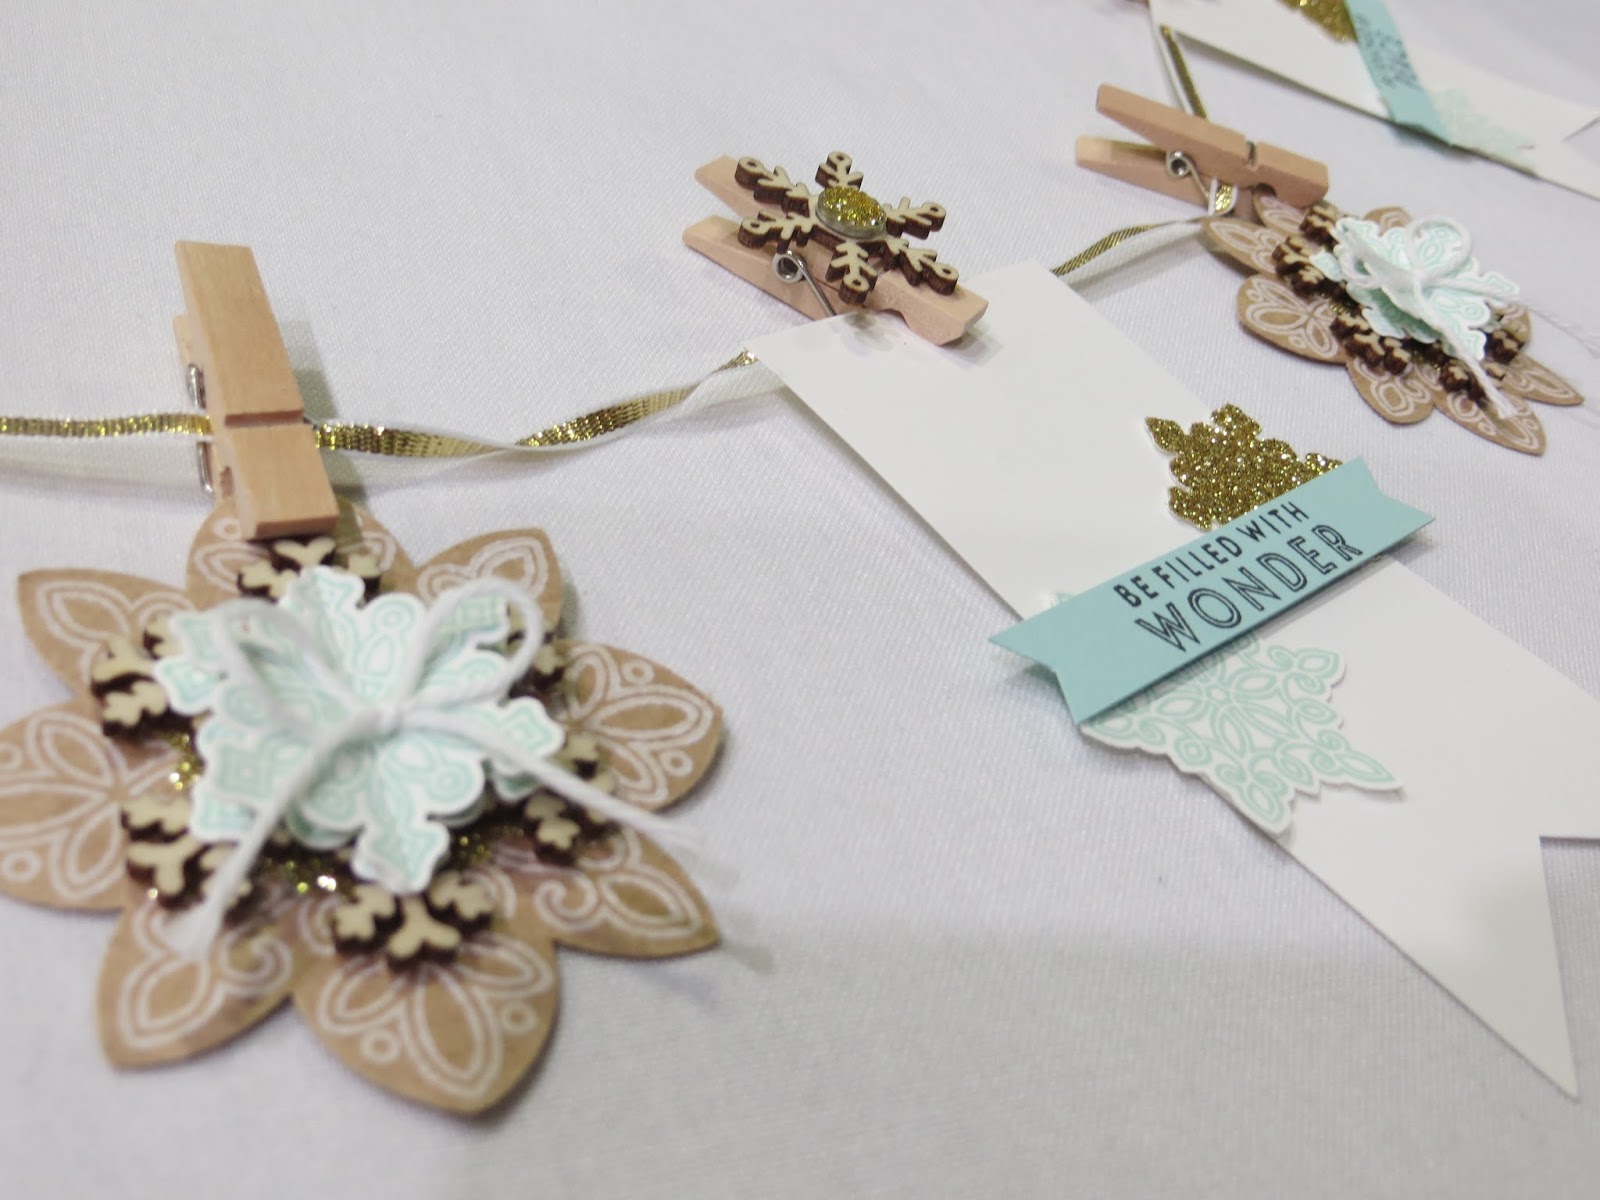
and this is the sample banner that our own Sharon Tong- Robinson won from Pam Morgan using the Flurry of Wishes set that Margery won as a giveaway. The snowflake wooden elements add so much texture. Gorgeous in person.
Hope you enjoyed this little slice of our convention fun! Lynda
Check out the felted bags we got for attending- very gender neutral messenger bag like for both men and women.
One of the banners shown on Main Stage using the foil doilies.
This was absolutely gorgeous in person - I had been debating getting the Leaflet Framelit but after seeing this wreath I am committed to it. It was a bit of unexpected color combination but really beautiful. The cones were little balls of styrofoam covered with paper.
After Awards night the party was themed the Roaring 20's and it was a spectacle to behold with all the costumes and cars.
My kids would have loved the mounds and mounds of cakepops that was flowing over all the tables at the party.
The samples on the Main Stage after the Holiday Catalogue reveal were super cute! Love the BOO! on this sweet little bag.
There were walls set up to put up your swap and I took some pics of some of my favorites- I did not pick it off to take pictures of the names of the creators but know that we loved them!
Is this not the sweetest punch art ever? Love the use of the oval punches and heart punch for the vellum wings!
This gorgeous sample from the main stage uses my favorite accessory from the Idea Book the Expressions Natural Elements. It just adds so much to any card for oh so little. What did I say about the Leaflet Framelit? Gotta have it now after seeing this!
Surprise was that the base cardstock for the left oak leaf was pool party - see the little blue peeking through?
Such a fun idea for the Sprinkles of Life set. Love the fold, the little tabs of color below the center square and the splotches of spilled ice cream using Gorgeous Grunge. What a humorous card!
Another fun punch art card. I think Dylan will really love this Doggie card for his birthday. What a clever use of the Oval punches again.
This one I took for my nurse Mary Lou- her granddaughter loves Frozen and I had to take a picture of this in case I wanted to case it for a card to use for her.
Love the Bokeh effect on this and the jellyfish floating by. This is another set that I had been debating about but I really loved the samples I saw using this set. So creative. I always need masculine cards and this just fits that bill. Just floating by to say hi!
Really pretty red door for the holidays- the Red Glimmer Paper makes the ribbon and the ornaments just POP!
A sample from the product playground using the Oh so Cool Spider Web Doily! Comes 24 for $4.50. So so cool looking! See how they covered the clothes pin with the Washi?
Oh, Yes! Yes! Yes! ( imagine Meg Ryan in that orgasm scene in "When Harry Met Sally") How long have I waited for SU to come up with a window die? with a matching Happy Scenes stampset to boot? Have I died and gone to heaven? It's just perfect! They got a fireplace stampset and diecut to match as well- I had thought of that as my holiday card and now I have SU products to make it happen. Doing my Happy Dance now.
Well, you have to love it that this is a flower made with a punch. When I have a lot to cut, love the ease of a punch. The stampset that makes the leaf pattern is great and I want to use it make the leaves for the basket card I was making with the strawberries from Market fresh. It neededs some leaves but I could not find a current leaf that suit. I think this will fit the bill.
And check out that music paper DSP. I want a whole pack of just that and the Woodgrain too, by the way, Stampin' Up if you are listening!
And what about the Pillow Box framelit? Perfect size! I have other dies and tools to make longish ones but love the square shape. Can't wait to get my hands on that one.
And the Perfect Pines Framelits? how many times can I say Cool? Does that date me? Three different sizes and little dies for a pot and the ornaments and star....
and the new Christmas Greetings Thinlits and the Seasonal Frame Thinlits - perfect size fonts and the holes in the letters are cut out (did you hear that Makani?) Put these tags on a card and it would be a darling holiday card.
Now these cards were a suprise how cute they were- couldn't see that they were so sparkly and cute in the catalog but in person, they were super sparkly and pretty. Definitely a kit to try- although the crooked line on the ornament holder sstamp bothers my OCD. The silhouette stamp on the To You & Yours Too set would be super cute inside the Sparkly Season snowglobe, eh?
We had some time the last morning to walk in the gardens of the Mormon Temple. They were so beautifully kept.
and this is the sample banner that our own Sharon Tong- Robinson won from Pam Morgan using the Flurry of Wishes set that Margery won as a giveaway. The snowflake wooden elements add so much texture. Gorgeous in person.
Hope you enjoyed this little slice of our convention fun! Lynda
Saturday, June 27, 2015
Birthday card for Max
Kyle was invited to one of his classmate's birthday party and this is the popup card I made for the occasion. They don't seem to want presents at their age- they all seem to be asking for money and this has a pocket in the back that hold it just perfect.
Balloon Framelits fit the sentiments perfectly
I had stickers, rub-ons and acrylic embellishments (non-SU) to decorate the box and it was a sweet little card that popped up to say Happy Birthday to a little boy- the size was not normal A2 so I had to make the envelope using the envelope maker to fit the off size card- Gotta love the envelope maker!
What did we do before this little gizmo? In matching DSP to boot.
Balloon Framelits fit the sentiments perfectly
I had stickers, rub-ons and acrylic embellishments (non-SU) to decorate the box and it was a sweet little card that popped up to say Happy Birthday to a little boy- the size was not normal A2 so I had to make the envelope using the envelope maker to fit the off size card- Gotta love the envelope maker!
What did we do before this little gizmo? In matching DSP to boot.
Subscribe to:
Posts (Atom)