Sunday, April 24, 2016

2016 April Paper Pumpkin


 I got this red package this month from my Stampin' Up Paper Pumpkin subscriptoins and it was this little foam wreath with little yellow flowers dangling from it which was kinda cute.  I had been playing with my Botanical Gardens die at the time and had cut a punch of flowers and I got to playing and this is what came out and I am super happy with it.  So cute!
I actually put a nail on my wall to make it a permanent part of my little wall.
 I used the branch that came with the kit as a base for the flowers. Folded the four sided flowers from botanical gardens for the blue blossoms on the end. 

I still have tons of leaves and yellow flowers left over to make more projects.  I will have to play some more.  This was the anniversary kit and it came with an extra stampset which was super sweet.  
I used a left over piece of DSP to make the pink flower in the center and tucked in the small yellow flowers on each side.  Added little pearls for that extra sweetness.

Lynda

Tuesday, April 12, 2016

Picture Perfect Botanical Garden

This was one of the projects at my last month's workshop.  The hardest part was the hummingbird- I had to do it several times before I got the jist of it- definitely a learning curve with it- although my friend Makani got it the first time perfect- she is an amazing stamper!  The base is blackberry bliss with a layer of Hello Honey.  Stamped the Hardwood background using versamark to get that subtle watercolor look.  Hello Honey was way to strong when I stamped it straight so if you use it definitely stamp off first.

Diecut the whisper white with the leaves- make sure you have the orientation right on that one.  Stamp the
sentiment before you mount it just in case.
Used the Botanical Gardens suite to diecut all the little flowers again and mounted them using dimensionals  and Multipurpose glue and put the jewel crystals in the center.

The hummingbird is stamped first with stamped off Pear Pizazz with #1 stamp, full strength Pear Pizazz with #2 stamp and the Blackberry bliss with #3 stamp.  Then use Melon Mambo for the collar stamp.  You do have to fussy cut the bird but it does not take long- took me less than a minute to cut it out and you know how I hate cutting with scissors!

Friday, April 8, 2016

Botanical Garden Gold and white cards and a great idea

I was at Michael's few months ago and they had their best buys- this box of 60 cards and envelopes for sale for $5.  I couldn't pass it up. The envelopes are paper thin and cheesy but man - a gold card and envie for 10 cents?

Anyhow in the pack were these really cheesy white heart with LOVE printed on it.  There really is no one I could possible send these to as it stood but there had been really pretty black  and white stripe cards I had seen.  When I layer cards and have to cut the cardstock to size there are always 1/2 inch strips left over that I keep and these left over 1/2 inch whisper white strips were perfect for this purpose.

Stamped the sentiment from Rose Wonder stampset in black.
This was the original cards that I put strips of white on.
I have to give credit to Gayle, one my Stamp-n-chat friends who brought a bunch of pieces diecut already in a container like this so we can pick and choose what we wanted and I thought it was brilliant.  So with all the little scraps of paper that I have I have been just diecutting all the pieces from the Botanical Gardens suite so I can make bouquets in a jiffy.  Love It!
So making all these cards were just a snap.  Just pulled some flowers are and laid them down.
With the gold stripes I wanted to add a little touch of gold sparkle so with little left over Gold Glimmer paper I punched out little 1/8 inch circles.

The flowers and leaves were mounted using dimensionals or the green Multipurpose glue - depending on whether I wanted the depth or not.  Leaves were stamped with Mossy Meadow - the white flower was sponged with the dauber with Calypso coral and the little gold circle added to the center.
This is just another variation on the same idea.
So all those little tiny pieces of cardstock, before you throw it away, see if you cut a few pieces of flower or center or whatever out of it.

Tuesday, April 5, 2016

Bloomin' Butterfly popup card

The base card is Blackberry bliss- with a strip of Wildflower Fields DSP from Sale-a-bration. A piece of  Hello Honey then Lost Lagoon die cut with the Bold Butterfly die.  I die cut whisper white with Bloomin' Hearts thinlit then with the butterfly again and laid it on the inside as shown to make a lacy butterfly.
Stamp Happy Birthday from Butterfly basics with versamark and heat emboss with white embossing powder.

The inside is a piece of  Hello Honey folded in half and oval cut  then scored in half on either side as shown.  Stamped the lines and sentiment in blackberry and leaf in Old Olive.  Stamp the big butterfly with Lost Lagoon and Blackberry then punch a bunch of white flowers from the Itty Bitty Accents Punch.  Added the little butterfly with the Bitty Butterfly punch. I messed the picture and could not turn it- Sorry!


Saturday, April 2, 2016

Party Party with Cucumber Crush

This was one of our workshop cards- easy  and fun little pop up card.   The base is whisper white with a layer of Watermelon wonder.  Layer of In color DSP  then Oval watermelon Wonder then whisper white oval.  The cake was stamped off then stamped with Cucumber crush then Happy birthday added with Blackberry Bliss.  The curly cues are from the Hip Hip Hooray diecut on the inside and then Silver Glimmer stars punched out with Confetti Stars border punch.
Cucumber crushed cut 1/4 inch smaller than basecardstock die cut  with Hip Hip Hooray die. 

Tuesday, March 29, 2016

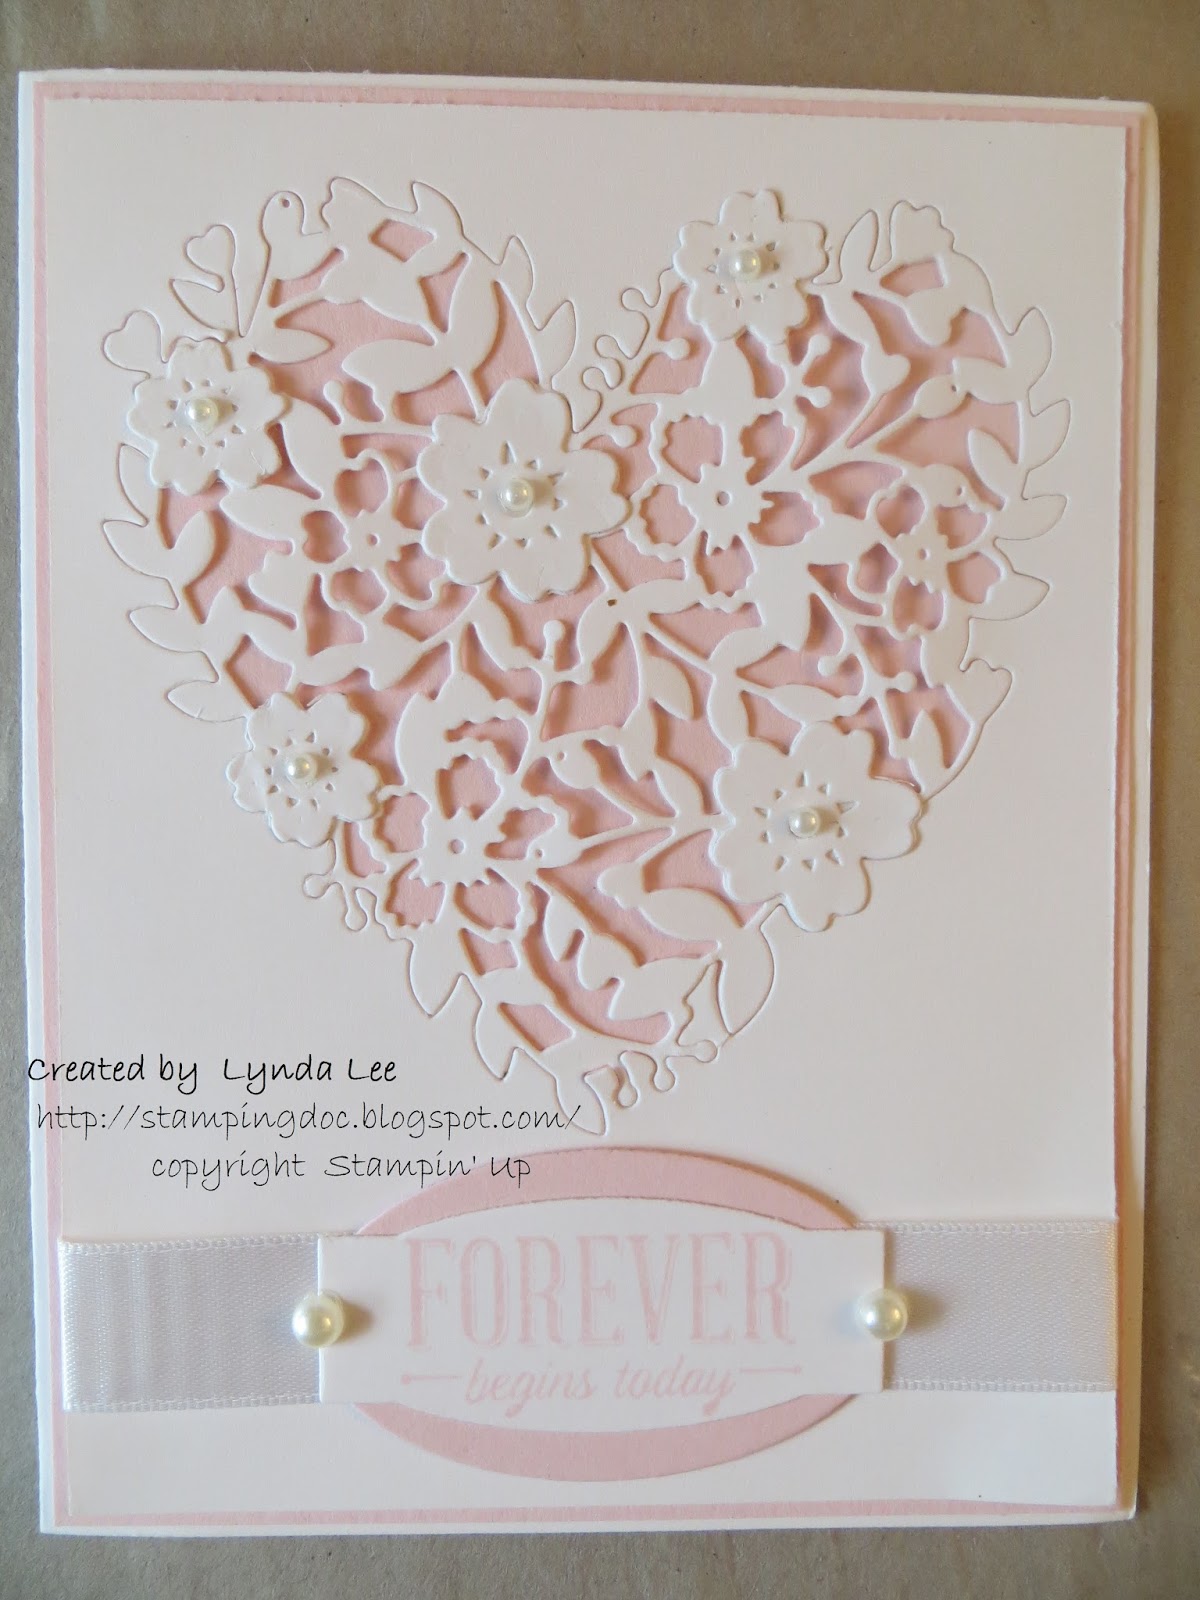
Bloomin' Heart P ink PirouetteWedding card

Pink Pirouette is such a girlie color- living with all boys I really love a little pink every once in a while.  I wanted to use this die for a wedding card- a little pink behind the die is a really subtle way of adding a bit of color.  added some pearls to add a little sparkle.  the sentiment from Suite sayings stampset was stamped with Pink Pirouette and diecut with Project Life Cards & Labels die with a layer of Pink Pirouette diecut with the small oval from Ovals collection Framelit.  The whole thing was layered over the 5/8"  whisper white satin ribbon.  More pearls on either side - very bridal I think.


Sunday, March 27, 2016

Happy Easter


 This is the little basket I made for my boys and put it on top of their Easter Breakfast plates- If teenage boys thinks these are cool, I did good!  The stamps and dies are from Lawn Fawn- I was inspired by Margery and little treatbags she gave us at the last Stamp-n-Chat.  Filled them with gigantic M&M's and chocolate bunnies.  The little daffodil was made using a 5 sided flower punch and one of those Michael's one dollar flower punch that I got eons ago- just folded them up like the center of the flower and the proportions were perfect.


Happy Easter everyone and God Bless!
Lynda

Sunday, December 27, 2015

Center open earring boxes

I made these boxes to hold my little earrings and gifts for some of my friends this holiday and wanted to share the template with you all.   I've seen boxes like this on several different sites but they were all in weird dimensions or in metric so I convered it to suit my needs and I hope you find it helpful.
 The box opens through the center to reveal earrings or a small trinket as shown.  The template is pretty simple.
The box is made with a sheet a smidgen less than 4x4 to make a 2x2x1 box. Fold up the sides and tape it to make the bottom of the box.   The right side piece makes the base and the sides/top.  The base of the box is taped to the middle square and the top and the bottom part is folded up to make the side/lid.I put tape on the 2 blue striped squares as shown and fold up the sides to makes the sides of the box.  I then took a 2" circle punch and put tape only on one side of the lid and attach to the one side of the top.
,
Inside is made by taking a piece of a cardstock a smidgen less than 2"  x 2 1/2 or so, score at the 2" and put the 1/16 inch holesalong the fold line if you are giving away earrings.
  This was a pair I made using some wire wrapping techniques and some beads and pearls I had.
This is a very simple pair I made using the new Botanical Garden Jewels that is in the new spring Occasion Catalog.  It was super simple to make.  Just a sterling silver earring back, a clear crystal and a sterling pin connecting it all.

The top of the box is made using the festive flower builder punch with a set each punched with whisper white and vellum -put together with vellum on top of the white pieces, just offset a tad.  Curl the edges a bit using a small dowel.  I put a little iced rhinestone in the center to add a little touch of sparkle. Enjoy!

Friday, December 25, 2015

Merry Christmas!

I had the kids pose as if they were looking out the window with this card in my vision.
The step up card made to fit an A2 card and the letters were diecut with silver glimmer paper to add sparkle inside.

Happy holidays to you all.

Lynda