This is the variations I made for my Stampin' with Lynda May 2022. Used the daffodil dies and Nature's Prints die and sentiment from the stampset.
This is the flower diecut hack I use all the time. I did this for the tulip dies and anything that can be cut together from the same color cardstock.
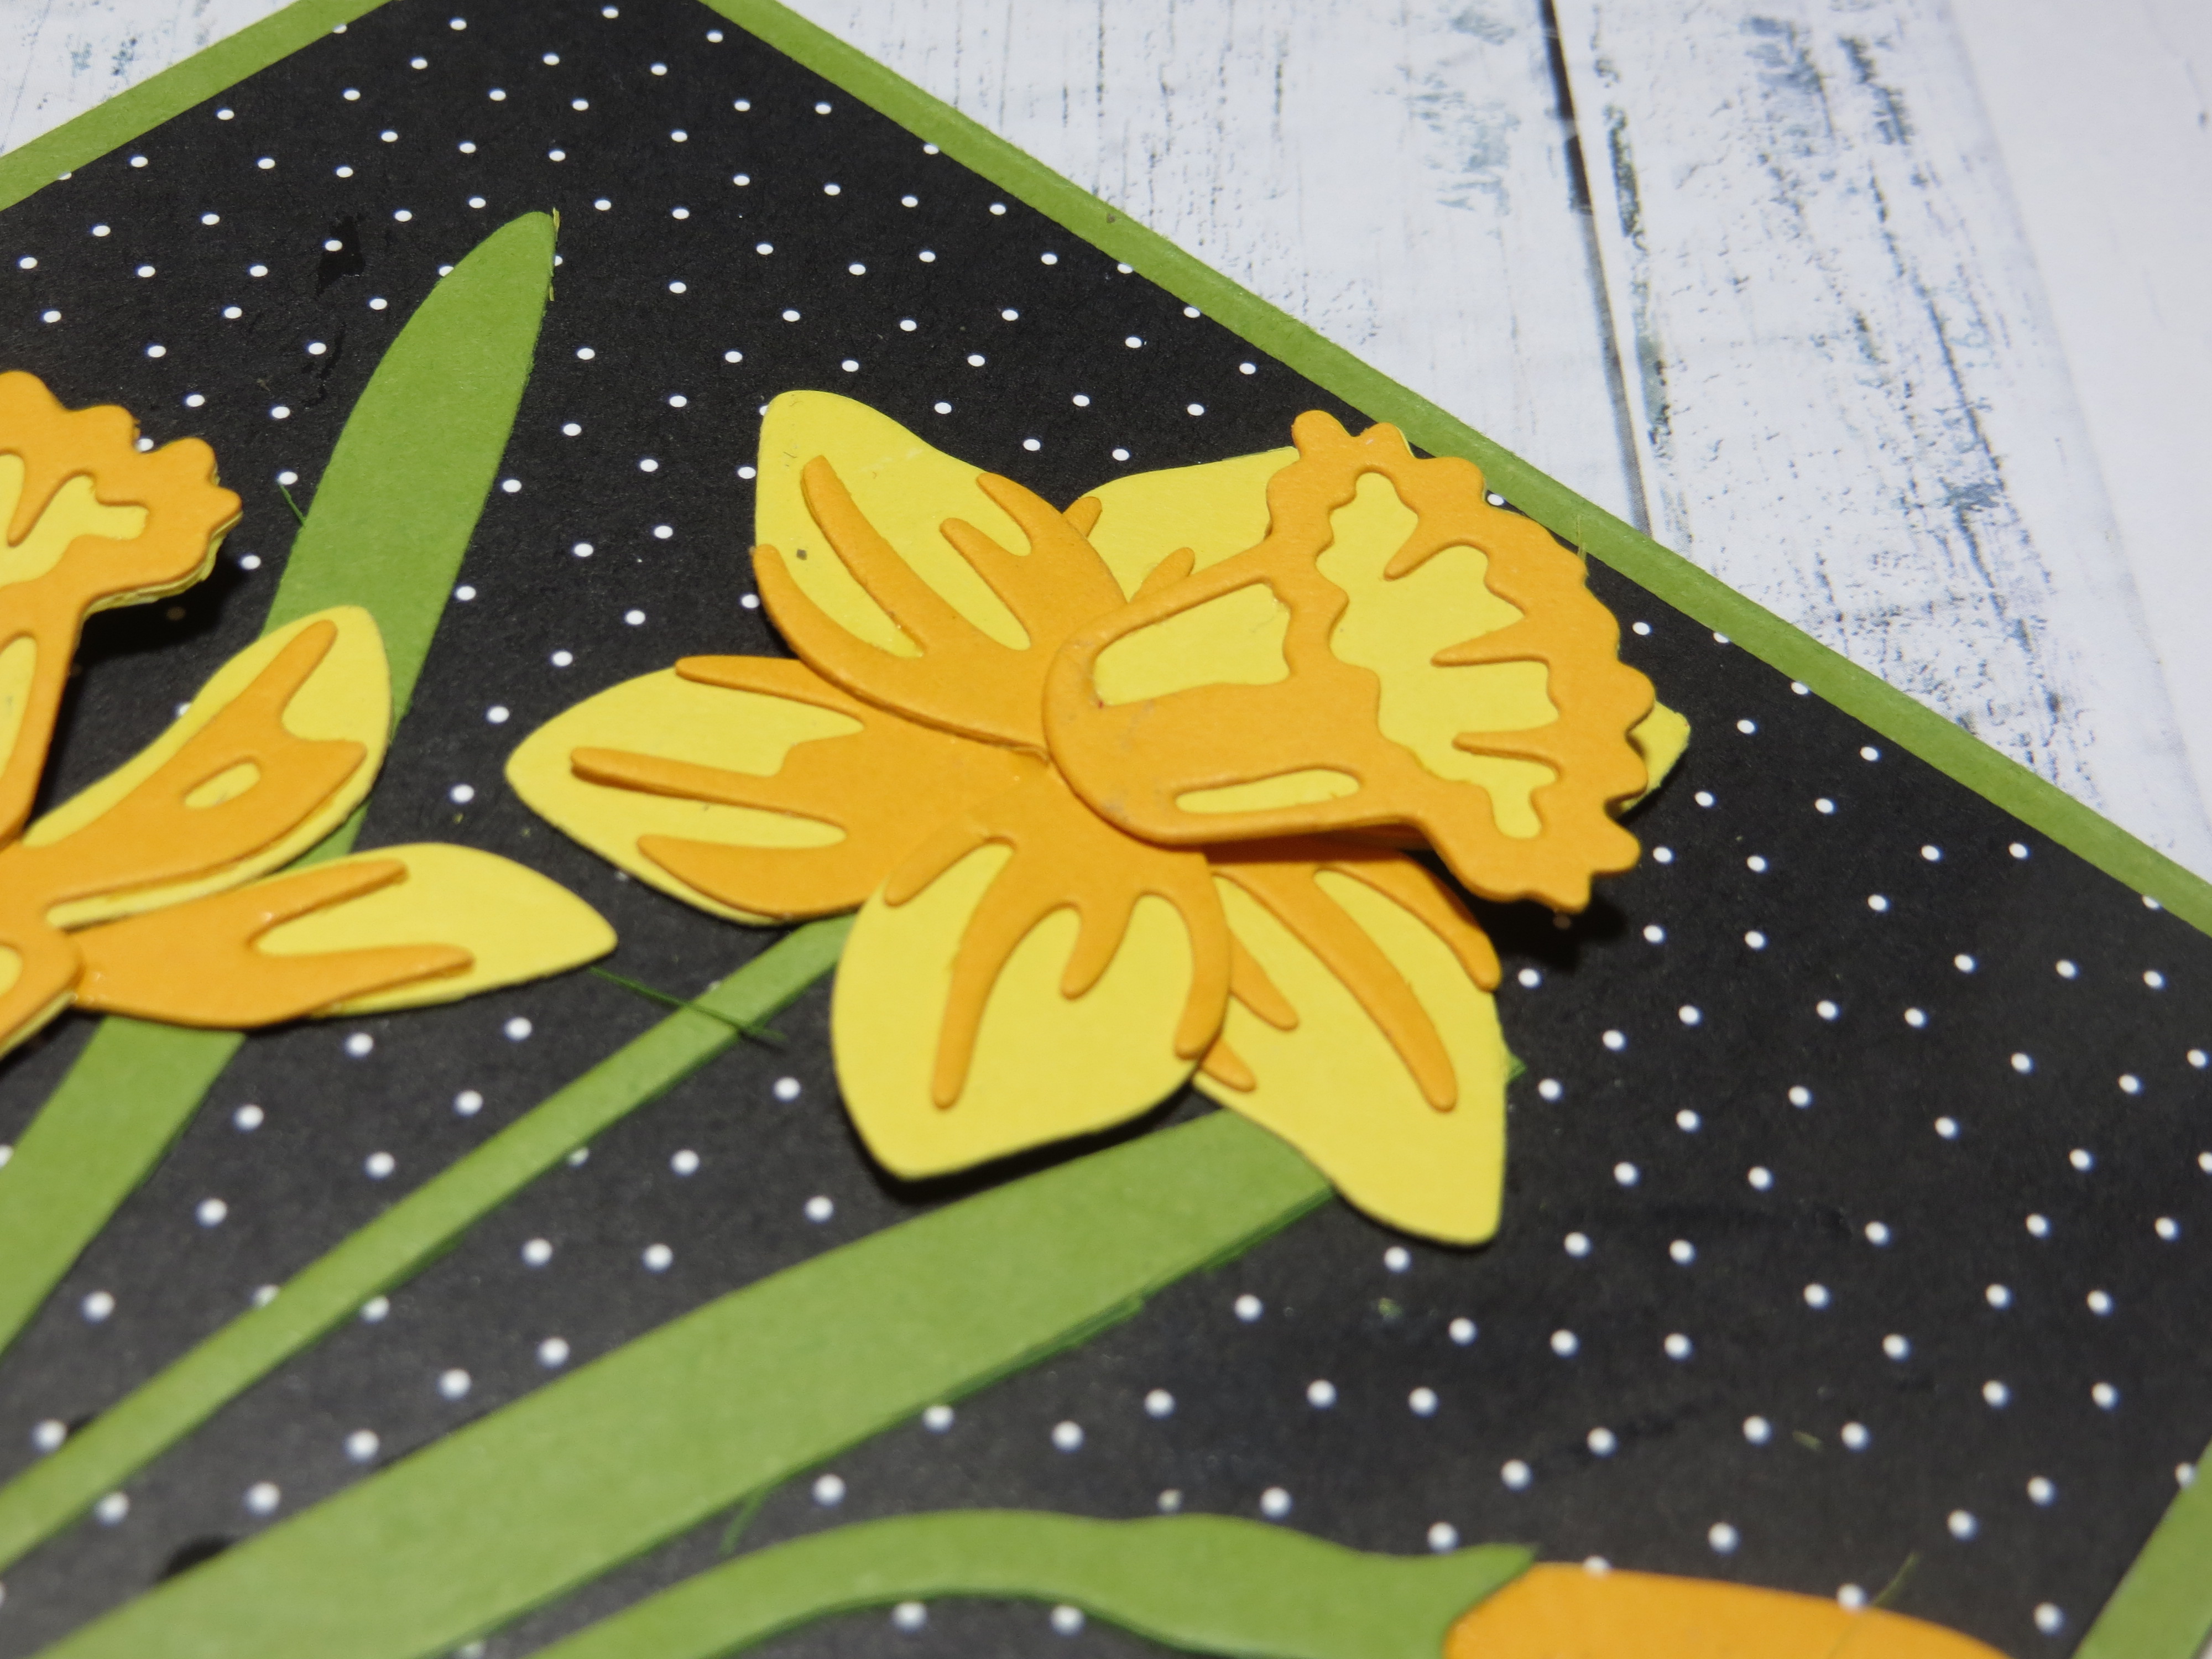
The daffodil dies make one set of 2 flowers and 1 bud so I separated out the base dies and put them together close together and put packing tape on it on the backside so it would cut all the pieces at one time- it saves paper and aggravation since I would normally make all 3 flowers at one time so I only have to diecut it once.
I put all the accent pieces together as well and again put clear packing tape on the backside to keep the dies together so I can diecut all the accent pieces at one time- as shown on the left.
I did the same for the stems- taped the stem pieces together using clear packing tape on the back- make sure there is no overlap -so you need a tiny gap between the die pieces- you cut out all the stems at the same time saving time and paper. Funny thing about the stems is that you need to keep the stem dies close aligned and when you die cut it you get these long skinny stem like pieces in between that I use for other stems as well-so more pieces from the same diecut!- I used some of the pieces to put a stem on one of the flowers -see picture left.
put the accent pieces on the base pieces then add the corona (cup part) on top. I put white glue on the base of the cup to contact the petals but the top part of the cut I mount using dimensionals to make it pop a bit.
The side piece looks like this. The funny 2 leaf piece I put behind the bigger petal piece then put the cup the same way- glue the base of the cup onto the petal and raise the top of the cup with a dimensional. You will be hiding a petal completely this way but it gives a place for the flower cup to sit. if you want the petal behind to show, move the cup of the flower a little sideways.
To make the pieces below I cut the flower pieces all in white and then used the water painters and ink refill of Polished Pink - put a few drops on the lid of the inkpad and just run it across the flower accent pieces and that was it. Looks so beautiful
and I did almost nothing. I did add a little color to the base cup shapes so it would not be so stark white but it was really easy to make this elegant look.
I love the shape of the label die from the Nature's Print die and the mixed font on the sentiment.
-the stems are Old Olive I believe.
-the ribbon is Sweet Sorbet Metallic woven ribbon but it looked just fine here.
Stampin' Up flower dies are brilliantly devised. I love you can cut all the flowers at one time- it seems daunting but since it all comes separate- try putting it together as I showed you above and you will see how easy it is to make beautiful cards making 3 easy diecut runs.


No comments:
Post a Comment