Tuesday, July 26, 2022

Fond of Autumn catalog case and variation


when I saw the holiday mini catalog and saw the Fond of Autumn set I was intrigued. one stamp diecut into 4 different pieces or used as one. Pretty cool. when I saw the sample I was hooked with the pale flowers against the mint background- I had to make for one of the classes.  

I used Mint Macaron base and sentiment banner in same using white embossing powder.  kept the flowers pale and I loved the contrast but I had to make a card that is still my own and that is what is above.                                                                                             Basecard is thick white with a layer of white and a layer of  Silver and gold DSP from Sale-a-bration diecut with large circle from Stylish Shapes . ink the stamp in Tuxedo black and color with Highland Heather and Blackberry bliss and the berry using Starry Sky and leaves in mint macaron and old olive.  Sentiment from happiness abounds set embossed on black all mounted with dimensionals.  Catalog case is such a fun way to use the catalog and a way to get going again when you have a card block... happens more often that you think.


Tuesday, July 19, 2022

Paradise palms variations

This was a simple SLC single layer card variation we made at my class  using the Oceanfront stampset
Balmy blue sky and Bermuda Bay water and a diecut from the palms in black.
such a simple card with jsut a piece of extra palm I already had diecut for a silhouette.


this was the card we made for our class.

stamp Rays of Light in daffodil using a straight edge to mask the bottom half.

use another straight edge to use stampin blends to color the water Coastal cabana.

stamp sentiment in black and adhere the palms and grass across the bottom. 

Seagulls from a retired set but you can use seagulls from Wave of inspiration, Heron Habitat or Let's set sail. Whatever you've got should work.
 

Tuesday, July 12, 2022

Sunny Splash


 Doesn't this just scream SUMMER ?  

Diecut the Picture This die in Tahitian Tide. Cut Sweet Sorbet, Parakeet party and mango melody to fit behind the openins and tape down.

Emboss the base card with the colored cardstock using the Into the Clouds embossing folder.

stamp the swim suits in parakeet, sweet sorbet and mango melody and cut out and mount with dimensionals.


diecut a rectangle from stitched rectangles die and stamp with the sentiment in Sweet sorbet and mount with dimensionals to finish the card.

enjoy!

Lynda

Tuesday, July 5, 2022

CAS Brilliant Wings


I love the sweet font from Happiness Abounds set- I needed a quick and simple card to say thanks and this just fit the bill- used blender brush to add a bit of color onto a plain thick white CS with Polished Pink - added a butterfly i had extra cut in white stamped the sentiment and voila! a sweet little card ready to go.

Tuesday, June 28, 2022

Ranunculus romance clean and simple card


 a simple card- base card is Orchid Oasis with a layer of white cut with Fancy Frames diecut 

stamp Ranunculus with old olive for the leaves and orchid oasis for the flowers and color with a little pink in the center of  the flowers


Tuesday, June 21, 2022

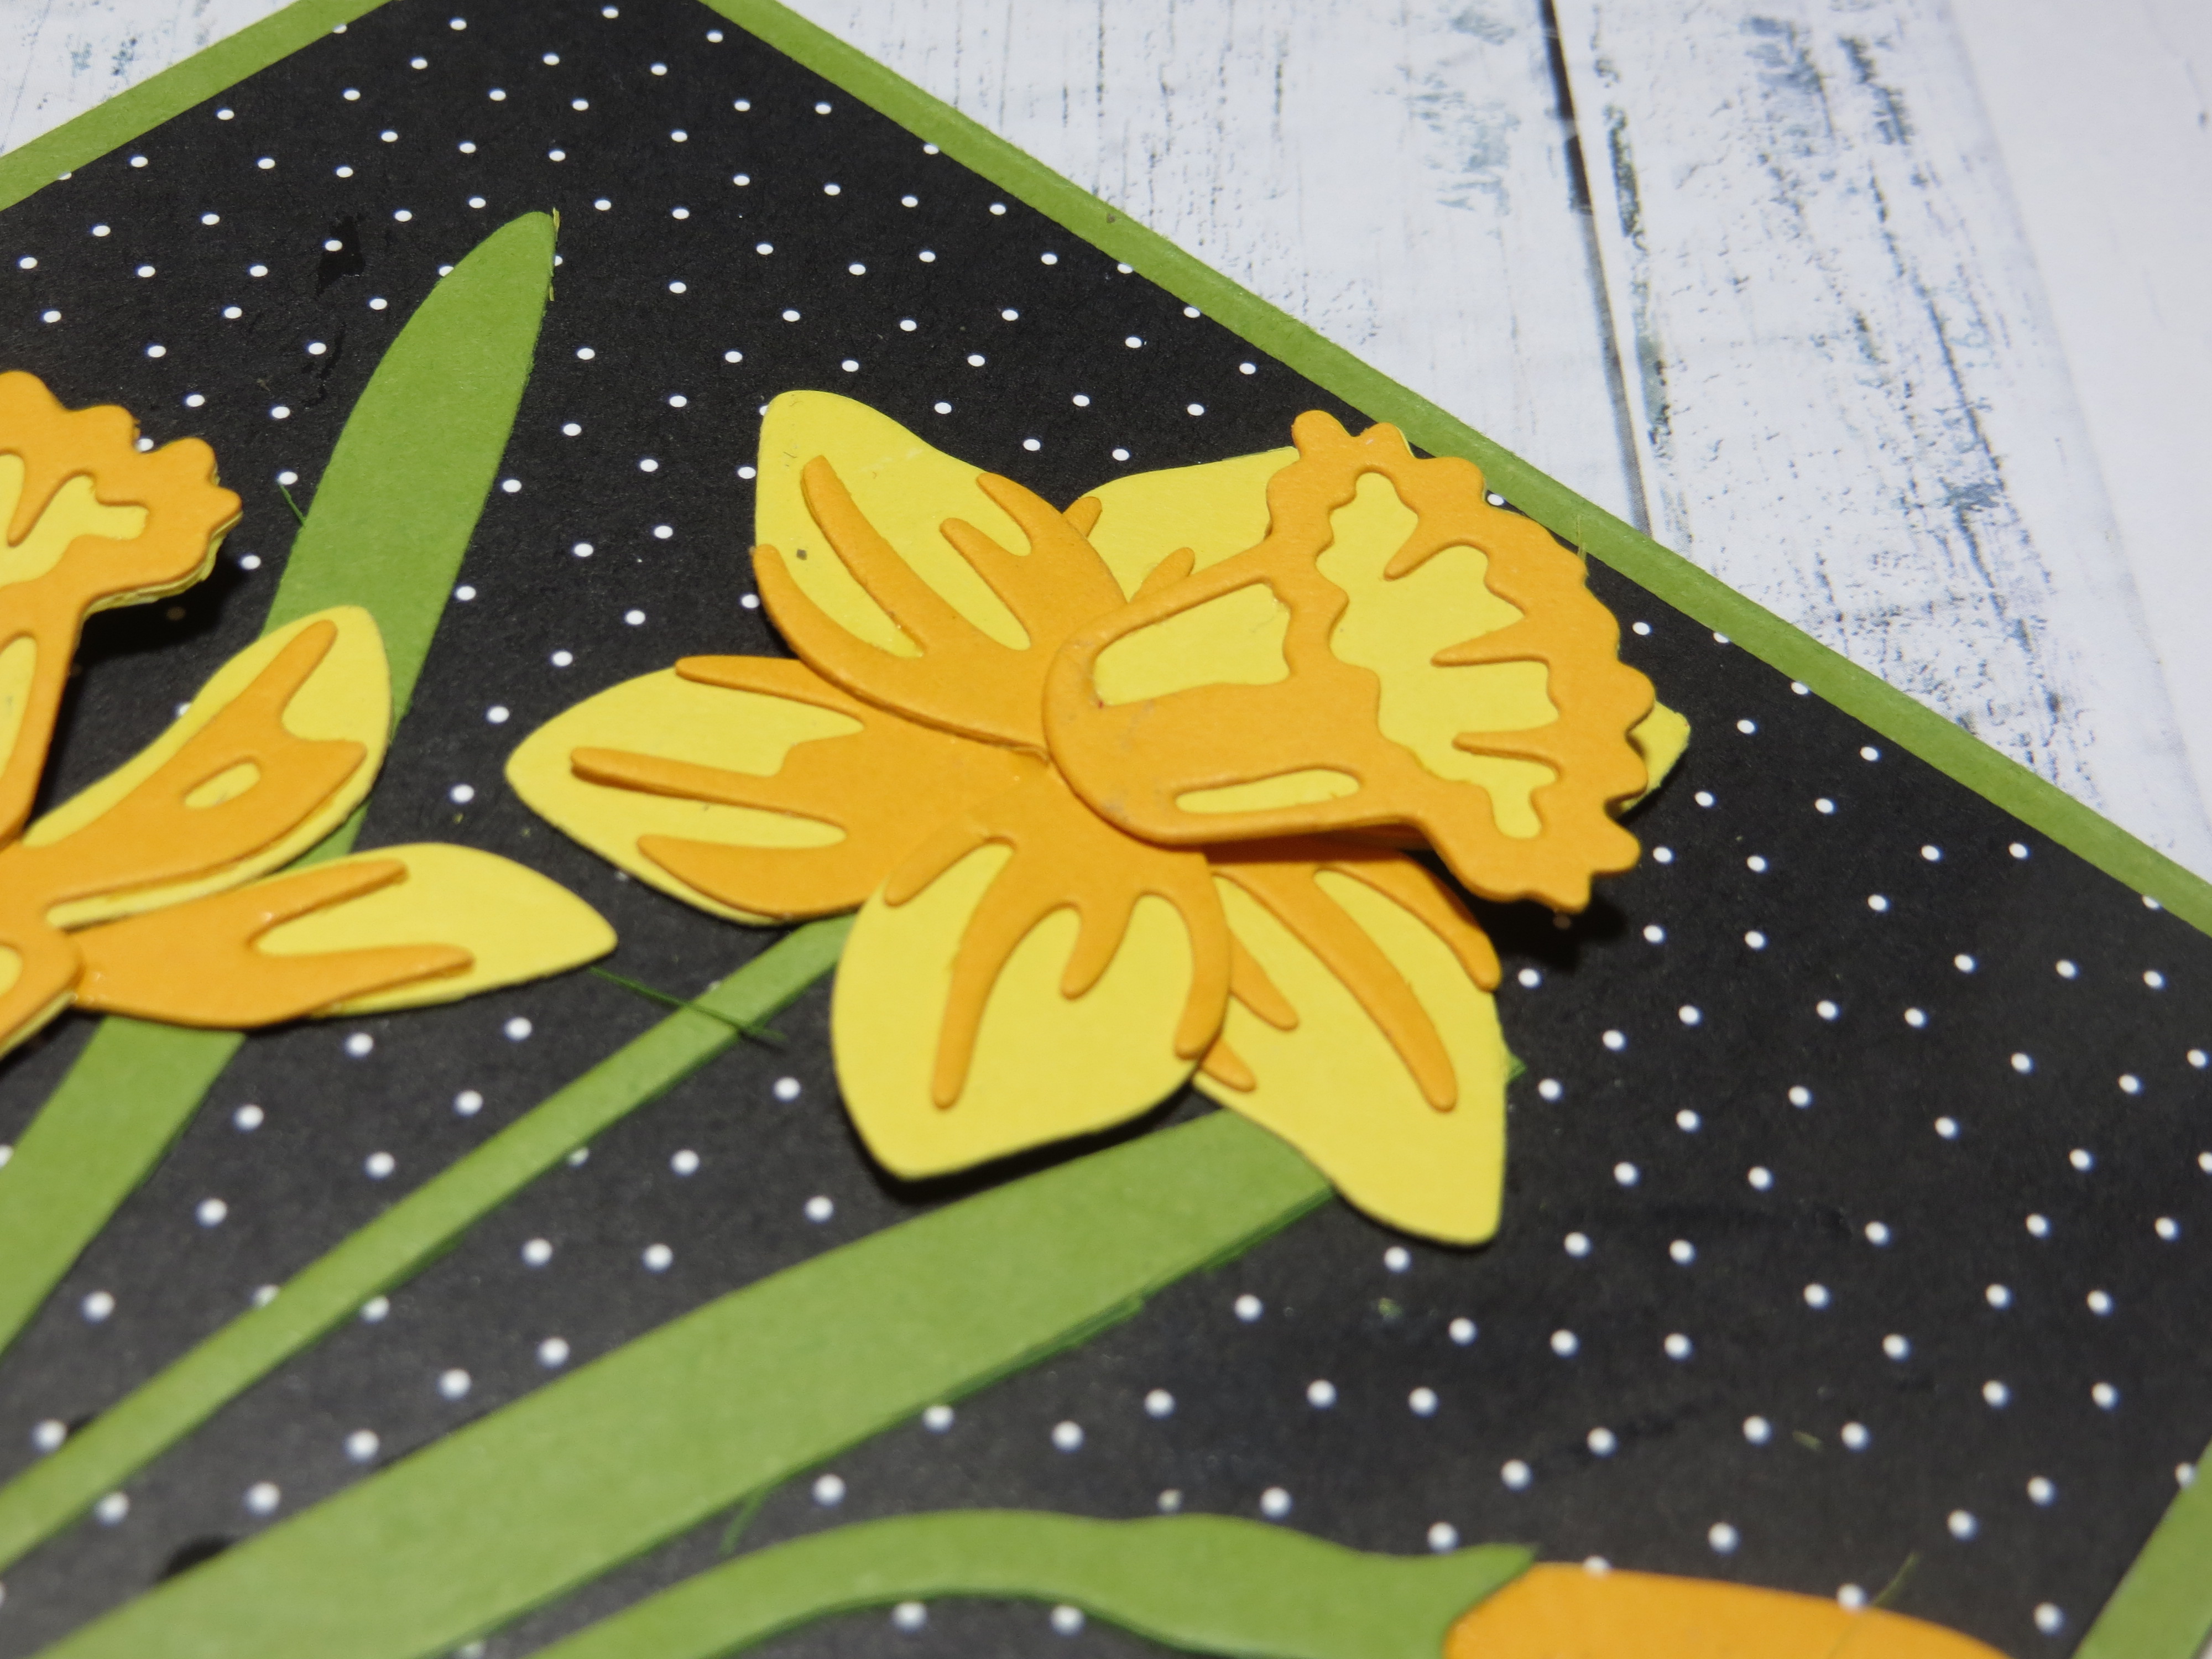
Daffodil cards- using easy diecut hack

This is the variations I made for my Stampin' with Lynda May 2022.  Used the daffodil dies and Nature's Prints die and sentiment from the stampset.

This is the flower diecut hack I use all the time. I did this for the tulip dies and anything that can be cut together from the same color cardstock.

The daffodil dies make one set of 2 flowers and 1 bud so I separated out the base dies and put them together close together and put packing tape on it on the backside so it would cut all the pieces at one time- it saves paper and aggravation since I would normally make all 3 flowers at one time so I only have to diecut it once.


I put all the accent pieces together as well and again put clear packing tape on the backside to keep the dies together so I can diecut all the accent pieces at one time- as shown on the left. 


I did the same for the stems- taped the stem pieces together using clear packing tape on the back- make sure there is no overlap -so you need a tiny gap between the die pieces- you cut out all the stems at the same time saving time and paper. Funny thing about the stems is that you need to keep the stem dies close aligned and when you die cut it you get these long skinny stem like pieces in between that I use for other stems as well-so more pieces from the same diecut!- I used some of the pieces to put a stem on one of the flowers -see picture left.

put the accent pieces on the base pieces then add the corona (cup part) on top. I put white glue on the base of the cup to contact the petals but the top part of the cut I mount using dimensionals to make it pop a bit.
The side piece looks like this. The funny 2 leaf piece I put behind the bigger petal piece then put the cup the same way- glue the base of the cup onto the petal and raise the top of the cup with a dimensional. You will be hiding a petal completely this way but it gives a place for the flower cup to sit.  if you want the petal behind to show, move the cup of the flower a little sideways.
 

To make the pieces below I cut the flower pieces all in white and then used the water painters and ink refill of Polished Pink - put a few drops on the lid of the inkpad and just run it across the flower accent pieces and that was it. Looks so beautiful 

and I did almost nothing. I did add a little color to the base cup shapes so it would not be so stark white but it was really easy to make this elegant look.

I love the shape of the label die from the Nature's Print die and the mixed font on the sentiment.
-the stems are Old Olive I believe. 
-the ribbon is Sweet Sorbet Metallic woven ribbon but it looked just fine here.

Stampin' Up flower dies are brilliantly devised. I love you can cut all the flowers at one time- it seems daunting but since it all comes separate- try putting it together as I showed you above and you will see how easy it is to make beautiful cards making 3 easy diecut runs.


Tuesday, June 14, 2022

Fold Flat Box card- template and sample using He's all that stampset for Father's Day


What a fun card this is. There are a lot of videos on how to make this but not a template so I had to make it up and it is below 

take a cardstock- here I used Early Expresso.  

cut off 1" from the 11 inch side to make a 8 1/2 x 10 inch cardstock piece- save this 1" piece to use for the belly band.


Score the cardstock with 11' horizontal at 

2", 3 1/2", 6 1/2 " and 8"

make a mark on the 7 " at the very top and bottom of the 7" line to mark the center of the diagonal mark you will need to make.

turn 90 degrees with 8 1/2 inch horizontal and score at

1 1/2" and 7" 

Cut out the diagonal hatched marks- (the 4 corners but make sure you keep the 1/2 inch tabs on either side of the center  top and bottom panels since you will need them to tape them to make the box pop)

use the 7" mark to make the score the diagonal marks as shown on the top and bottom center panels.

I would recommend that you decorate the center of the box panel before you put the box together

I stamped the trees from Campology stamp set. I stamped the tent on a scrap piece of white cardstock and cut it out. I also took the happy Father's day and stamped it on the smallest of the Tailor made tags. You could stick a gift card and pop it up if you wanted and it would be super cool.

to make the pop out elements:

- to pop out 1/4 inches- take a 1/2' x 3 inches and score at 1" 1 1/4", 2 1/4' then 2 1/2 inch and put the ends together to make a rectangle piece you can use as a mechanism for a popout if you wish.

-  to pop out 1/2 inches -if you want it to pop out more you can take the 1/2"x 3 1/2" and score at 1", 1 1/2", 2 1/2" and 3"  to make it pop 1/2"  if you want more dimension.  

put tape on the bottom and the side you want to stick to side of the box - make sure it does not get in the way of the box closure though.

To put the box together, fold the top down then fol the angles up then put the tabs down and put the tape on the tabs facing you and when you close the card it will form the box.

same for the bottom center panel, fold it up, and then fold down the diagonals, then fold the tabs up then put tape the tab facing you and fold over the front panels to make the box. 

decorate the front panels with DSP  5 1/4 tall x 3 1/2 wide, cut in half to decorate the left and right side of the front panel. put the belly band on with the seam in the front and put some decorative element to hide the seam. Here I put the piece from He's all that diecut with the scalloped circle die that is really sweet


Tuesday, June 7, 2022

Sweet Songbird cards

This was one of the projects we made for our May Stampin' with Lynda. 
Base card is thick white cardstock- I really do love a sturdy cardbase don't you?
take another piece of white cardstock and stamp the sentiments.  stamp the branch in crumbcake and the leaves in Parakeet Party.
punch out the birds in parakeet party and balmy blue and stamp eyes open or close your choice in black.  punch out the belly in white and beak in Poppy Parade. you can pop out the bird and the wing if you want. 
stamp the little feet and musical notes in black.
so sweet!


If you only have one bird you can try making this one that I whipped up while waiting for my class to join me.  Base card is thick white. - take a strip of DSP and a circle diecut. Stamp the branch with Soft Suede. stamp some leaves and flowers on a scrap piece of paper and cut it out. stamp sentiment and musical notes as shown. add the bird- I had some extras from my class so super easy to put together and how cute is this? 

Wednesday, June 1, 2022

Eclectic Garden


take the base Shaded Spruce cardstock.  Stamp sentiment with versabmark and Emboss with white embossing powder and heat set. 

Take a piece of white cardstock and emboss with Fern embossing folder (hard to see I know but it is there) .  Take a piece of white CS and real red CS and diecut using circle cutter and layer as shown. Use blender brush to add some balmy blue to the white cardstock circle to make the image pop a little

Take a scrap piece of white cardstock and stamp the bird image in memento tuxedo black.  Use stampin' blends to color it in - here I sued Shaded spruce, real red, bronch, old olive and mossy meadow and pumpkin pie for the beak. fussy cut out. Because the background is also white, it will look good no matter how bad you are at scissor work.  

add to the circle using dimensionals to make it pop a bit.  a simple but easy simple stamped card.

the set comes with 4 different images so swap it out and it will look just as good.


Tuesday, May 24, 2022

Sports Event Dies and penguin from Count on Me


I love this Sports Events die - my kids are not even athletic and I still bought the die because I liked how it looks. even the left over piece around the ticket is cool looking so I saved it for another project.

Base card is Pool Party with a strip of paper from the Rainbow Sale-a bration paper - I love the bright colors.   Layer a piece of white CS and then a Magenta Madness large diecut and the white piece diecut  on top as well.
take a scrap piece of paper and stamp the penguin, the happy sentiment from Biggest Wish set in mango melody and the birthday in magenta madness and cut it out.  Color in the penguin using smoky slate dark Stampin' blends, mango Melody for the ebbed feet and beak and Magenta madness for the balloon. 
This die does retire with the spring mini catalog end of June so get it while you can.