Showing posts with label 3D cards. Show all posts

Wednesday, December 14, 2022

25 days of Christmas- Splendid Thought swing card


I really love the simple line images from the splendid thought stampset but just didn't have much opportunity to show it in my classes but with the Framed Florets die it was a fun play card to make. take a base petal pink cardstock 5 1/2x 8 1/2 and score at 4 1/4 to make the basic A2 card.  cut a piece of DSP from the Splendid Day for the front panel 4 x 5 1/4 with upright image. You can adhere it around the margins to secure and run through with the diecut to cut the heart border and the oval frames.  Diecut a piece of white for the insde oval piece.  (You will have a whole mess of sparkly hearts and left over ovals which you can save for another project)


this mechanism is super easy

just take a piece of cardstock 6 inches by 4 1/2 and score at 2 and 4 inches to create a trifold as shown on the left.  you just want to tape it on the back panel only so that it is big enough to cover at least half of the oval opening. 

stamp flower and sentiment on the white oval.  I then close the card and adhere the oval frame and the white oval panel on the front panel of the mechanism on the right side only so that it will slide back and 


forth.  

take a piece of white cs 4 1/4 x 5 3/4 for sentiment panel for the inside. You can also stamp the mechanism panel with leaves as shown.  The DSP had a petal pink version and a seafoam green version and I just did not have enough for the whole class so some got pink and some got green- they are pretty either way. Super easy mechanism but big impact.

Enjoy! Lynda

Tuesday, December 13, 2022

25 days of Christmas - Framed Florets Z-fold


I was intent on having 4 projects for my November class and then when I saw this set I could not resist adding it to our class so this ended up being our 5th card- a bonus!

take a base card of Polished Pink cardstock - one piece 5 1/2x 8 1/2 like the usual A2 card and another piece :

1 1/2x 8 1/2 and score both at 2 1/8 and 4 1/4. flip the 1 1/2 inch piece so that it makes the z fold mechanism.  stamp the sentiment on the front of the smaller piece and emboss with white EP and heat set.

cut two  4 x 1 7/8 inch pieces of DSP 

for the left front and right back panel and same size pieces of white cardstock for the inside panels.  stamp with sentiment of your choice. diecut the ovals panel and frame from the Framed Florets set. Stamp the flower image in the smaller oval piece and color as you wish- the colors from the DSP is what I chose- Polished pink, evening evergreen, blushing bride, soft succulents. take some scrap pieces of white and stamp the small flowers and leaves and diecut to use as accents
Mount the pink strap piece making sure to only tape the left half of the font panel.  mount the left half of the oval panel to the left half of the card as shown.


Saturday, December 11, 2021

25 Days of Christmas- Day 11- Easy Pinwheel Card- How to

 Here is the card we made for our class last month- I finally got around to posting the blog on how to do it.

I did heat emboss with clear embossing powder the Pumpkin from Pretty Pumpkin set all on the back side of the panels so that it would add some interest without detracting from the main images. These are the 4 panels we made. the top was made using the Pretty pumpkin set and sentiment. 
colored in with Pumpkin Pie, Cajun Craze and Old Olive stampin' blends.
Panel 2 was made using flowers from Nature's Harvest and the sentiment from Quiet Meadow- I stamped the flower on a postit note to create a mask to stamp the words- colored with Daffodil, pumpkin pie , old olive and soft suede.
Stamped the pumpkin in pumpkin pie then did a rock n roll with cajun craze to add some color to the edge and then added some old olive to add some interest to the pumpkin.  the sentiment is from Encircled in Friendship stampset - what a lovely sentiment! 
The last panel was a piece of Daffodil embossed with the timber Embossing folder.  Diecut a tag from Taylor made Tags dieset, stamped the image from Nature's Harvest, stamped Love from Quiet Meadow set, added a piece of Daffodil Delight 1/4 " Ruched Ribbon- currently on clearance and the card is done.


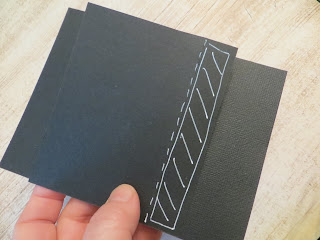
The basic mechanism is pretty straight forward - you will need even number of the basic panels 4 1/4 by 3 1/2 scored at 3/4inches as shown below.   For this card you will use 4 panels. 
the back of the panels will have tape on the section marked on top


You should start with 4 pieces that should be scored like this on the left.  
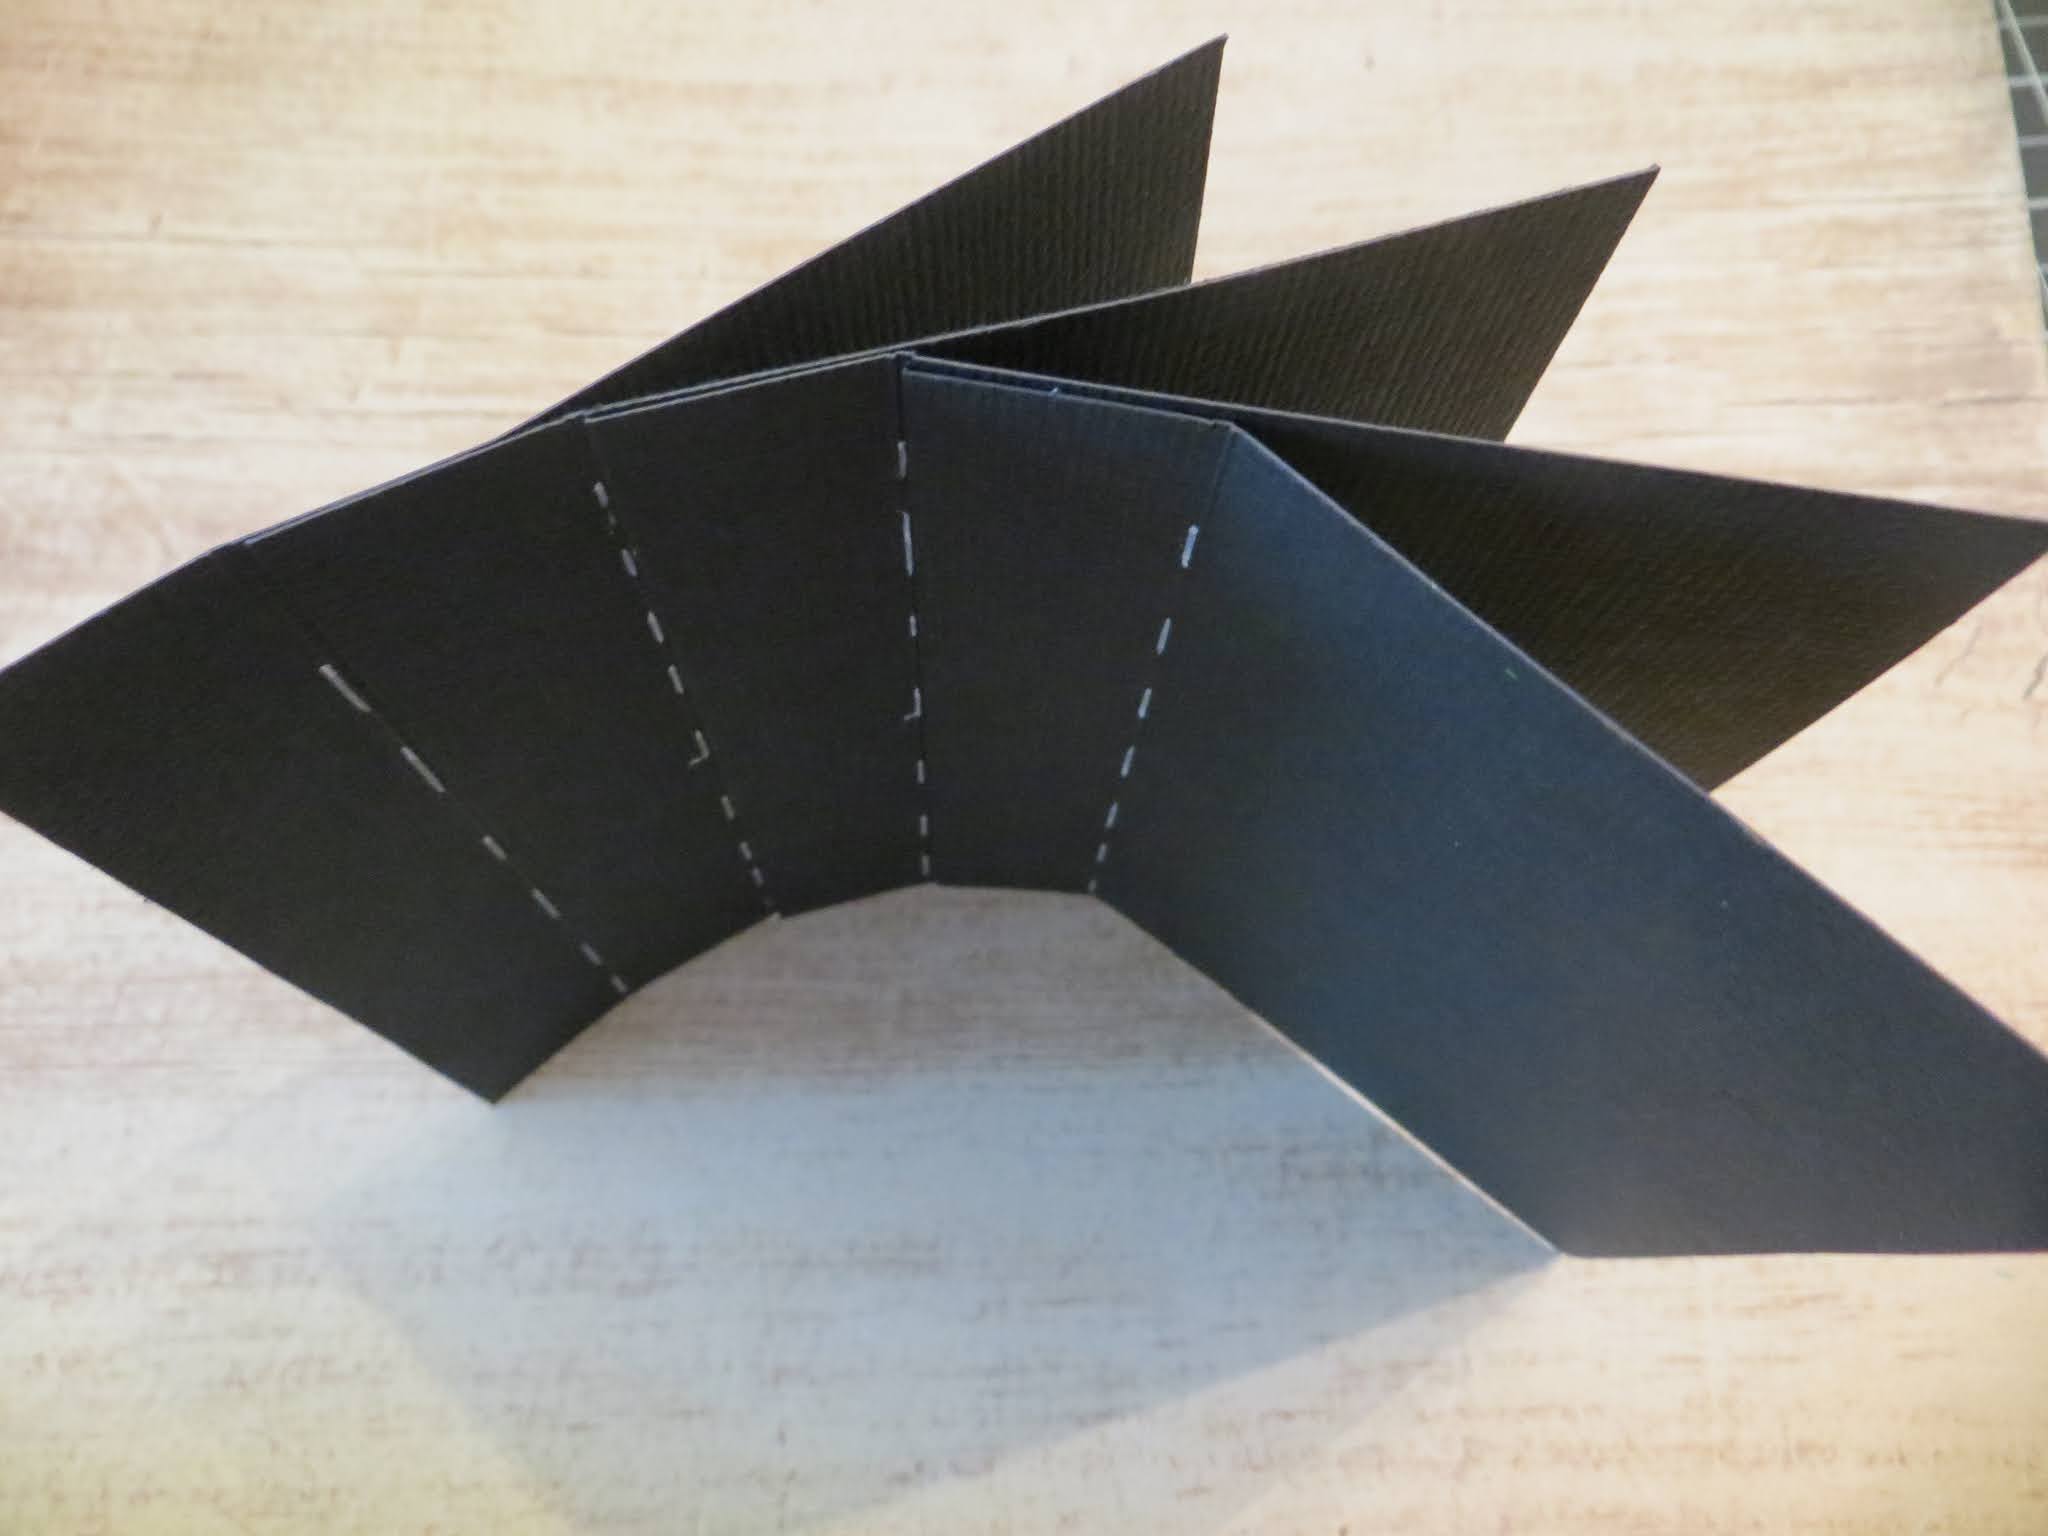
You will then tape the one piece onto the piece below at the fold line until you have all 4 pieces stuck together as shown below.


 the 4 panels should be stuck together staggered like this. From the side it should look like this.

You then want to fold over the top part at the third fold as shown on the left  and from the top it should look like the picture below that - although the card was flipped the other direction.
then you waill have the back of the top piece as shown on the panel on the bottom right.  


You put the tape on the back of the top piece and then you fold it under and tape it down as shown below.
Now you should have a four sided pinwheel as shown on the left from the top. Basically you are taping one piece on top of the other to make the pinwheel so no need to make a center panel- it is thinner and easier to mail.    The accent panels are 4 x 2 1/2- decorate it however you want  with whatever fancies you- I think this would be super cute with kid's pictures for grandparents- or a multiple sentiment birthday card-  Love the idea.   This four panel card will fit inside a A2 envelope.
 You can extend it by another 2 panels- it has to be even for it to lay flat for mailing but the six panel card will be 3/4 inch longer so you will need a larger envelope- at least A6 ( 4 3/4 x  6 1/2" ) to mail it but isn't it super cute?