Showing posts with label Fun Fold. Show all posts

Tuesday, June 10, 2025

You are remarkable card


-you need 5 1/2x 11 white cardbase-
 with 11inch across the top score at 3 1/2  and 6 inches

-turn it around to 5 1/2 on top and cut between 1 3/4 to 5 1/4 inches 1 1/4 inches from both sides

-turn it around back to original position and score at 1 3/4 and 5 1/4 inches on the top and bottom panel only  to the cut line and not inbetween

fold as instructed 
stamp flower or some image on a scrap piece of paper and fussy cut it out
you need a color panel 2 1/2x 2 7/8 and white 2 1/4x 2 5/8 for inside that
color the image as desired
stamped the leaves in lemon lime twist 


Tuesday, June 3, 2025

peekaboo forest card


base card (the back panel is White A2 cardstock 5 1/4 x 4 1/4- 
with 5 1/4 on top, score 3/4 on both left and right sides
sponge dauber or using blending brushes to create the blue sky in the back ground.
In the video I forgot to do this step until after the front was attached which made it a bit difficult...


front top is extra thick white cardstock 6 1/2 x 1
front bottom is extra thick white cardstock 6 1/2 x 3/4
score both at 3/4, 1 3/4. 3 3/4 and 4 3/4 
that's the white layer under the green leaves and grass you can see above. 

glue both sides to the base panel with the flaps on each side- make sure it lays flat when you move the card to the left or to the right


old olive cardstock for grass and treetop 5 1/2x 2v 1/4 diecut the grass die between and 1 1/2 inch area ; use leaf dies to pop it up at the same time. cut the edges to separate the pieces and glue down the flaps on each side - (only glue onto the white pieces and not the entire back of the green panel so it does not stick to the back of the card) 

stamp wood pieces (tree truck and branch) and critters on white scarp piece
color in as desired- some brown- pecan pie, bronze etc
critters in crumbcake, penca pie etc. diecut out and attach to the front as desired. 
make sure when flat it will fit inside an A2 envelope.- you can have one side or the other pop out but not both if you want it to fit. 


Saturday, March 22, 2025

Easy Peasy Cake celebration card.- turned front panel


Happy Birthday Chris!


hard to see the sentiment embossed in gold on the other pictures.


open card standing


Cake celebration card.- turned front panel 

base card is Flirty flamingo  11x 4 1/4 scored in half to make top folding card.
cut 1 1/4 inch from the front panel from bottom and from the top fold 
use the cut panel turned 90 degrees and glue or tape to the top and bottom to fit the A2 size- align with back basecard panel to fit .

take 2 3/4 x 4 inch white panel and decorate as shown
stamp the image as desired:
the cake base was pecan pie
base cake was pretty in pink with accent of flirty flamingo 
frosting diecut in white (don't you LOVE this die?)

stamp flowers in pretty in pink and leaves in granny apple green on scrap paper and diecut 
and decorate the cake as shown

sentiment strip in pecan pie cardstock and embossed with sentiment in gold embossing powder and mount to front panel so the base of cake has something it is resting on- I don't like to see cake and plates "floating!"

Saturday, March 1, 2025

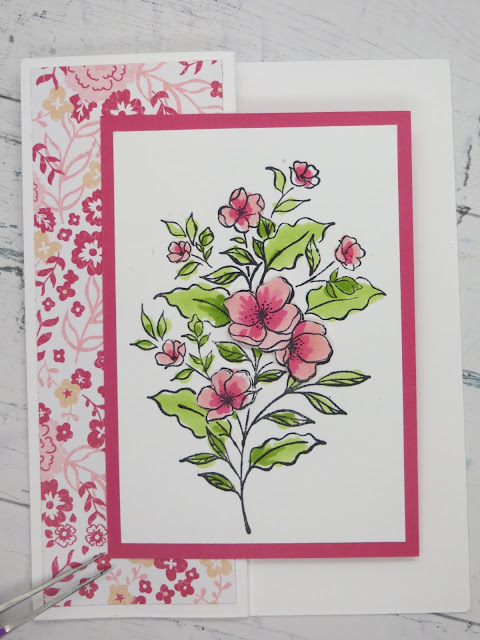
Memorable Blooms Z fold card


• White cardstock 5 1/2 x 8 1/2 scored to make side folding 4 1/4 x 5 1/2  A2 size card. The stamped flower will on the back inside of card.
score the front panel vertically at 2 1/8" to create the z-fold.
• add a designer paper to add interest to the left front panel (1 7/8 x 5 1/4")
• take the white panel 2 3/4 x 4 and stamp the center image from memorable blooms and color as desired.
• Take the little scrap of white with flowers color in and cut it out and mount to the front panel stamped image with dimensionals and tombow multipurpose glue to add a little dimension. 
• Mount the stamped white panel onto a layer of Melon mambo 3x4 1/4. 
• use glue or tape to the back of the left side of the melon mambo panel to mount to the left side of the base card only to make the Z 
• stamp the image in the center in the back  behind the melon mambo panel  or write a personal message 

Saturday, February 22, 2025

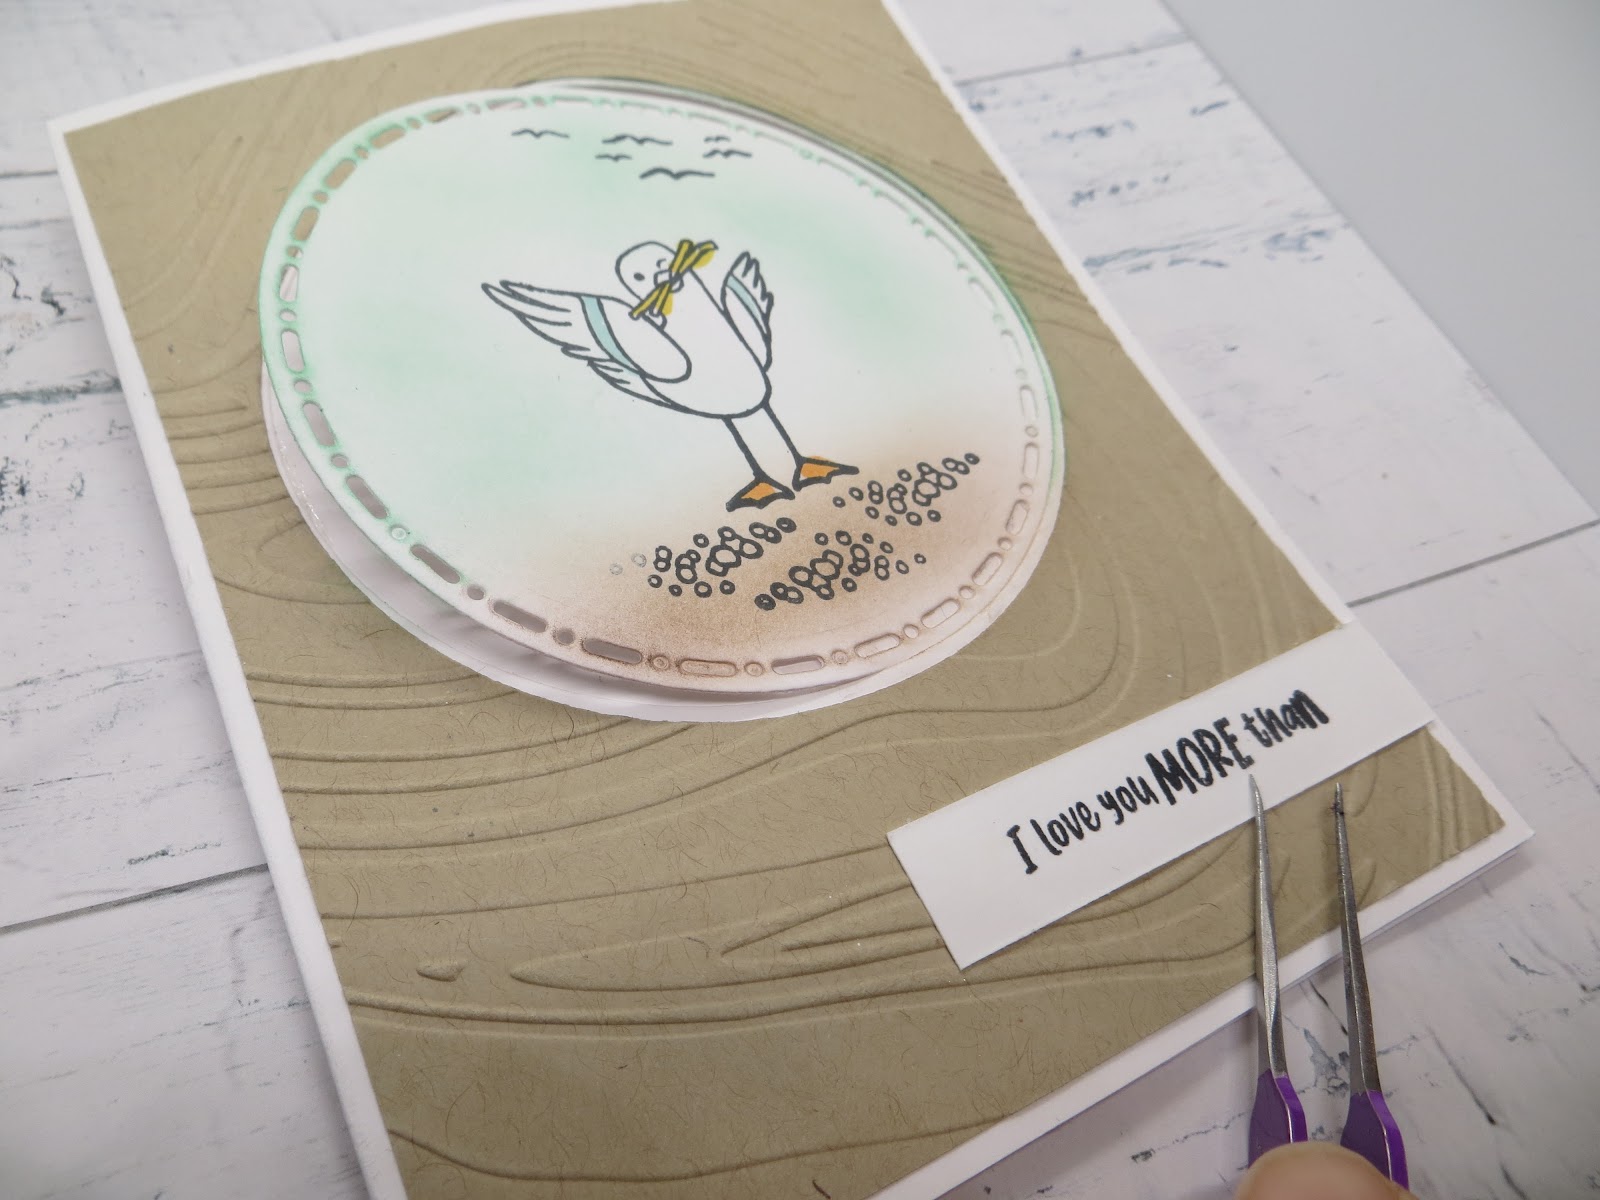
Friendly Seagulls flip card.


#3.   (free sale-a-bration set with $60 purchase)
take 2 White cardstock scored to make side folding 4 1/4 x 5 1/2 A2 size card.(DO NOT use thick cardstock for this project)
with one add a 4x 5 1/4 piece of crumbcake and mount using tape to the outside margins only and diecut a circle from the white and crumbcake panels. - Here I used Spotlight on Nature dies (but any simple shape die will work- even if irregular will work too for this project) 
emboss the crumbcake panel after cutting with So Swirly but Soft Waves embossing folder would be really great for this.
stamp the seagull with french fries, the distant seagulls and gravel onto the white circle panel you diecut (keept the crumbcake piece for another project)  use blender brush to add some color to the sky - here I used pool party and crumbcake for the sand) 
Stamp I love you more than sentiment on a 1/2 inch strip of white cardstock..  stamp French fries on another piece and the french fry image on a scrap piece of white cardstock and color in.
 
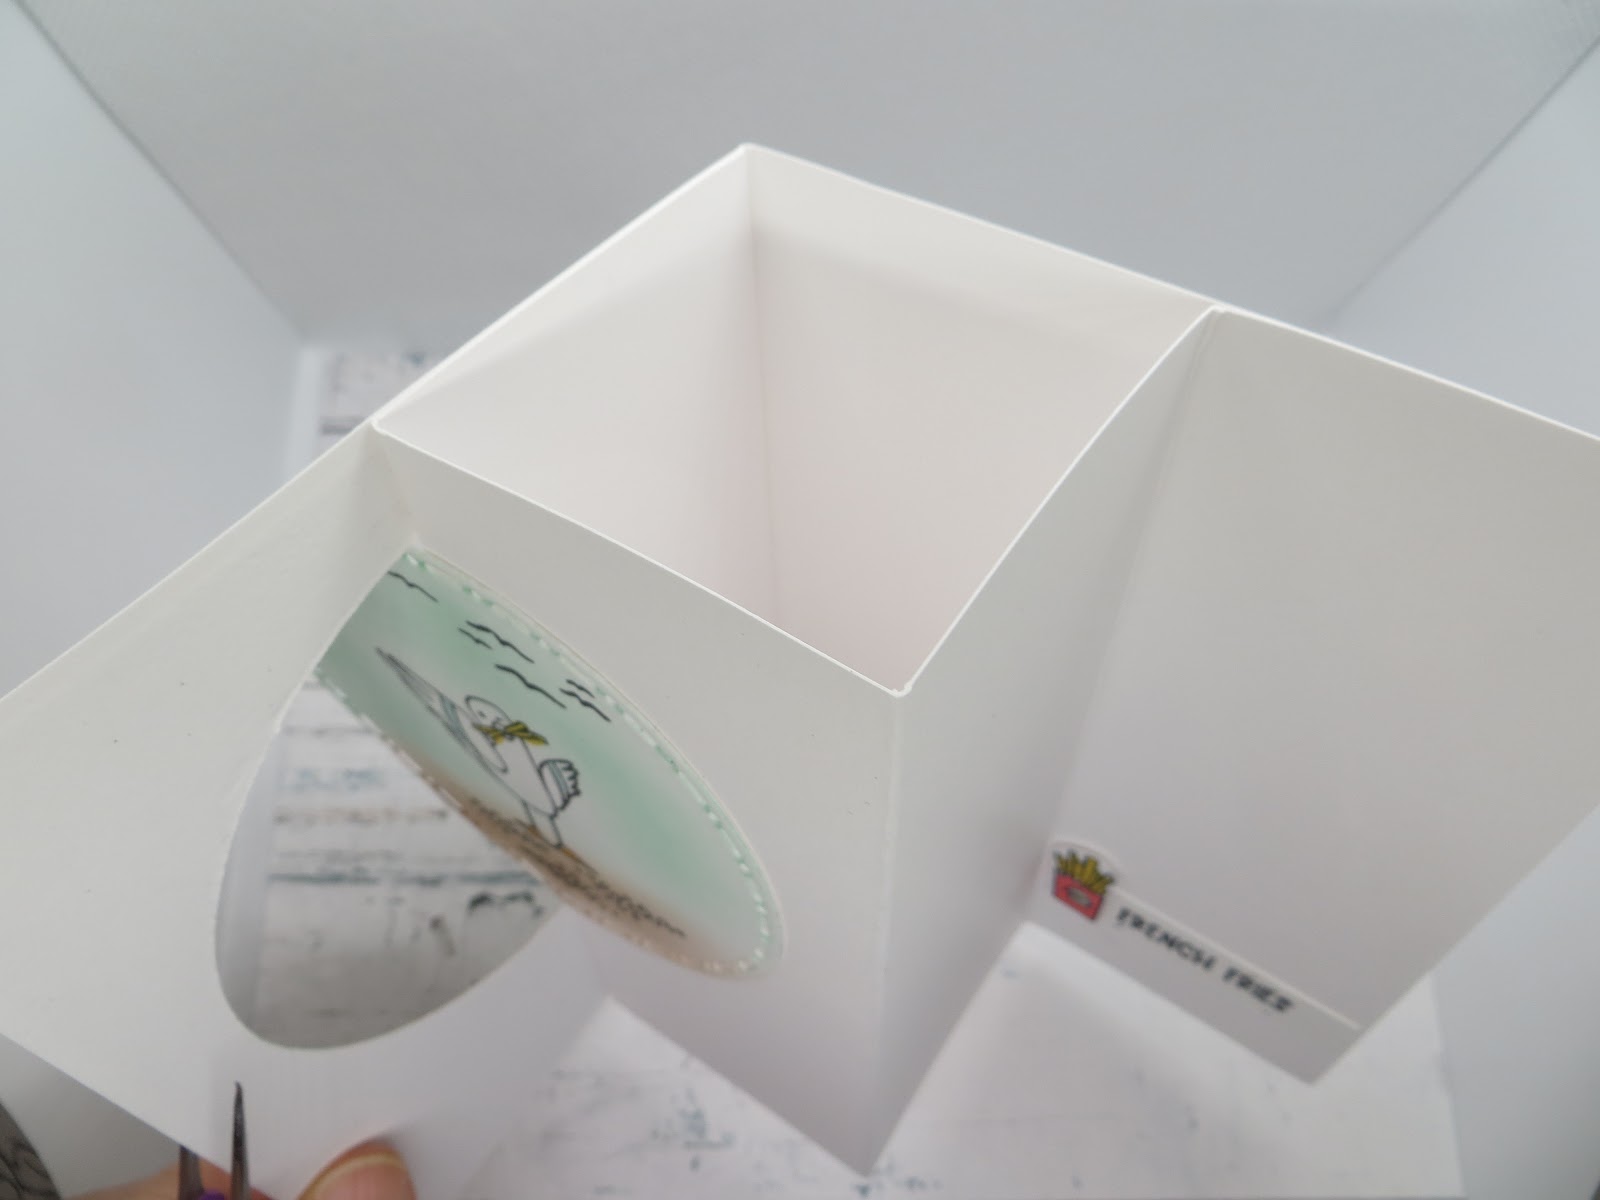
take the second white cardstock and score in between the center fold 2 1/8 inch from each end. 
Glue the left panel of the second white basecard to the the right half of the back of the white panel with the circle diecut out ( from the scored center to the half way out) - make sure to put the glue only on the back panel with the circle cut out and no glue on the open area..
the far right panel of the second white cardstock will be glued to the inside far right side of the first panel with the circle diecut.
so when you open the card there will be the circle opening on the left and a W fold in the center.
close the card and glue the circle panel to the RIGHT HALF ONLY in the opening so that it will flip when your card opens. 
attach the sentiment to the front and inside as desired. 
 

Saturday, February 15, 2025

Corner in Bloom Easel card\ and variations


Corner in Bloom stamp set (Saleabration free item for $120 purchase)
take White base card to fold  4 1/4x11 and score at 2 3/4 and at 5/12 inches 
layer of Poppy parade 5 1/2 x 4 1/4 
take a layer of white cardstock 5 1/4x 4 inches and stamp the poppy flower corner image twice one on each corner
color the flower - we used poppy parade and leaves with Granny Apple Green stampin Blends.
stamp the little piece of flower with same colors and fussy cut out. mount with dimensional on the inside to create an easel card. 
if you have time if you time a few minutes to fussy cut the outside of the frame image it makes for a more interesting card. 
or try mounting it on basic black cardstock instead of Poppy parade for a dramatic looking card


another color variation with checked embossing folder background in a landscape shaped easel card.


Tuesday, April 30, 2024

Zinnia Easel card and variation


 1. Zinnia easel card- on line exclusive

base: take thick white cardstock  8 1/2x 5 1/2  fold into 1/2 into A2 size card 4 1/4x 5 1/2 
emboss the front panel with Zinnia Embossing folder.- score the front panel in half horizontally 

cut a piece of Zinnia DSP paper for the bottom inside panel.

Use every day details die to diecut a circle panel for the front.- adhere the bottom half of the circle onto the bottom half of the front panel as shown.

stamp large Zinnia image on a scrap piece of white cardstock and diecut out and color as shown.- i used Stampin Blends - flirty flamingo melon mambo and berry burst and old olive but whatever color you want to use - the colors are lifted from the DSP colors.

Stamp sentiment on a banner punched with Banners Pick a punch (retiring)
stamp sentiment in Memento Tuxedo black in front and on the banner. mount with dimensionals. 


Here I used the poppy parade cardstock embossed with zinnia folder and a piece of zinnia DSP bordered with a sliver of gold peeking .after I stamped the flowers on the scrap white and coloring it in I used the poppy parade stampin blends to color in the outside- I have a pet peeve about the white border showing- so I usually use white background so it will not show...

Embossing folders add such texture to the background I really love it! More often than not I will add some embossing folder texture instead of leaving it plain.


Tuesday, April 9, 2024

Everyday Details popup card


 basecard is thick white 8 1/2 x  5 1/2  scored at 4 1/4 for A2 card
Diecut a large circle using the Everday details die. 
emboss the front panel minus the circle using the Layered Florals 3D embossing folder
stamp the sentiment on the inside panel.
 
mechanism is a piece of white cardstock 3 x 1 1/2 inches- scored  3 times every 3/4 inches with the 3 inch side across the top.
fold the mechanism piece in 1/2 and with the open part of the fold on the fold of the card on the inside, place glue on the mechanism panel on the bottom panel closest to the fold of the card.
Tape or glue the top panel of the mechanism closest to the fold to the inside panel - only on the part that will stick to the area between the fold of the card and the circle opening, Do not put adhesive beyond the front opening.
 
Stamp and color in the image from Everyday Details. Fussy cut an extra egg and apply with dimension if you want some dimension.
I put glue on the egg closest to the nest so it will stay put  and dimensionals on the top part so it will pop up- I did not want the eggs to "float")

Tape or glue on the second panel of the mechanism visible through the opening with the card closed. 
align the circle (or whatever diecut you use for this technique) and burnishso it will stick to the tape on the second panel of the mechansim.  
When you open the card the diecut will pop up.

Use stampin' Blends - so saffron, Pool party inkpad using sponge daubers to color in the raised potaion of the embossed front panel as shown to add some interest without detracting from the front panel.
. 


Tuesday, March 26, 2024

Spring Double flap card


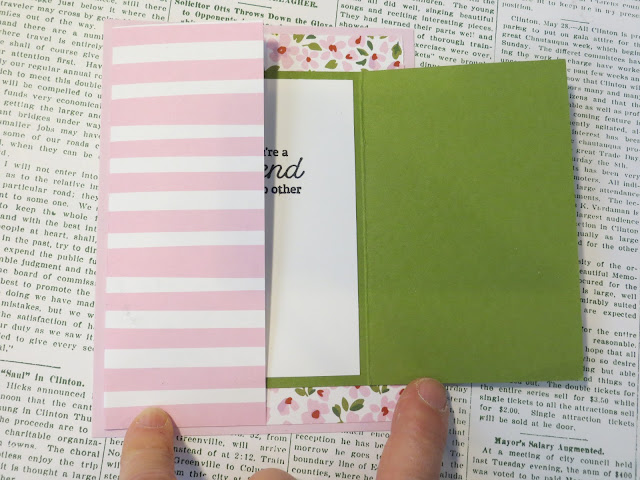
basecard is bubble bath cardstock 4 1/4x 5 1/2


Use delightfully eclectic double sided DSP  5 1/4 x 6 scored at 4 inches with 6 inch side across the top

take the old olive panel 4 1/4x 5 1/2 scored at 2 3/4 with 5 1/2 across the top.
front panel is white 2 1/4x4 white cardstock. 
stamp the easter bunny on a post-it note to use as a mask. 
stamp the Easter bunny on the white panel, cover with mask and then stamp the grass elements.
Stamp sentiment from Hooray for Surprises set in memento black.  color in the easter bunny - bubble bath inside the ears - green grass, however you want to color it in.

Easy card using 2 quarter sheet and a piece of DSP - you can get 4 pieces out of a 12x12 DSP so good way to use up your stash- especially the really pretty ones that you want to show both front and back.


Tuesday, March 12, 2024

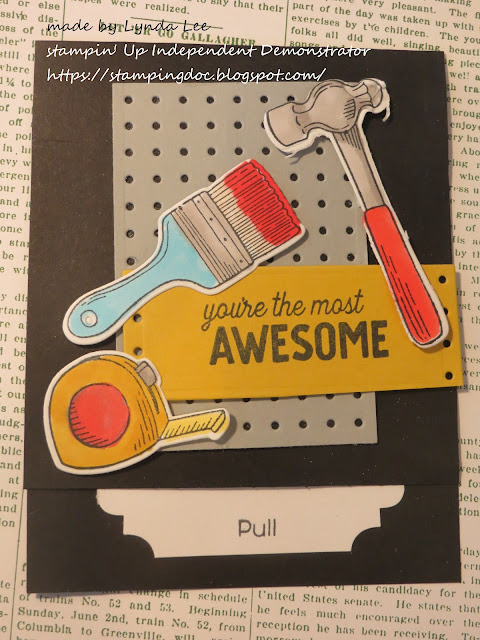
Trusty Tools pop up Card


basecard is basic black 10 x 4 1/4  scored at 5 1/2 
inside center panel is piece of white 8 1/2 x 3 scored at 3 3/4 inches
Inside panel DSP  3 1/2 x 2 3/4- cut bottom corners with  Stampin' Up Very Best Trio punch. (Flip the punch to make the corners symmetrical.
mechanism is a piece of Cello bag 3 x 2 1/2- the tear tape goes onto the 3 inch edge- and adhered to front top of the inside panel.
another piece of tape goes on the other side of the cello piece on the opposite edge.
position the center panel as desired and then stick to the main card. 
make sure mechanism works before adhering the sides closed. 
stamp "pull " on the bottom of the center panel (from Hurray for Surprises stampset)
stamp
Diecut the woodpeg panel.
diecut the tool box panel and stamp the sentiment
Stamp the tools on a white cardstock scraps -color in as desired and diecut.
adhere to the front and inside panel as desired - use dimensionals to add interest.

Tuesday, March 5, 2024

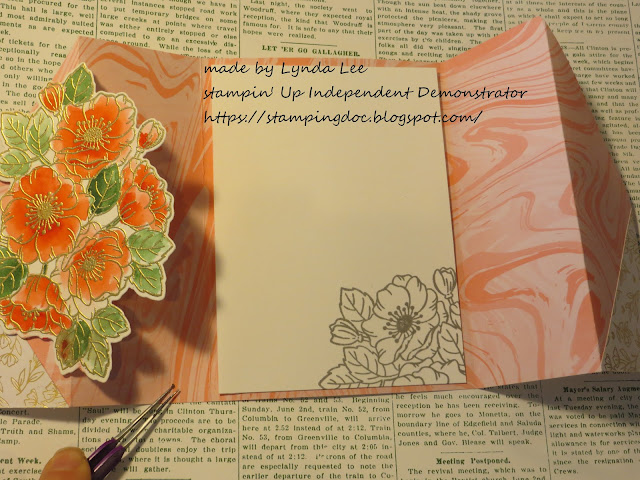
DSP Gatefold card with Enduring Beauty flowers


The basecard is a double sided DSP 5 1/2x12 scored with 12 across the top at 2,4,8 and 10 inches.

Mark the front panels along the sides at 2 3/4 inches using a pencil and cut the triangle from the top fold at 2 inches and 10 inches to the side 2 3/4 inch mark.  save the 2 triangles to use on the bottom.  Flip the triangles and adhere it to the bottom part of the front panel so it mirrors the top when card is closed. 
watch direction of your fold if top is in one direction.

stamp the Enduring Beauty flower image with versamark on a separate piece of scrap paper, heat emboss with gold embossing powder and diecut to create the front panel. mount with dimensionals on the left side of the front panel only 

inside panel is white cardstock 3 3/4 x 5 1/4- stamp with image and sentiment if desired with smoky slate ink - leaves plenty of space to write a message- and if you wanted you could cut the paper twice as long to create a flap for additional messages. 3 3/4 x 10 1/2 scored in half for a top flap inside panel.

Tuesday, February 20, 2024

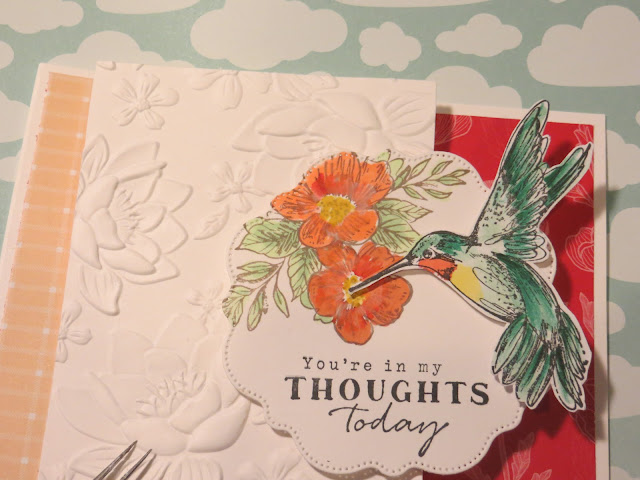
Thoughtful expressions Book Z-fold card-


basecard: take white cardstock  4 1/4x11 and score with long end across the top at 2 1/8,4 1/4,5 1/2
top panel 4 1/4x 3 1/4 (here I used white cardstock embossed with Layered Florals embossing folder) (if you want DP 4x3 to put on top of panel)
2 pieces of DSP (sunny days from Sale-a-bration spring 2024) 4x1 and 4x2- one on the left side and one on the right side as shown.
a panel from the Thoughtufl expressions die in white- stamp images in black Memento ink sentiment and flowers in Gray Granite
stamp hummingbird in black on a scarp piece of paper and color as you wish and mount with dimensionals on the left side of the panel only.
Fold back the main card right front panel and center the front panel on it and tape down. adhere the scalloped piece on top only on the left side and the bird on the scalloped piece as shown.