Showing posts with label Paper Flower. Show all posts

Friday, April 8, 2016

Botanical Garden Gold and white cards and a great idea

I was at Michael's few months ago and they had their best buys- this box of 60 cards and envelopes for sale for $5.  I couldn't pass it up. The envelopes are paper thin and cheesy but man - a gold card and envie for 10 cents?

Anyhow in the pack were these really cheesy white heart with LOVE printed on it.  There really is no one I could possible send these to as it stood but there had been really pretty black  and white stripe cards I had seen.  When I layer cards and have to cut the cardstock to size there are always 1/2 inch strips left over that I keep and these left over 1/2 inch whisper white strips were perfect for this purpose.

Stamped the sentiment from Rose Wonder stampset in black.
This was the original cards that I put strips of white on.
I have to give credit to Gayle, one my Stamp-n-chat friends who brought a bunch of pieces diecut already in a container like this so we can pick and choose what we wanted and I thought it was brilliant.  So with all the little scraps of paper that I have I have been just diecutting all the pieces from the Botanical Gardens suite so I can make bouquets in a jiffy.  Love It!
So making all these cards were just a snap.  Just pulled some flowers are and laid them down.
With the gold stripes I wanted to add a little touch of gold sparkle so with little left over Gold Glimmer paper I punched out little 1/8 inch circles.

The flowers and leaves were mounted using dimensionals or the green Multipurpose glue - depending on whether I wanted the depth or not.  Leaves were stamped with Mossy Meadow - the white flower was sponged with the dauber with Calypso coral and the little gold circle added to the center.
This is just another variation on the same idea.
So all those little tiny pieces of cardstock, before you throw it away, see if you cut a few pieces of flower or center or whatever out of it.

Friday, July 15, 2011

Flower Fest thank you


After finding out that my tomato plants were being eaten by aphids, a friend of mine gave me some ladybugs to put in my garden. I wanted to send her a thank you for that and for so many other ways that she has been looking out for me and here is my little thank you using the flower fest set. All the flowers were embossed using white EP onto pacific blue, elegant eggplant, regal rose and daffodil and celery and pear using versamark and punched or cut out and adhered using dimensionals. Flower pot was made using cherry cobbler CS.


I did use a dauber to add a bit more of the same color to the center of the regal rose and eggplant and crystal jewels to the pacific blue starburst flowers.


The small script was embossed in white as well with gel pen to make the trail to the lady bug made with red and black cs and itty bitty circle punch. Split the red circle and dotted the back with white gel pen too and added a little bit of head detail with the detail end of the black marker.


Monday, June 27, 2011

Double embossed Notably Ornate CASE


The stampin success magazine had a double embossed card whose colors I loved so I CASE'd it for my embossing workshop. The base card was pear pizazz with a razzleberry layer. The top layer was vanilla stamped using River Rock with the Notably Ornate stampset. the bottom was Newprint DSP that was double embossed. Using the Vintage Wallpaper EF, ink the SU logo printed side( on the inside) with versamark the emboss it using the big shot. Use black embossing powder and heat emboss it. I wrapped the pear pizazz stitched poly ribbon - put it through a hole and spread it out and taped it to minimize bulk. the flower is Fancy flower punched out 3 times with razzleberry, wet it well then crumple it. The center is the Boho blossom in black and the smallest paper daisies pierced and held with a black brad.


Most of this came out of not having the exact stuff they used to make their sample. But I guess that's where creativity and resourcefulness comes into play. I think some of my best work comes from just not having the stuff I thought I wanted and trying something different and have it work out - some times for the better- or at least I think so.


There are no mistakes in crafting- just creative opportunities!


Lynda


Saturday, June 11, 2011

A simple Fabulous Floret


I am told that the older you get the faster time goes by and somehow a whole month just zipped past with doing this and that without me posting once. I feel like I am going way past the speed limit and no one is pulling me over. I've got to slow down and get back into my stamping groove. The new catalogue is coming out and I feel inspired to clean up my space- that always makes me feel better-


This is the Fabulous Floret set from the summer mini- the minute I saw it, it called to me- " buy me, buy me, it said, I am oh so pretty and I've even got a matching DSP...."- Oh why oh why do they keep coming out with new things I want?


Anyhow, this is a very clean and simple version using one of my favorite sentiments from the retiring hostess set Occasional Quotes. Basecard is whisper white with the leaves stamped in wild wasabi. Sentiment is stamped in black and the flowers punched out using the MS flower and center from my favorite $1 punch from M*chaels in red and white. Simple as can be- literally a 5 minute card- maybe not even.


Happy almost summer!


Lynda

Thursday, March 24, 2011

A bouquet of flowers


I just love this card- I was tempted to send it in to SU but thought it was too simple. I've done variations on this before but I just love the First edition DSP for this. It just looks like newspare. Took a little square of it left over from another project, maybe 2x2 or so and glued it in the front overlap and tied it with linen thread as they would in a french open air market. Embossed the crumb cake CS as shown here http://stampingdoc.blogspot.com/2009/10/embossing-selective.html and stamped just for you from the teeny tiny wishes set in white. I punched a bunch of flowers from the itty bitty shapes punch set, rolled it using he stylus as shown yesterday and stuck a tiny pearl in the center- I think I've gone through 3 packs of these pearl jewels from Stampin Up in the last few month- I just love them so. I punched a bunch of leaves using the two step bird punch using old olive and set them up to look more 3 D using dimensionals behind some leaves and flowers- yes I did cut them into quarters so they would not show. Try your hand at this. It is reasonably easy with the beautiful punches we have and the DSP makes it just look perfect. Enjoy!
Lynda

Wednesday, March 23, 2011

A bouquet of flowers

I had left over 1 1/4 circles and a small oval that was punched out in red CS and you all know how I hate to waste anything so I spiral cut them and dropped a little pearl in the center, set them on top of the leaves from the xtra large bird punch, (Trina Kuriger did a versions of this that I loved on Stampin Connection- website for demos only) tied them up with a 1/8 inch ribbon and voila simple cards made from left overs.

I did want to make a frame around the flowers so I used the square lattice EF to selectively emboss the oval area around the center- previously shown here. http://stampingdoc.blogspot.com/2009/10/embossing-selective.html

I just used a balsa wood oval frame - less than $1 at M*chaels- Then I wanted to make it simpler for my workshop and I had seen punched flower on the success magazine (monthly publication for SU demos only) where they used the itty bitty shapes punch to make flowers with a pearl in the center and I just loved it so I changed it up a bit and this is what my "girls" made.


The punched flowers are rubbed with the stylus to make a bowl shape over the spongy piece of mat pack (a mousepad or any slightly soft surface will work too)
I used the saleabation set So Happy for you for the sentiment- which you can substitute for any other saying in the set as it all fits perfectly.
Change up the color of the flower and the ribbon and you can make it for lots of different occasions. Almost a single layer, eh?
A variation on this will be posted tomorrow - so check it out.
Lynda

Monday, March 21, 2011

3D Daffodil


I am a freak for flowers- I have been amassing - and that really is a good word for this- shapes for punching flowers for so long my collection out rivals most stores- and when Stampin Up came up with their Blossoms Petals Punch I HAD to have it. Although there has been some glitches with the SU punches I am pleased as punch (heh heh) about the shapes they deliver. My daffodils were blooming outside and I thought it would be perfect for that. I brought in one of my blossoms and studied it to see if I can make one. The base card is Poppy embossed with the tulip folder for the pretty edge. The sentiment was stamped in versamark and embossed in white EP. The wild wasabi CS was cut into 1/4 inch strip to make the stem and folded to free shape the leaf. I glued only part of it so that I could shape it. The flower is cut with 2 shapes. The skinny big leaf for the petals. I used the 6 sided flower from the Boho Blossoms punch to glue the petals down onto it so make spacing a little easier- I did overlap the leaves a bit on it though. I then punched daffodil CS using the circle 1 1/4 inch punch to make the bottom part of the daffodil center then used the scalloped leaf from the same blossoms petals punch to punch out the top part. The center part is about 1/2 as tall as the petals are long I figure. Sponged the edges of all the pieces. The center part is a bit tricky. I tried to figure out how I was going to make it stand up and stay. The dimensional did the trick but it was not so sticky on the side so I put a little line of glue around the edge of the dimensional and wrapped the petal around it - I used a tiny clothespin to hold it in place while it was drying which took about 1/2 hour. I then sprinkled some microbeads into the center which stuck to the dimensional. Although not exactly true to life, not a bad replica. If it would only smell like the morning dew........
Happy first day of spring!
Lynda

Tuesday, March 8, 2011

Variations on the easter basket

I am having so much fun with this stamp- again the same easter basket carrying girl from Pure Innocence (MFT)- this time carrying spring flowers. Used the lattice square embossing folder with an old oval frame to selectively emboss the whisper white CS. I then stamped the girl image and the sentiment on the center of the oval, stamped the girl again on Sunny Gardens DSP and cut out the dress part to paper piece- then colored it in using Cop*cs and then punched out little teensy weency flowers- $1 punch from M*chaels- my favorite for small centers of flowers because they are So tiny- although I would like them to come out with a hand punch- with long handles like the circle punches that they used to have- it would be so much easier on my hand than these dinkie punches that are sometimes really hard to punch a lot-


This is the detail on the flowers - this is a great way to use up those little tiny left over pieces you have left over from all your projects- I have a plastic container filled with small flowers that I punched out from left over cardstock that I was going to throw away anyway- where do you think I got these flowers from? I did add some green ones to add interest as leaves and put gold lame Smooch to add a little sparkle in the center. Added the wreath on her head and a flower that dropped on the floor and another way to use all your easter basket stamps- fill them with flowers!
Lynda

Saturday, February 5, 2011

Valentine Treats


It's that time of the year again! Valentine's Day is just around the corner and it is time to make 63 valentine's treats for 3 classes- I had to make it not too difficult so here it is. Little valentine posies. There are specialized dies to make just these kind of things but of course I do not have any so I used my old Island floral die to make these but any large flower die would work.


I punched a larger hole in the center to fit the tootsie pop I wanted to use. I cut through one of the leaves and petal between so I could roll it up a bit to make it more dimensional. I even used the stylus and a mouse pad to add some leaf lines as you can see.


after I put the lollypop in the center then I used some tape to overlap one of the petals.


I overlapped the petal fully to make a 4 petal flower.


The leaf petals were only overlapped about 1/2 to make an asymmetrical leaf as shown.


This is what the completed flower set looks like. Easy peasy flowers.


When I was at the local M*chael's - with generous gift cards I received for Christmas, I saw these ribbons for 50% off and I had to have them. 4 yards for a buck- not bad! I cut off each happy valentine's day and punched a hole with my cropadile to pierce it and threaded the lollypop bottom as shown on the right.


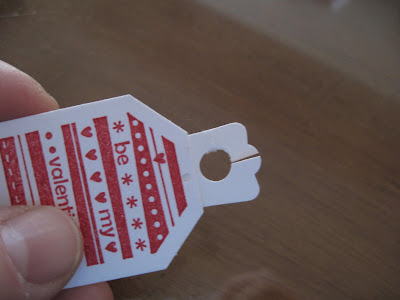
I wanted to add a tag so that my kids would have to write the names of the recipient so I used this retired stamp that matched the tag punche in red to make easy tags. Originally I had added the tag with linen thread but my kids had a hard time tying it- they are supposed to make their own valentines- so I used the modern label punch and 1/4 inch circle punch to make a tie the way like those bread ties. I just cut through with scissors and it stayed on the lollypop reasonably well. It does shred after the while so I would have the kids sign it in the back and put it on at the end.


and here it is. My kids are having a ball making these- I hope you do too.
Lynda.


Wednesday, April 28, 2010

SCS CC268 Old Banana Ballet


I had a load of work to do but this card kept creeping up on my dream last night and I had to whip it up this morning to post it.
It is the SU Sizzix Daisy diecut- the smallest of the 3 flowers diecut 6 times in white- I did it 3 layers at a time so it went really fast. The old olive leaves- another one of my favorites- I think I will have to buy one as spare in case this wears out in the future- The center of the flower is my old friend Liquid Applique in yellow gobbed on and heated with my heat gun to create the raised center like a really flower after raising them up on dimensionals. I actually had a big giant hole inside the flowers and stuck the dimensional underneath with the sticky showing but the liquid applique will cover it all up with no indication of what is underneath so don't worry about that.
The sentiment is from the Everything nice SU set- I LOVE this set- it is so sweet!- the banana oval cut with my old Coluzzle, mounted on the BAllet blue cs and thne on whisper white base card. It just calls out to me and makes me smile. With the mountain of work I have to do today, I need that! Have a happy hump day!
Lynda

Saturday, April 24, 2010

frost white shimmered fancy flower card


This is a very simple card I had at my workshop to show how simple it is to use the frost white shimmer paint. You know me- can't stand to make too much of a mess- I get enough of that from my three active boys-
Take a whisper white CS and stamp the small flowers and stem on the top using so saffron. I did not even stamp off to make the flowers, I just stamped it straight and it still looked fine. Take Sahara Sand CS strip and run through big shot using perfect polka dot folder ( I can't get away from this folder- I love it so )


The accent flower piece is made by inking the solid flower image with the So saffron classic pad and then BEFORE you stamp, take a dauber, take the frost white paint, shake it up then take the lid and dab a little bit of paint off the LID using the dauber and using the dauber to dab some shimmer directly onto the rubber with the saffron color underneath it to add a subtle shimmer then stamp on the whisper white cardstock. Stamp the outline with so saffron as usual and cut the flower out.


The ribbon is a stay put ribbon, punch a hole where you want the ribbon to come out and tie it- the ribbon will not move, no need to glue it in place and you use less ribbon to boot!


Mount the flower with dimensionals. It is a subtle card and it is hard to see the shimmer here but I thought it was lovely.
I like this technique because you don't have all the little pans of color laying about and you can make ANY color pad into a shimmer pad with no mess. Make sure to wash off the stamp between inking to not contaminate your classic pads though- I used a baby wipe in my class between inkings and it worked great. The daubers can be rinsed off to use with another color as well.
Lynda

Friday, April 23, 2010

5 circle paper flower


Another paper flower idea I used for my workshop.
The flowers are made with 5- 1 inch circles - here with raspberry lemonade DSP but any double sided DSP you like will do. The base card is melon mambo with whisper white cardstock on top, that has been run through the big shot with the perfect polkadot folder but with a frame with an oval opening on top of the folder for selective embossing- (the frame is made of wood I bought at local *chaels for less than one buck), corners rounded.
The flowers are pretty easy. You can measure out 1/5 of 360 degrees and fold it - or take any perfect 5 sided star- here I used the SU star punch- cut off the arms as shown- 2 on one and 1 on the other- I used the one arm sticking out to tape the two together to create the perfect angle


use the template, place the corner on the edge of the circle with the sides showing pretty even- the fold the edges over-


like this- make 5 circles and voila- easy peasy 5 leaf flower with any size circle punch.
I used 1/4 old olive strip for the stem and used a folded olive cardstock put only partially into the same circle punch to create the leaf, ran it through the crimper with it still folded to make the leaf. Tape down the flower leaving the flaps alone for added dimension. Place a rhinestone brad to match in the center and a cute flower you can mail!


Add a 1/2 inch strip banner in so saffron with sentiment of your choice- attached with dimensionals to add some curve and lift and another easy peasy card you can easily show in your workshop.
enjoy!
Lynda


Wednesday, March 31, 2010

Scallop Circle 3D flower- 1 layer spiral rose


This is another 3D flower I have been playing with. The colors look a little off here but is really pretty in person.
Rose red CS base with barely banana CS embossed with perfect polkadots embossing folder over the bottom half then scored to create a line as you can see. I stamped the sentiment with an old olive pad then used a blender pen to take off the olive ink and used a rose red stampin' marker to selectively add color (another one of my favorite techniques) .
The leaves are diecut with Little Leaves using the big shot.
The focus this time is on these little flowers, which are super easy to do with just one punched scallop and a pair of scissors.


Take a scallop in a color of your choice and cut out a spiral from between one of the scallops until you reach the center as shown. You could draw it out first if you wanted and it would still be fine.


Start with the center and spiral it around as shown as tight as you can and that is all there is.


This is the final card with 3 flowers (I find tombow multimono, crystal effects, tacky glue et to work better than tape for this though.


closer up view of the 3 flowers - all looking a little different and the side view that shows them just siting down on the card.
I am SO ready for warmer weather!
Lynda


Monday, March 29, 2010

scallop circle 3D flower- 6 layers


There are lots of scallop flower instructions out there- most of them tell you to punch 9 scallops, wet the cardstock, wrinkle it up one at a time, then stack the wrinkles flowers up, make a hold in each, put the brad in then unfold blah, blah blah. You know me- impatient as all get out. I can't wait for anything if I don't have to. Life is too short. So this is my version.

I saw a lot of 9 scallop versions- but if you are using stampin' up CS it is really pretty sturdy and I found 6 scallops to be much easier on my hand. Besides, for my classes, one quarter sheet punches out 6 scallops so it was easier math then to try to figure out a third sheet per person.
The look of punched book or manuscript is also widely popular so here is my version using the Define life stampset. No one really looks at the words so I just stamped one definition a bunch of times on a sheet -like a brick wall -as shown on left.


Punch out six scallops.


I've done it with flowers all wrinkled up before hand one by one like people said and just crisp cardstock straight from the punch, stacked up, pierced and brad placed in center- and you know what?- It is not enough of a difference that I care to wet it and wait for it to dry. It seems to work just fine either way.


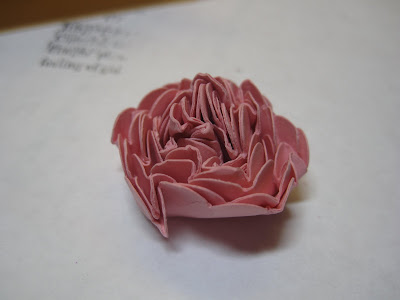
When I did it just straight, just pierce the hole, add the brad and just really scrunch it up into a ball. A lot of people in my class were so gentle- I say - just scrunch it up. Don't be so gentle. It can take it.


Then do the next layer and the next.


Until you get this kind of an ugly little ball of layers.


Then you loosen it up a bit, and it's as pretty as it gets, with 6 little pieces of punched up paper.


I've used glue dots and dimensionals to stick it and both work fine.


This is what it looks like when you use only 3 layers with a button from Button Latte Designer buttons tied wtih a hemp twine.


You can sneak a look at the brad holding it in, but if you scrunch it well or use 9 layers, it is much harder to see it. If you wanted it to show you could use a rhinestone brad or a halfback pearl from the pretties kit, some seed beads etc. Imagine how it would look in orangish paper with black or brown center like a poppy.
Sponge the edges or spray with shimmer paint diluted with alcohol, so many possibilities.


This is a card CASE'd from Dawn McVey using Stampin'Up instead of Papertr*y products and still oh so pretty.....
The motif is stamped repeatedly using an image from Tiny Tags.
Rose red CS and DSP with 1/2 inch strip of paper stamped with a note of thanks from Thank you Kindly set. I like to have the ribbon effect of the strip raised slightly and tacked down like a real banner- see some of the pictures above.
Try it out
Lynda