Showing posts with label Family. Show all posts

Sunday, May 27, 2018

Truly Tailored Graduation Easel Card

 I love popup cards.  For some young men in my life who are graduating I wanted to make them a special graduation card and what better for that than the Truly Tailored Suite?

 Take a 4 1/4 x 11 inch cardstock and score it at 2 3/4" and 5 1/2" as shown.
I made a template out of a piece of chipboard that comes with our DSP to make the collar.  Use it to cut out the sides on the 2 3/4 side of the base card as shown.
I used the same template but this time on a 4 1/4x 5 1/2 inch whisper white CS and just but the shoulder part- leaving the vertical lines without cutting as shown on the left.
Fold the cut pieces in as shown on the left into a V to create the collar.  I took a 3/8 inch strip and glued it down for the front.  I used small gluedots on the corners of the collar to secure it.  You can flatten the collar if you are mailing it or keep it sort of  rounded it you are hand delivering.
 Put the Tombow glue on the base card as shown to adhere the shirt on the top only to create the easel.

I did not have enough matching small buttons so I made them using an old punch that has 2 holes in it and then punched it out with a 5/16 inch circle punch.  Put it on the shirt with the mini stampin dimensionals- the perfect size!
The pocket is just a 1" strip of whisper white CS that I fed through the Tailored Tag punch to create the angle on the bottom. The Old hexagon punch will work too.
 You can use scraps of triagular piece of True Gentleman DSP to make the pocket squares as shown.  I took a rectangular piece of scrap, cut it diagonally and layered it side by side to make it look like this.
Stamp the sentiment from Truly Tailored set in Night of Navy and punch it out. Layer it with a piece of Basic Gray CS then again mount it with dimensional.  Put a piece of DSP on the bottom of the basecard on the inside as shown, mount the sentiment and you are good to go.
 I needed graduation cards so I used the congratulations from Stampin Up retired eons ago and the graduate is from another company.  But you could make it a promotion card, birthday card - it fits all occasions depending on what you say on the inside piece.

Sunday, October 18, 2015

Amazing Birthday


My kids came to me the day before their birthday and tells me that they need cupcakes for the next day for their class- by the time my oldest was in fifth grade they did not seem to do birthdays in classrooms but these guys are a little younger at heart and wanted to celebrate it with their classmates.  They wanted half chocolate and half vanilla so of course I had to make a run to the grocery store at 9 o'clock to get the supplies to make the cupcakes. 

With all the allergies in classes, I thought best to make it then buy - but it was really that they did not have enough in the store for both their classes!

So I got done around 2am making all the cupcakes and frosting it all but it just looked plain.  I needed something to jazz it up a bit but what to do- what to do.
Then Amazing Birthday set to the rescue-I  stamped little images of birthday cake in different colors then  these guys after they woke up in the morning punched it out  and we taped front and back together over a toothpick and it was super cute although it was super easy.  We did the whole thing in less than 30 minutes and they were very pleased with what they took to school for everyone.
Thank the Lord that I had these aluminum pans from some catering event a while back- they were perfect for 26 cupcakes- stable and tall enough for them to carry each batch to their classroom.  Whew!  Crisis averted.....

Thursday, December 25, 2014

Merry Christmas!


 This is the Christmas pop-up box that I sent out this year.  I started with the box forms that I cut and scored during a trip. I made the tabs for the middle of the box and stamped the sentiment and colored it in during another trip with my new Blenderabilities that I had gotten.  I then stamped and punched all the trees and punched them out.  I knew I wanted to do a hanging ornament and I tried strings, ribbons then with diecuts and it was all too much and then I got the 25 Days set from the Holiday Catalog and at real size the ornament topper (day 11) was perfect size so I cut it and stamped it using versamark and embossed it using silver EP.  I used the Small scallop Stamping Trimmer rotary cutting blade to cut a strip of red glimmer paper and used 1/2 inch circle punch to punch out the ornament and voila!  2 inches by 1/2 inch strips of white glimmer paper to imitate box ribbons.  I was pulling my hair out putting snail individually until I realized how easy it was to use transfer adhesive sheets!  I used less than 2 sheets to adhere all the strips for 98 cards so bargain to boot.
 The thing that took the longest was trying to get a decent picture of the kids- I finally ended up having to bride them and the whole time Dylan was asking- why do you want me to hold this stupid red paper for? when I asked him to pose this way- he finally got it when he saw the card all assembled...  Cutting them out took a lot of watching of Masterpiece Mysteries then rewinding a lot because I couldn't pay attention and cut out the darn fingers on Tyler- Next time, keep the fingers together!

The backside has our only reasonable family picture I could find.  Notice the little red bag on my side- it was our cute little bag from convention!  It was the perfect little travel bag holding my phone, camera, ID a little money and the room key with a map! That bag  has gone everywhere.  Thank You Stampin' Up and
Happy Holidays Everyone!  Lynda

Sunday, December 25, 2011

Merry Christmas to all and to all a Good Night!


Hopefully all my family would have received their cards for now so I thought it would be safe to post- this is my Christmas card for this year- I have 3 boys and with an engineering husband they really like moving parts so I try to make somewhat of an interactive card every year and this year I decided to do a water fall card.
Figured out the dimensions based on the pictures I wanted to print out. I was also tired of having to photoshop a picture to send out every year and thought separate pictures would be best. Basecard is whisper white with real red embossed with the Snowburst embossing folder (love the geometric pattern!). Take of strip of Holly Bouquet DSP - it has glitter on it - so sparkly! Took a piece of limeade CS with corner rounded for the right pull out side , scored it to make the waterfall- instructions are everywhere- here is one from Splitcoast Stampers- http://www.splitcoaststampers.com/resources/tutorials/waterfall_card/ . Added the pictures printed out wallet size. The cover image and sentiment is Beautiful Season from the IB&C. The image was stamped in black stazon and watercolored using the watercolor crayon then glittered with dazzling diamonds onto shimmery white CS.

Tyler, Kyle and Dylan in order and the three of them during camping this summer with sentiment from Four the Holidays set beneath. Some faraway friends got a short letter I attached to the back for a little update.

I attached a little handle made of roundtab punch- could not live without it!- 2011 stamped with Calendar Alphabet & Numbers in red and tiny snowflake from Snow Swirled in bashful blue.
The pictures have JOY on the right side bottom if you can see it - did not work out as well as I liked but it's like a secret message....
Happy Holidays to you All! and may the new year be filled with good healthy, happiness and good fortune for you all!
with much thanks and Love,
Lynda

Sunday, February 21, 2010

A day at Boreal


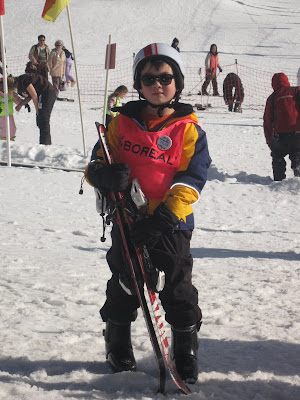
In California where we live, we don't see any snow at all. But my DH is from Seattle and I am originally from Ohio where we have lots of snow and thought it would be fun for the boys to see what this is all about and get them started on ski lessons so at least they would know how if they wanted to. So last weekend we trekked up to Tahoe to see some snow and the boys all in all had a ball. They were slip and sliding on saucers and innertubes whizzing down the hill and Tyler took a ski lesson the next day and although this was his first time and it was hard and he did gripe about his flat feet rubbing in the ski boot, he loved riding on the ski lift and how cool he looked in all the gear. Dylan was a little apprehensive about the huge downhill slides and after a while decided he prefer to just play and climb in the snow.


Kyle on the other hand loved the speed of the slides and was up and down the hill the whole time. Here he is making a snow angel- he knows how to at least look the part of an angel.....
Warm wishes for those of you living in the snow....
Lynda


Saturday, November 21, 2009

Adventure balloons


Mykids love, I mean LOVE balloons. I've hired a balloon artist every time I have help a birthday party for my kids at home or park where I could do this. I've even learned to do some basic shapes myself. But, yesterday we went to Appleby's on Saratoga Ave near 280 in SanJose and a guy was working there- unfortunately did not get his name but WOW, was he fabulous!


He blew everyone I've met out of the water. He made cinderella and a snow white with an apple in her hand, big giant spiders, supersoakers, I have not seen someone with more repertoire of balloon shapes.


He made this giant spider with yellow eyes with hot wheels fire printed on it and Tyler just loved it and pretended to be attacked by it.


Dylan refused to say what he wanted until Tyler's was completely made and then he says " I want a worm, a black one, all squiggly like this" making a zigzag with his hands. I thought a worm? what is the point of that? just one long balloon! but look what he did with his request!


Dylan put him to sleep on one of his blankets last night with a pillow under his head- saying "good night, Wormie" and gave him a kiss.

It was so sweet.


Kyle asked for " a propodile, a breen one- A DARK breen one " he says. and this is what he made him.

I saw him go around the room and make some amazing shapes and things. I did not get his name but did get his card. They have a web site at http://www.adventureballoons.net/

Dale thought maybe Tyler will be too old for this on his next birthday but I beg to differ. If you could see how much he loved his balloon spider, you would know too. I will certainly be using them for my next birthday party.

Lynda

Monday, June 8, 2009

School year thank you album


I was asked by one of the moms if I could help decorate the scrapbook album cover for


album and buterfly stickers by Marcella from K and company - cover paper from making memories,


the perforated orange lined paper from Chloe's Closet line from Making Memories


teacher's apple from PT


Monday, June 1, 2009

Tyler's school project- Quilted pillows


Tyler's second grade class made quilt squares after visiting with San Jose Museum of Quilts and Textiles and I volunteered to make them into pillows. The squares were so darling, all colored in with bright and bold markers I wanted the fabric to match but could not find any fabric that matched the pictures enough after visiting 4 different fabric stores and the one I did finally find not only cost 9.99 a yard, it was not even available and they could not guarantee me a date even if I ordered it. Even with my 40% off coupon, I could not make it work with the $40 budget for the 19 pillows.
So I ended up piecing the borders and the backing and I thought it turned out really cute. The one on top was one that one of Tyler's playdates made and I thought it was adorable.


This is the pile that we had to put it all together.
I strip pieced all the different fabrics -some from my stash to add variety and Tyler stuffed all those pillows we made to put inside the casing. I forgot how much fun it was to sew and piece things. I am going to get back to my quilting- or maybe I can incorporate some of my infamous fabric stashs into my papercraft!
My 4 yr old twins loved the pillows so much and they were begging me to make one for them too. I had to go out and buy some more muslin and stuffing for them to use to to paint on with my Fabrico markers and they love their little pillows I made for them this weekend with left over scraps.
I had the twins stuff their own the pillows and they loved playing with it - they said it was a cloud- and they loved taking part in making their project.
If you could only see all the "clouds" they spread all over the living room......


Sunday, May 17, 2009

Carrot Cake with Orange Cream Cheese Frosting and Arthritis Walk

Tyler and I have done the Arthritis Walk to raise money for the Arthritis Foundation since he was 1 year old- It used to be him in a stroller but now he raises his own money and walks it all. He has beaten me in almost every year with the money he raises for this good cause. I guess cuteness counts! Our team including ever vivacious Julie, her son and Linda raised almost $2000 this year. Tyler saw a young man who lost his vision from his arthritis at the walk and he commented that he did not know arthritis could do that and how sad that was. I told him that rheumatoid arthritis that the young man has is a disease that affects the whole body not just the joints and we need a cure of this disease some day and that is why we are working so hard to raise money for this cause. Thank you to all of you on the team and who donated to our cause, it will make a difference!

This year it was at the Guadalupe River Park and the San Jose Shark mascot was there so we got to goof a little before the walk. I think Tyler's favorite part was the candy tables they have as you go around. His right pocket was busting with candy at the end of the walk.

I've gotten a couple of requests for my Carrot cupcake recipe that I made for Tyler's birthday celebration at school so I thought I'd share that here. It's from America's Test Kitchen recipe book.

Carrot Cake- makes one 9x 13 sheet cake or 24 cupcakes.

Adjust oven rack to middle and heat oven to 35 degrees. Lightly coat the pan with vegetable oil spray and line bottom with parchment- or use cupcake liners.

Whisk together in large bowl and set aside:

2 1/2 Cups AP flour
1 1/4 tsp baking powder
1 tsp baking soda
1 1/4 tsp cinnamon
1/2 tsp nutmeg
1/8 tsp ground cloves
1/2 tsp salt

Whisk together in large bowl until forthy and sugar is mostly dissolved about one minute:
4 large eggs at room temperature
1 1/2 C granulated sugar
1/2 C packed light brown sugar

While whisking above egg/sugar mixture, slowly add in:
1 1/2 C vegetable oil until thoroughly combined and emulsified about 1 minute.

Whisk in the flour mixture until no streatks of flour remain.

Stir in 1 pound of peeled and grated carrots. (Best to use shreddding disk on food processor or large hole of box grater- DO NOT USE PRESHREDDED CARROTS as they are too thick and will leave you with a crunchy cake.

Pour into prepared pan and bake until wooden skewer insered comes out with few crumbs attached 35-40 minutes- rotating pan halfway through baking. (for 24 cupcakes bake 30 minutes) Let cool in pan on wire rack 2 hours.

option: stir in 1 1/2 C toasted and chopped pecans or walnuts and 1 C raisin into the batter with the carrots.

Orange Cream Cheese Frosting: This is the most yummy soft frosting ever! and it only takes about 30 seconds to make total with a food processor! Although it may take a good 5 minutes to lick the bowl and the spoon after.....

Process in a food processor until combined about 5 seconds:
8 oz cream cheese softened
5 Tablespoon unsalted butter softened
1 Tablespoon orange juice
1 Tablespoon grated orange zest

Add 1 1/4 C confectioner's sugar until smooth about 10 seconds, scraping down bowl and blades as needed.

Enjoy!

Lynda


Lynda

Thursday, November 6, 2008

I want more rainy days like this...

I love the four seasons. The coolness of the air as the leaves change colors to golden orange hues remind me of the passing time and the preciousness of it all. I used to love walking in the rain kicking the water up off the sidewalk and getting soaked when I was a kid. Even now I like the cool drizzly mists that signals the coming of winter here in California.

We couldn't stand being cooped up in the house any more- there is only so much coloring and playing you can do inside- and decided to go for a walk in the pouring rain. All dressed in raingear, high boots and umbrella, the kids still loved kicking up the water after cautiously measuring how high it would come up.

Nothing like going for a long walk in the cool rain to come home to a cup of hot cocoa with little marshmallows floating on top....... "Just like Curious George" Dylan says......

I want more days like this......


Friday, October 31, 2008

Jack O' Lanterns

Did you ever try to carve pumpkins with 3 little boys?

They all want the knife!

Dylan wanted a spider man pumpkin and then wanted to give him a lobotomy- I let him carve and destroy the back of the pumpkin.

Kyle decided he wanted to draw a bunch of jack o'lanterns and see which one he liked and make a book- using my post it notes and my eraserboard marker! Do you think it's acid free and archivable? (LOL) Not bad for a just turned 4 year old, eh?


Here's one of the JOL's carved and ready...
Happy Halloween!
Lynda

Saturday, September 27, 2008

Tyler's viewmaster card

This is the card that Tyler's class made with my viewmaster card idea- I thought it was so sweet I had to share it with you- you can see the seasons he drew in with the turn of the wheel...

I think I screwed up the order by uploading it not in the right order but you get the idea. Thanks for looking!