Showing posts with label Boxes and Bags. Show all posts

Saturday, December 28, 2024

6x6 DSP bag

 6x6 DSP bag

score at 2 1/2 and 3 1/2 on one side and 1 1/2 and 4 1/2 on the other side  and fold as shown on the left below
You can use a clip to close the bag or fold over a tag and close it with staple or glue
here I punched 2 holes and tied a red and white baker's twine.
Add a tag if you wish. 


Saturday, December 21, 2024

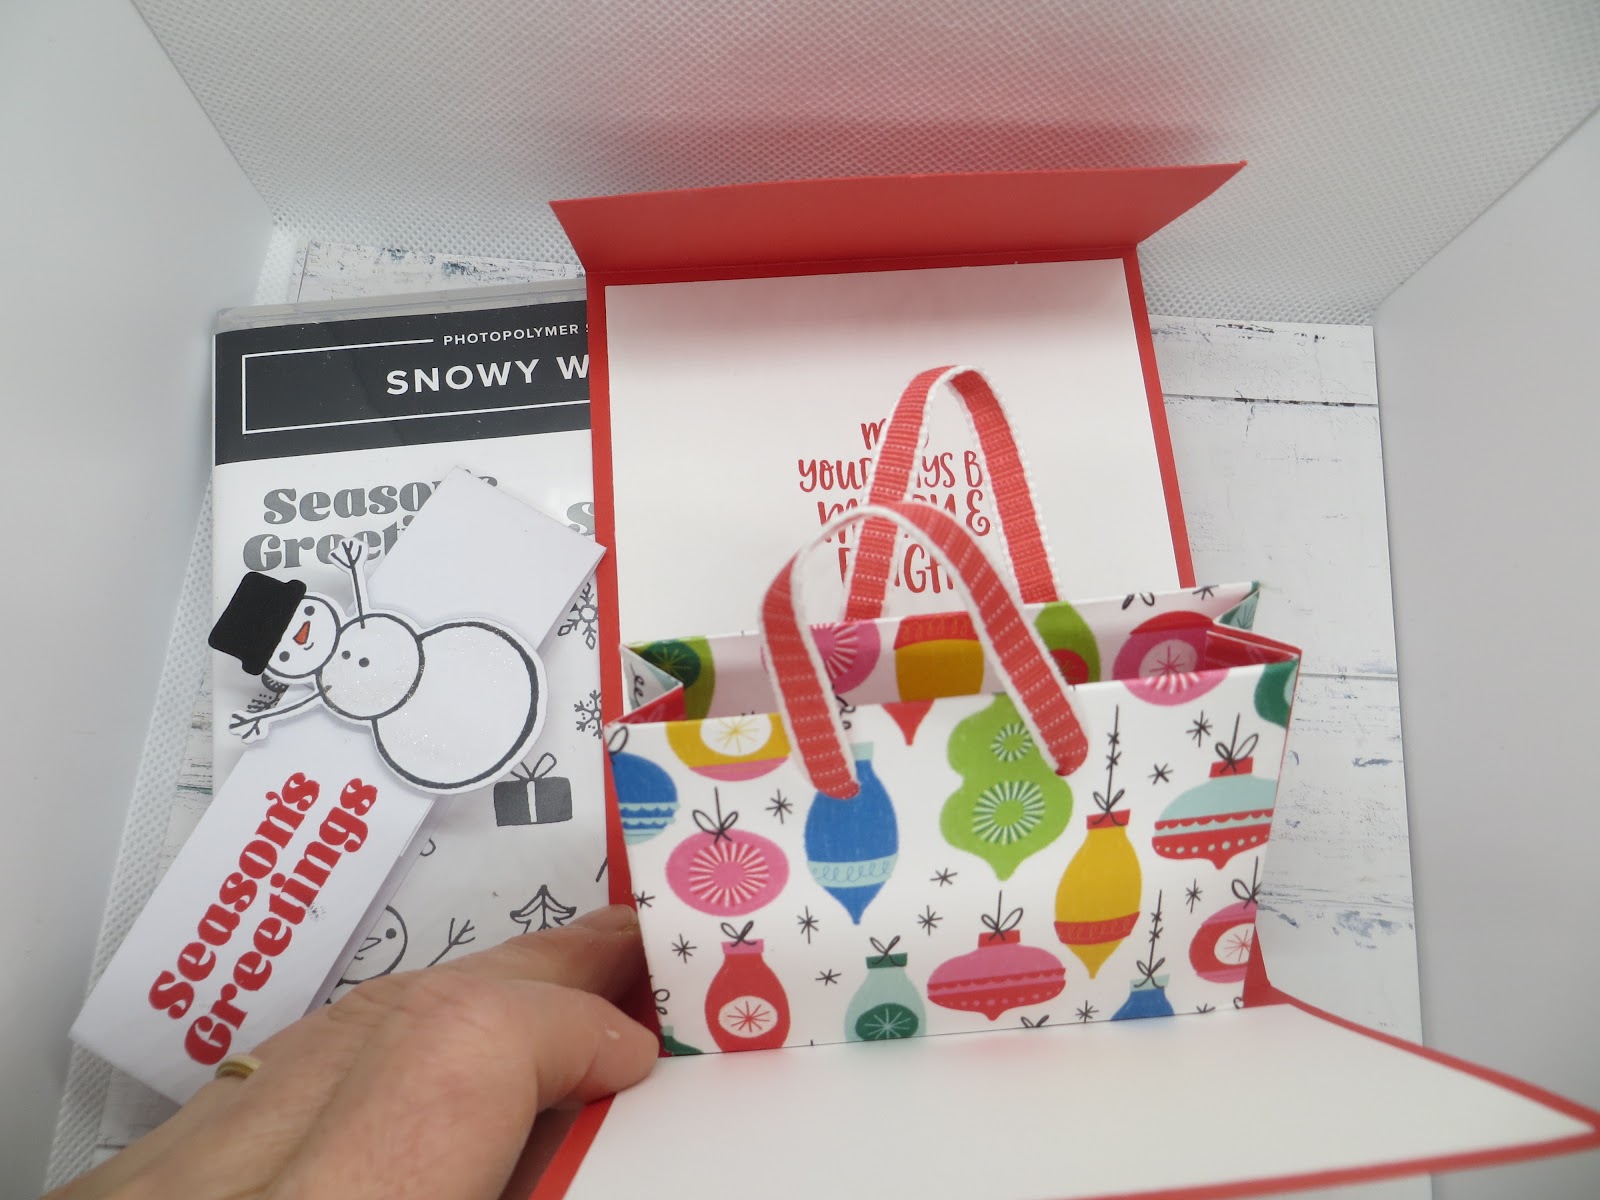
shopping bag card

 Shopping bag card


• Poppy Parade cardstock basecard scored at 4 1/4 x 11 score at 3 1/2 and 9 to make a 4 1/4 x 5 1/2 A2 size card in a different fold
• white cardstock for inside middle panel 4 x 4 3/4; inside bottom panel 4x 2 3/4  to stamp sentiments
• shopping bag from DSP 4x 9 1/2  score at 1/2,4,4 1/2,5,8 1/2, 9 and turn 90 degrees 1/2 from bottom and 1 inch from top (if directional)
• 1/8 inch circle punch to make hole for the ribbon or awl to make hole
• 2 pieces of ribbon for bag handle- 2 pieces of scotch tape to tape down the ribbon - 
• belly band 1 1/4x 9 1/2 or so white cardstock - put opening in front to hide behind element - stamp sentiment in poppy parade ink and put the snowman (from Snowy Wonder set over the fold to hide the seam
 

Saturday, October 19, 2024

Halloween treat box using 6x6 DSP

 halloween treat box


A good way to use up all your DSP's you have been hoarding- makes 4 from your 12x12 papers.

Playful Ghosts stamp set and Something fancy die for the tag
take a piece of halloween DSP 6x6 inches
score on one side at 1 and 5 inches
score on the other side at 1", 2 1/2", 3 1/2", and  5"
cut the tabs to the 1 and 5 inches. taper cut only the one inch tabs (so the ones between 0-1 inch, 2 1/2 -3 1/2, and 5 and 6)
circle punch 1/2 way up the panel that makes up the front to make it easy to open.
adhere the side panels to make the box.
stamp image onto the tag and color in as desiredsmall hole punch top to thread the twine
tie with ribbon or baker's twine three color pack.


Thursday, December 22, 2022

25 Days of christmas- Cracker Treat Box with Eos Lip balm inside


I am giving my staff a little Christmas treats  of Eos Lip balms which I really like. It fit the Cracker Treat Box perfectly but with the different flavors i wanted people to be able to choose the flavors they wanted so i put a little window to make sure they could see what they were getting.   I also did not need to make a 5 sided box ao I just needed the 4 sides with one overlap- for that I just needed a 4x6 inch DSP which also saved me paper.  First few I made whole and then had to cut out the last panel so by using a 4x6 paper and setting it up this way I was able to make 6 treats out of eatch 12x12 DSP which saved me paper - a win win!
I tied a bow on each end and hooked a little candy cane on it so it was dangling off the treat- it was super cute!
I set it up so people could choose the cover and the flavorof the lip balm and the window made it super easy to pick out what they wanted.

Happy Holidays!


Wednesday, December 21, 2022

25 Days of Christmas- free standing shopping bag using same template as pop up


For a free standing bag you can make it one of two sizes.

Use the template for the pop up bag but turn it upside down (be mindful for the pattern on the DSP)   
Do not cut out the panels but just make vertical cuts.
the dimension is 4 x 12  NOT 6x12 - unless you want to make a 4 1/2 inch tall bag then you can use 6 x 12.

The top part of the pop up will make the base of the bag and you turn in the bottom part of the template to make the top of the bag.

I took 2 strips of 1/4 inch expresso cardstock here and ran my fingers through it to create a soft curve and attached it using glue dots to create the handle.  Added a little piece of tissue paper- I cut up the ones I get from Paper pumpkins into thirds for this.  I rolled some crisp money for my kieds so this is how they got their cash  but it will also fit a gift card or a small trinket.  The finished bad is 2 1/2 x 4 1/4 using the 4x12 inch DSP


Tuesday, December 20, 2022

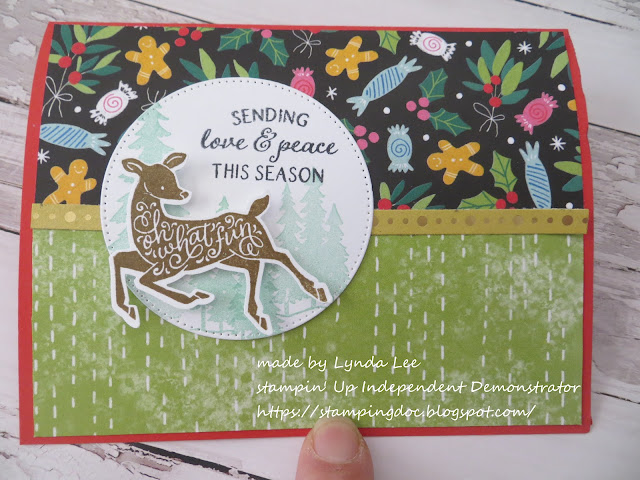
25 Days of Christmas- Pop up Shopping bag and Peaceful Deer


I LOOVE this paper- I have used it so many way- love the bright colors- so modern- Celebrate Everything was the hostess DSP from the holiday mini and I hope to buy another pack before it is gone!

cut 2 pieces of DSP  2x 5 1/4 as shown. Take a piece of gold Festive Foils and cut a strip to show the dots - so sparkly pretty- 

Take a piece of circle diecut from Stylish Shapes and stamp the trees in pool party and sentiment in black. Stamp the deer in Soft suede onto piece of scrap whisper white and punch out and mount with dimensionals - now that is the front of the card.- pretty all on its own. but of course we can't leave a good thing alone- we are going to make a pop up shopping bag on the inside - this is a great way of getting rid of all your 12x 12 pretty double sided DSP - each sheet makes 3 bags- cut them into 4 x 12 inch pieces keeping in mind the direction if you need to-

Score along the 12 inch side at 4 1/4,  5.  5 3/4  and at 10, 10 3/4, and 11 1/2 inches as shown.  Score on the 4 inch side 1/2 inch from one side and 1 inch from the other.  

in order to make the pop up bag you will cut out the side panels as shown above in hatchmark. you can angle the bottom part ot make it sit more pretty.


 Glue the last 1/2 inch onto the other side to make the bag side.  Fold over the 1 inch top to the inside (important if you want to make a handle with eyelets or holes and put ribbons in for handles or if your paper has an ugly inside- to cover it up like I did for this one- who wants fireworks for Christmas?)

Put tape on the bottom part both front and back and put the bag close to the crease and tape down. when you open, the bag will pop up. put some tissue paper and gift card and you are good to go- You can also tie the handles to keep the card secure.

Sunday, December 18, 2022

25 Days Of Christmas- Design a Treat Box and variations


The Design a treat box is so funny- Love the tiny box but more so I love the antlers and bunny ears it came with.   The only thing is once you put the ears on and glue it down you cannot open the box without ripping it - and I like to store it flat when I am making it so what to do?
the Kit is really clever- I like the little lines stamp that mimics ribbons on the box - although I wish the ribbon was more delicate. The deer is made using soft suede cardstock. The antlers were made using Early Expresso. Punch out circles using crumbcake and cut in half and stamp the bottom of the face on the half circle and 2 small matt black dots for the eyes. His ears were diecut using crumbcake cardstock.
Doing it this way you can squeeze the ears and antlers between the 2 half circle tabs on top and still be able to open the box.
I did the rabbit ears the same way - used thick white cardstock to make the box, stamped the face on it and diecut the ears and colored the center with light flamingo stampin blends. Now the only issue is the center falling out because it was diecut all the way through- so what I did  was to punch a large daisy punch (retired now) using white cardstock and colored it in with same flamingo stampin blends and glued it to the back- it is just large enough to hold the center piece i n place- just add a fluffy white bunny tail to the back and you are good to go for Easter!
These tiny boxes do hole one piece of Lindor chocolate bonbon as shown on the left - what a sweet surprise- 

details of the rabbit ears


details of the present with the ribbon stamped in real red


on the original sample I had the eyes on the top half of the circle with another piece of 1/2 crumbcake piece - although the face was split it looked better than having that big hump on the top- but I think I like this version - Margery came up with - better since I can still open the box using this method.

 Details of the card variation for those who did not want to make a box- sentiment from Brightest Glow set. Used a rhinestone gem colored in with real red stampin blends to make it red.  You could also use a small red pompom1


Friday, December 24, 2021

25 Days of Christmas- Day 24- Peaceful Cabin Popup giftcard Box Card


Giftcard Box card sounds redundant doesn't it but it really is a box that holds a giftcard that is a popup. I cased this from https://buckeyeinklings.com/2021/09/02/pop-up-box-in-a-card/ but the box she had was a bit too big so I shrunk it down a bit to make it the size you see below. it fits the giftcard on its side exactly.
The base card is thick white CS. I took another piece of white CS and stamped the trees in Mossy Meadow but I wanted it more green so I used the water painters to spread the ink to make it a bit more green.  Stamped happiest holidays with heartfelt wishes. I used blender brush to use Balmy Blue with Basic borders dies to create some Cloud background and the fox in soft suede.


Stamp the house in black on a scrap piece of paper and diecut some fences from crumb cake as shown to create the front of the card..


  This is the dimension I used for my card. You will need  DSP 3x 6 1/2 or so. Score at 1 1/2, 3, 4 1/2 and 6 inches vertically.  Score at 1/2 and at 1 1/2 inches.
remove the middle panels on the bottom and cut the 2 remaining bottom diagonally as shown.
Put tape on the side tab and put the box together. then put the tape on the 2 triangles.


put the taped triangle face down on the fold of the card as shown with diagonal of the triangle on the fold.  When you close the card the top fold with stick to the top triangle and make the popup. Make sure the box and the giftcard does not pop out of the margins of the card though.
Enjoy!


Wednesday, December 22, 2021

25 Days of Christmas- day 22 - Christmas Season Giftbags


I love these bags -3x9 Printed Gusseted Cellophane bags - 25 for $7 and the print althoug for all year round- does look kind of like snow so still very cute.  
I took the larger tag from Seasonal labels Dies  which is 3inches wide, stamped the pine leaves on the tag directly, and stamped the cone and the berries on a scrap and diecut it out and mount as shown.
I just used one cone and 2 berries.


Take a 3x 7 inch piece of Balmy blue and score at 2 inches to fit the gussetted bottom as shown. 

Fill with treats of your choice.
Punch two holes through the tag and the bag and cardstock.  Put a piece of Real Red stitched satin ribbonthrought the hole as shown on the left

then bring one of the ends through the other side as shown then back through the other side to create the loop and secure.  Trim the ends to make the sweet ribbon tie secure.


 I forgot to tell you that I stamped happy holidays from Frosted Gingerbread set on the back before I put it on in Mossy meadow.


Thursday, December 16, 2021

25 days of Christmas- Day 16 - easy gift box hack


My husband is always asking me at the last minute for a box for a gift card or something and I am always panicking looking for something.

This is an easy trick using so many beautiful christmas cards I get that I do not have the heart to recycle or throw away.  Take anycardand split it in half so it is equal in size.  score whatever you need- here I scored 3/4 inches on all 4 sides of both pieces of card to create what you see, cut side of the box at the corners as shown- I usually will cut horizontally on one side and vertically on the other cardpiece to reduce bulk when you assemble the box.  This card was one I got from Stampin' Up one year and it was so pretty so I kept it for just this purpose.  I did punch half rounds on the sides to make it easier to pull the box out.  Put tape or glue onto the 4 corners at the X to make the bottom piece. i then use the box bottom to put the top together so I know it will fit.  you may have to adjust it a little bit to make it fit.


Make sure to use a sturdy tape to put it together so it does not fall apart - Stampin' Seal + should do not the regular Stampin' Seal.
 Easy boxes that you can make any time using what you have on hand- You all must have so many beautiful Christmas cards you are hoarding- it's time to make something and give it away.


  If you have any writing on the inside cover it up with a piece of blank cardstock to fit the box or use some tissue paper- it is nice to get a gift card in a box instead of just a flat card, don't you think?
Enjoy!
Lynda