Tuesday, August 22, 2023
Paper pumpkin August 2023 back fold card
Monday, October 31, 2022
Happy Halloween - Paper Pumpkin September 2022 Spooky Treats
I make treats for my staff every year for many holidays including Halloween- there are a lot of them and sometimes one kit is not enough so I have to make it stretch- so this is what I made- I used the base box to make an openable box - I tired one way with top panel open- see the left bottom trick or treat box in the above photo-but it was not as stable so then I made some candy box type boxes with top opening boxes which worked better.
Saturday, October 2, 2021
September 2021 Paperpumpkin Haunts & Harvest
September Paper Pumpkin was genious. I normally have a whole mess of the boxes the kits come because they are too nice to throw away and normally I turn them inside out as gift boxes or mailing boxes and they are terrific - but they put this wood pattern on the package and had a design inside that you cut out to make a new project that goes with the content- very cool- the kit was adorable with theseadorable pumpkins with leaves and paper wrapped wires for the vine. It was just so sweet and I was able to make halloween treats for my whole staff. I gave the cart to one of my favorite nurses - I did replace the glued on front wheel with a brad so it would actually turn-
it came with 3 different color diecuts - do you think they will ever sell this die? I certainly could have used more of these. stickers for the jack-o-lantern faces and everything you need to put it and the wheel barrow together.
this is the finishes wheelbarrow - and we used the tissue paper that came with the packaging - nothing wasted!
Some times I make alternates to get some variation but this was just so cute and I used every bit as it was originally designed- thumbs way up!
Tuesday, February 14, 2017
Happy Valentine's Day- Card and Owl Treat bag
You want to emboss with Falling Petals embossing folder but put the embossing plates from the Big Shot only to where you want the texture to go so you don't encroach on the hearts to the right.
Stamp little hearts with Sealed with Love set and diecut them out- I like the little white around the edge that offsets it from the background with this die. Stamp Happy Valentine's day in red ink onto a Stitched Circle cut out of whisper white CS. Layer on top of the lacy doily. It looked a bit empty so I was playing with silver thread and cord and ftinally settled on the Sunshine Wishes thinlits dies - I used the flower looking thing because I liked the loop de-loop of the thicker glittery shimmer paper over the thread that seemed be lost.
I was vising with Mercedes Weber on her workshop in San Jose and she gave me this adorable treat from the February Paperpumpkin kit. Details on her blog here: http://mercedesweber.blogspot.ca/2017/02/valentine-owl.html
Now that my kids are older they are not doing Valentine swaps- where did the time go? - now I have to justify buying all the Valentine stuff - Anyhoo, I just loved it and I thought I should make it for my office staff who work so hard all the time. With the kit it was super speedy although diecutting the wings with the heart die from the Love Notes framelit took the longest.
The Owl is done with Pink Pirouette CS- the body is made from the Best Badge punch with the heart that comes with the kit stamped with sentiment from same. Love the little heart outline that fits inside the heart and the sentiment and the heart nose is from the owl builder punch in Peekaboo Peach. Take 3/8 inch strip and punched a bunch of hearts in a row to make assembly line style.
Googly eyes and tiny clothspins from local craft shop Beverly's. (Love my Mother in Law who gave me a gift card this year for my birthday to this store- all used up already!) With this precut bag already with tape on it, it was really speedy once I finished all the owls- So Sweet! That's why Mercedes is Artisan again this year! A badge Owl.......so creative.
see my basket of owl valentine treats for my wonderful staff.....
Sunday, April 24, 2016
2016 April Paper Pumpkin
I got this red package this month from my Stampin' Up Paper Pumpkin subscriptoins and it was this little foam wreath with little yellow flowers dangling from it which was kinda cute. I had been playing with my Botanical Gardens die at the time and had cut a punch of flowers and I got to playing and this is what came out and I am super happy with it. So cute!
I actually put a nail on my wall to make it a permanent part of my little wall.
I used the branch that came with the kit as a base for the flowers. Folded the four sided flowers from botanical gardens for the blue blossoms on the end.
I still have tons of leaves and yellow flowers left over to make more projects. I will have to play some more. This was the anniversary kit and it came with an extra stampset which was super sweet.
I used a left over piece of DSP to make the pink flower in the center and tucked in the small yellow flowers on each side. Added little pearls for that extra sweetness.
Lynda
Saturday, November 7, 2015
Sweet Stack birthday favors
Sunday, April 5, 2015
Boy Scout Pinwheels from PaperPumpkin June 2014 kit
Then the lightbulb moment!. The pinwheel set from PaperPumpkin from this past year June kit was perfect for it. I proposed it to my husband and he was all for it. The pinwheels are summer sun and blue paper that I glued back to back to make it double sided. I used the straw and the brad and clips from the kit- the mechanisms- and used toilet paper rolls for the base- I always save them for after school clubhouse program that are always in need of them for their craft projects anyway.
I printed out some boyscout logo from the internet and used MDS to print it out and punched it out with a circle punch to fit the center of the brad and it looked great! The kids used gluedot to stick it on.
I cut out some thick foam that had come from one of the packages I got from something and hot knife cut it into a circle to fit the bottom and sticky taped it in place before the kids got there. The toilet paper rool wascovered in same blue paper and the names were diecut using the Little Letters thinlits so they could diecut out their own names. We then diecut the fleur de Lis (from Michael Strong that I bought years ago just for this purpose) in Gold foil sheets and used multiliquid tombo glue to stick it on.
then the roll was weighed in with 20 pennies each and then they inserted the straw into a circle chipboard- I used the ends from the some of the Dpaper packs- the real hardy ones - I think this one came from the glimmer sheets or the window sheet- and diecut little circles to fit inside the toilet rolls snugly with the circl in the center to hold steady the straw as shown.
I think it looks like a firecracker going off- perfect for a celebration dinner with each of their names on the side to mark their place. It was a great fun for the kids to make them.and definitely do-able craft project for the 10 year olds.
Sunday, July 6, 2014
Pop Up Flower card
I made this card for a Paper Pumpkin contest using a stamp set from a prior kit. This was a April 2014 kit. I used the Pool Party base card with Mossy Meadow cardstock cut with fringe scissors to create a "grass".
Flower from Itty Bitty Accents punch using Hello Honey cardstock and the leaves using the Bird Builder.
The sentiments are stamped with Blackberry Bliss, the butterfly with the Tangelo twist.
I love how it pops up and sits high. I thought I may add a picture of my kids and embellish it for a card that would be on the desk for my husband.
Details of the pop up.
enjoy! Lynda
Saturday, July 5, 2014
Sea Street Sea-riously Paper Pumpkin Challenge
Friday, July 4, 2014
Happy Fourth!
Monday, May 26, 2014
May Paper Pumpkin trip into the Redwoods
The elk are aplenty - grazing all over the place. We went to Fern Canyon where they filmed Jurassic Park, the place looks absolutely prehistoric with ferns growing up and down the canyon walls and wood pilings rich with green growth.
This was our campsite with the huge netting for the mosquito- challenged family like mine- although my legs today still looks like a map of the constellations with all the bites I still got...
Now what does all this have to do with stamping? Well, as I was leaving for the trip, what arrived in the mail but my favorite little monthly box! I took the box off and tucked away the package with my portable stamping bag (with all my essential stamping gear). just in case I had any time to kill.
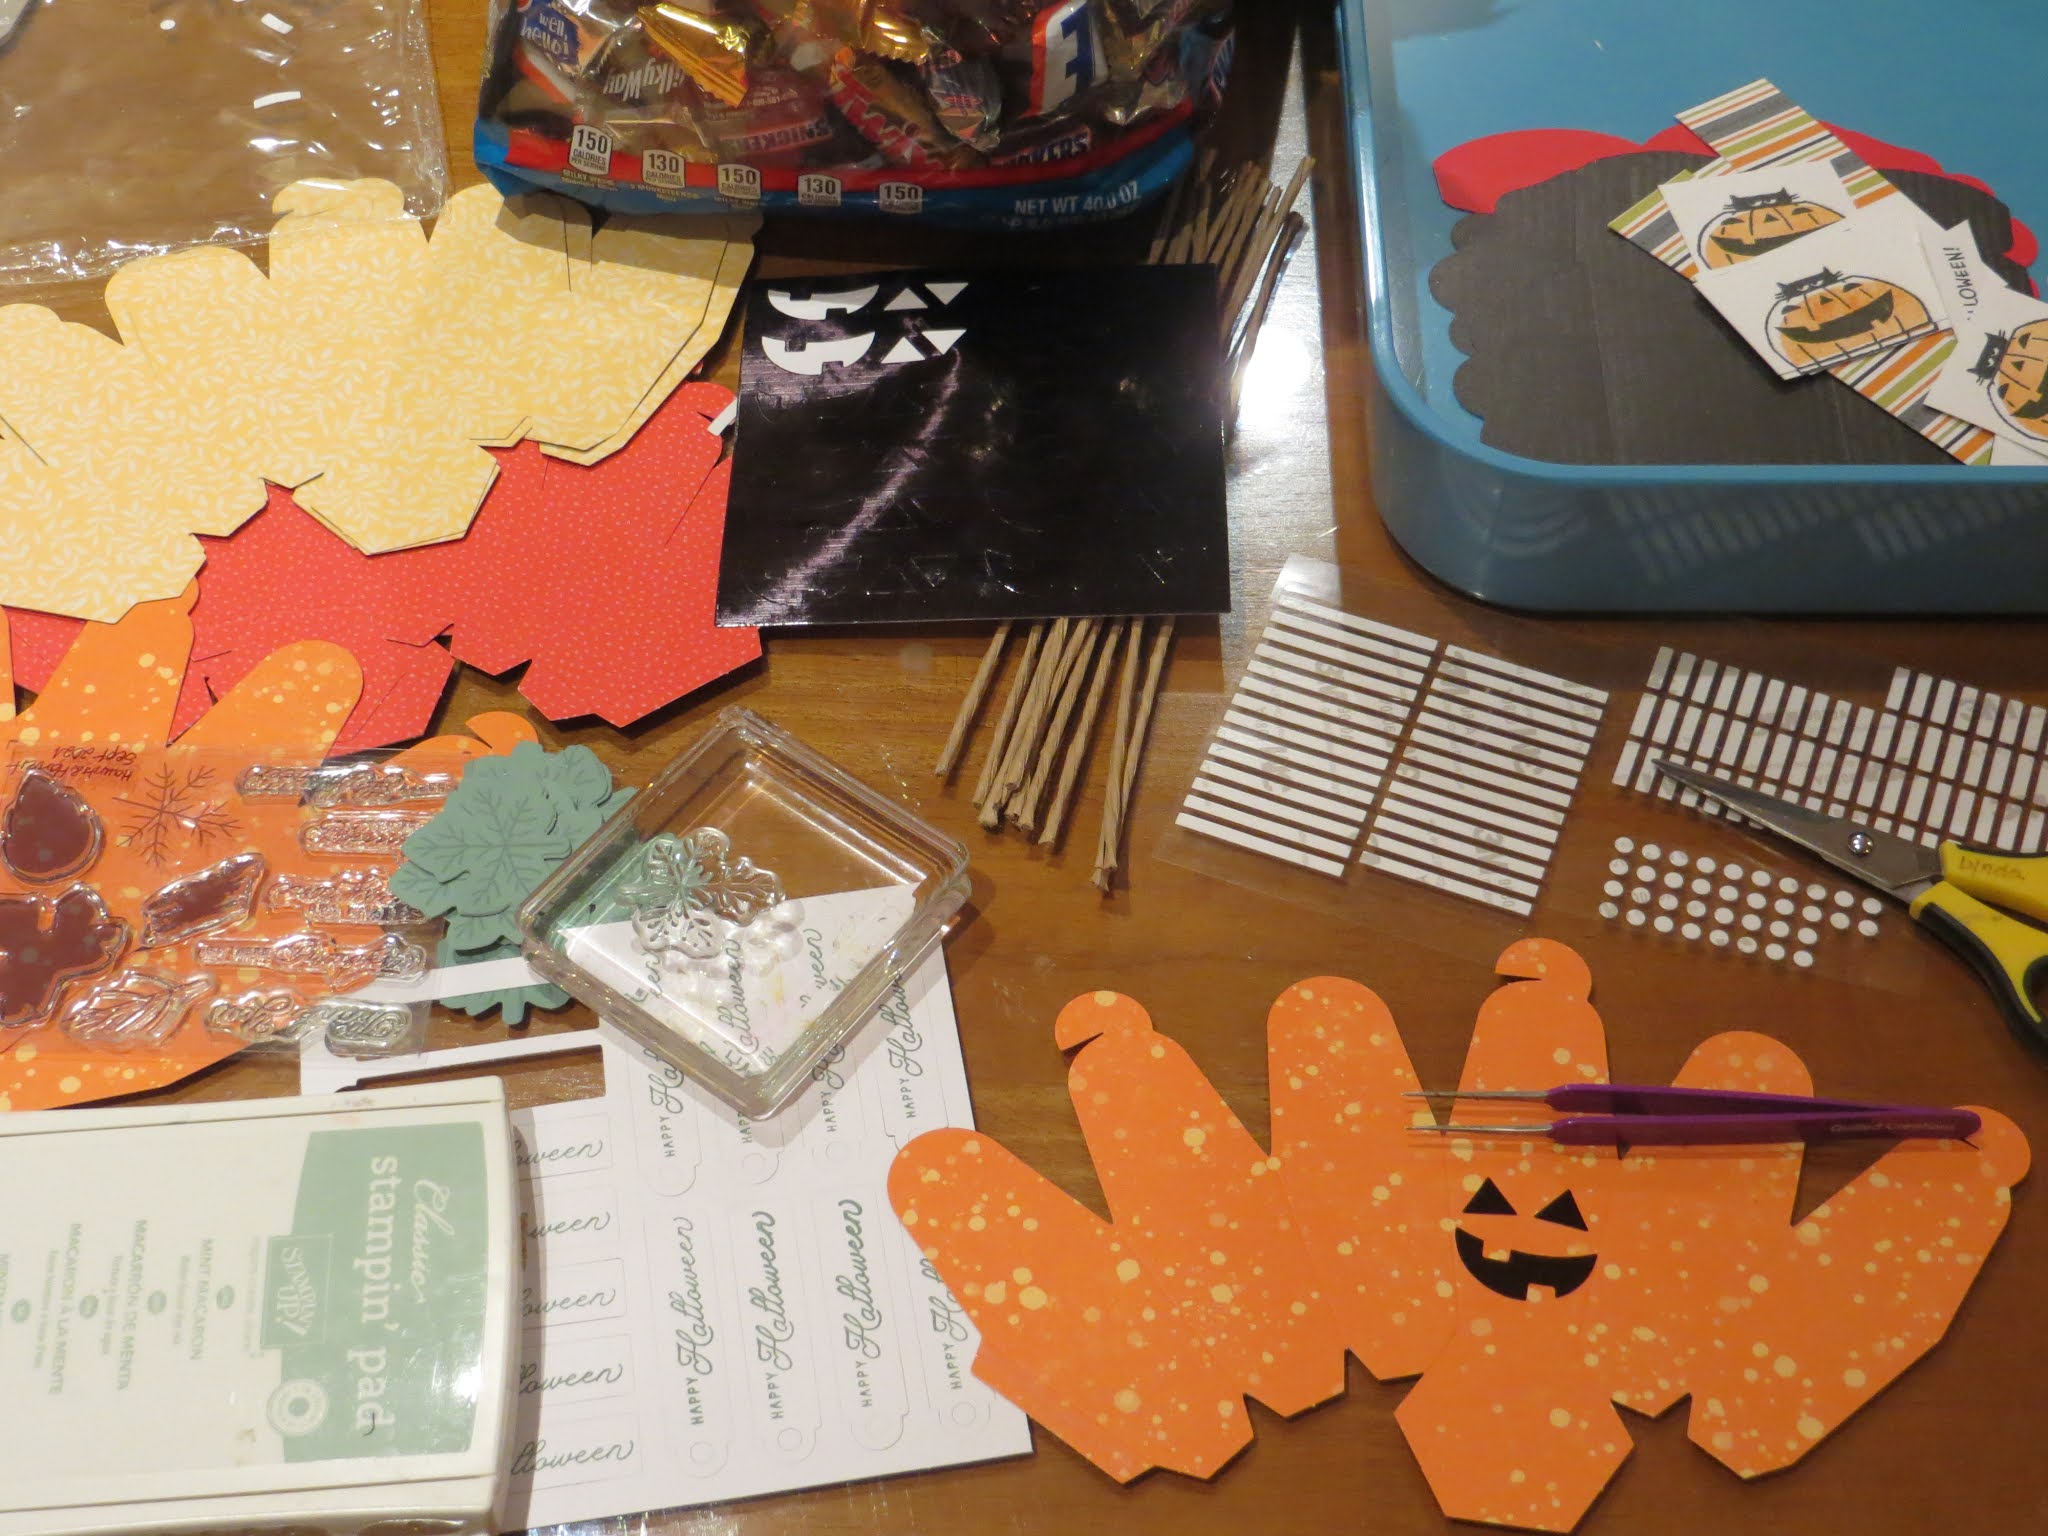
This was the corner of the picnic table where I laid out my kit to figure out what I wanted to do with it. The kids were still snoozing, I had my morning cuppa and I had my little Quiet Time- Yippee Skippee! Time to get out the Paper Pumpkin!
This is a picture Kyle took of me literally "stamp camping" as he was goofing with my camera after he got up. Now I am more in love with my Paper Pumpkin than ever. I love it that it is complete and portable. I used my catalog as the stamping surface, even.
Below is one of my finished cards- a variation on the sample in the pack. Love the stamps in this Hey, Man kit- Love the baby tags and the words that go inside it- Dad, Son, and Bro. And out of the whole kit I brought the only thing I really needed was my scissors and that was because 'I had to be different' and wanted to make a horizontal card instead.
I think Stampin' Up should have a "where can you take your Paper Pumpkin?" challenge- Imagine it on a plane, on a train, in a box, with a fox....
by the pool, at a game....
Thursday, March 27, 2014
MyPaperPumpkin March 2014
These are some of the cards I made using the March kit I received this month.
Saturday, February 8, 2014
My Paper Pumpkin Card Contest Winner
Monday, June 24, 2013
June Paper Pumpkin - Hello to you.
This little box you get every month is actually quite fun. This time there was a zigzag background, hello to you, and small heart stamps and 3 diecut hexagons in polka dot yellow, red pattern (self adhesive) and blank white in addition to the base cards and envelopes and a soft suede stampin spot. The base cards have little hexagons cut that you can punch trhough but I left some of them for a more minimalist look that I liked. For the one on the left I punched out 2 of the windows, stamped the heart through one and attached the polka dot yellow one on the inside. Then I stamped hello - stamping off each time to get the gradation and stamped the "to you" on the inside to the right of the heart- you can't see it though.
I played with the supplies but I really LOVE the square zigzag background so I started to play with that- the card to the left is one I made using just one layer of whisper white and the new in-colors- I did use stampamajig to place the squares- kind of fun card- beach colors- Coastal Cabana on top left, Crisp Cantelope on right top, Strawberry Slush bottom left and Pistachio Pudding bottom right- HELLO to you is in Baked brown sugar. I thought about punching out a heart stamped with the red zigzag and putting it over the pistachio square but I stopped myself. I think this would be a great background for lots of punched shapes
This is a variation from above using the the square from this set in Pistachio pudding then stamped the flowers from Summer Silhouette in Strawberry Slush and sentiment in Baked brown sugar again for a one layer card. Added little tiny pearls in the center of the flowers - the large one had black stamens stamped first.
I am enjoying these kits much more so than I would have imagined. I hope you are too.....